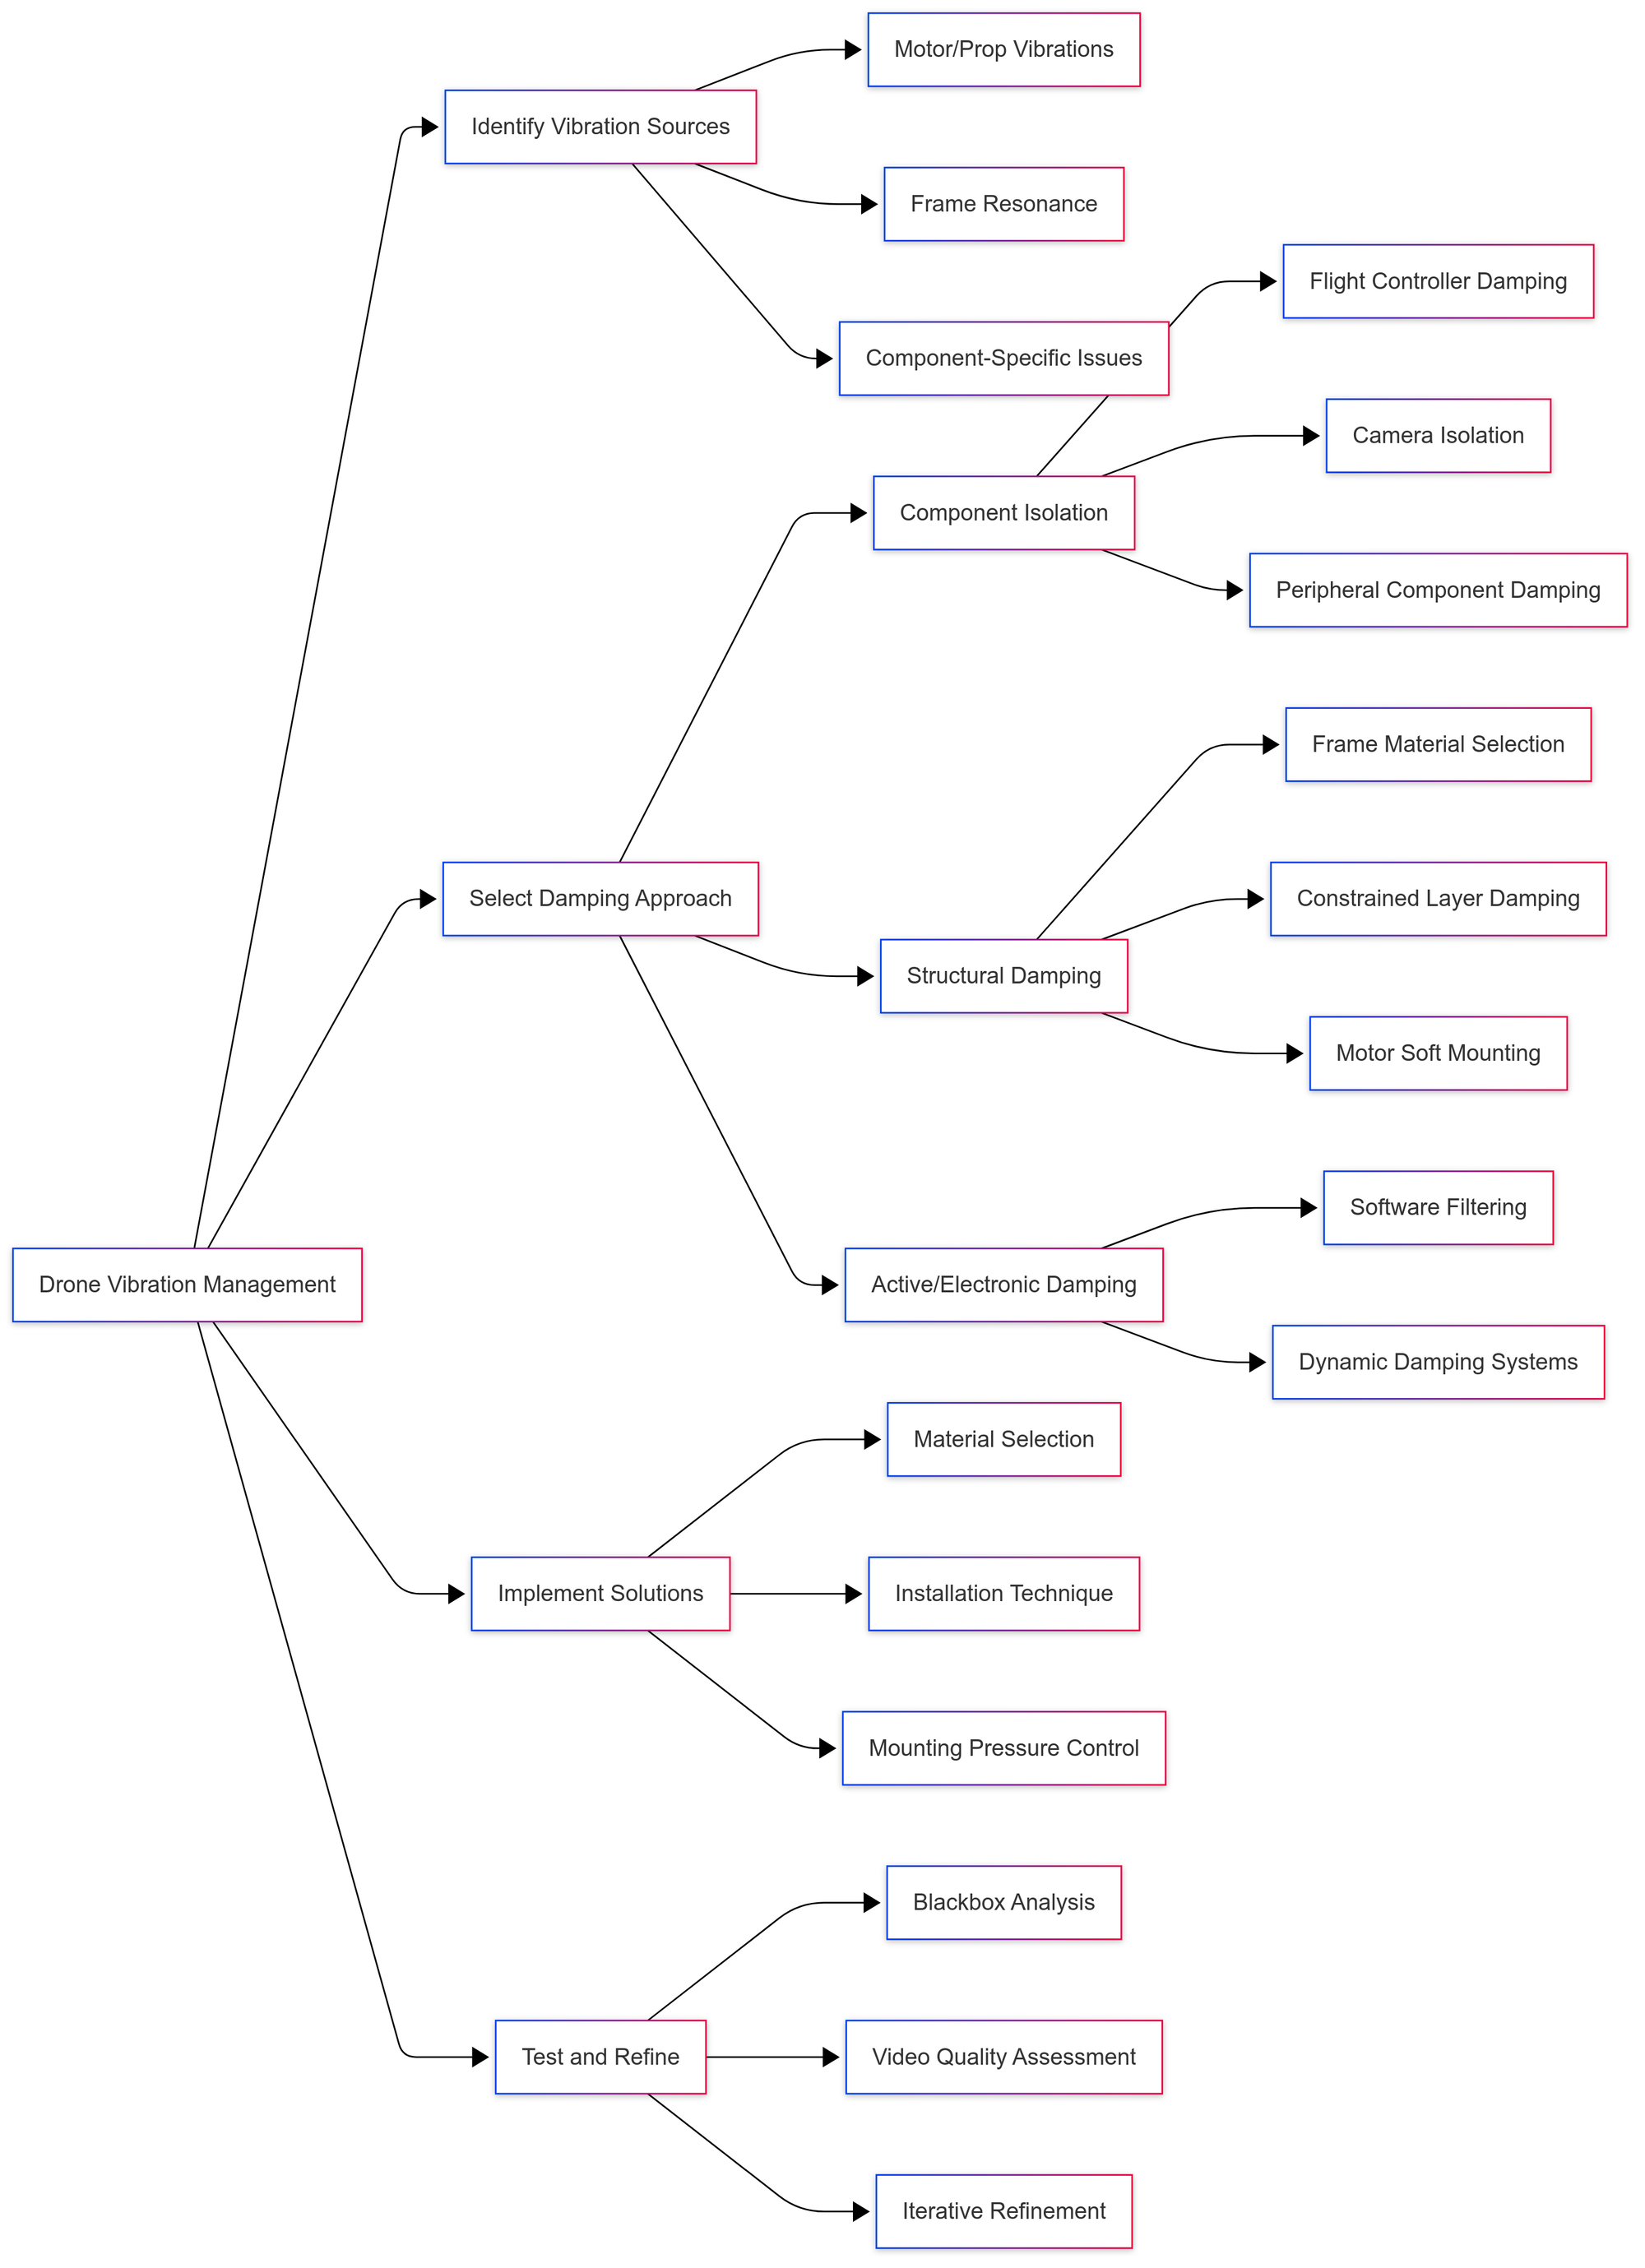
Drone Vibration Damping
After building and flying hundreds of drones over the past decade, I've learned that effective vibration management is often the difference between mediocre and exceptional performance. This comprehensive guide explores vibration sources, damping techniques, materials, and practical implementation strategies based on my extensive hands-on experience across various drone platforms.
Introduction to Vibration Damping in Drones
My first serious FPV build back in 2020 had all the right components—quality motors, a respected flight controller, and a solid frame. Yet it suffered from persistent flight issues and poor video quality. After weeks of troubleshooting, I discovered the culprit: excessive vibrations reaching the flight controller and camera. Implementing proper vibration damping transformed that drone from frustratingly unpredictable to rock-solid reliable.
Vibration damping is the practice of isolating sensitive components from the mechanical vibrations inherent in multirotor aircraft. While often overlooked by beginners, it's a critical aspect of drone building that impacts:
- Flight Performance: Excessive vibrations can confuse gyroscopes and accelerometers, causing flight instability. I've seen drones with identical components perform dramatically differently based solely on their vibration isolation.
- Video Quality: Vibrations create micro-jitters in footage and can cause "jello" effect in videos. Some of my smoothest cinematic footage comes from drones with meticulous vibration management.
- Component Longevity: Continuous vibration can damage electronic components and loosen mechanical connections. I've had flight controllers last years longer after implementing proper damping.
- Sensor Accuracy: Navigation, altitude, and positioning sensors all perform better with reduced vibration. I've measured significant improvements in position hold accuracy after optimizing vibration isolation.
- Overall Reliability: Reduced vibration means fewer in-flight failures and more consistent performance. My most reliable builds all share one characteristic: excellent vibration management.
Understanding Drone Vibrations
Before effectively damping vibrations, it's essential to understand their sources, characteristics, and effects:
Vibration Sources
Through extensive testing and analysis, I've identified these primary vibration sources in multirotor aircraft:
- Motors and Propellers: The primary source of vibrations in most drones. I've measured vibration differences of over 300% between well-balanced and poorly-balanced propeller setups.
- Frame Resonance: Certain frame designs amplify vibrations at specific frequencies. I've encountered frames that resonate severely at particular throttle positions, creating vibration spikes.
- Damaged Components: Bent motor shafts, damaged bearings, or cracked frames create abnormal vibrations. I now perform vibration analysis after any significant crash to identify potential damage.
- Loose Connections: Inadequately secured components create their own vibration patterns. I've solved mysterious vibration issues simply by properly tightening all frame bolts.
- Aerodynamic Effects: Turbulence and prop wash create variable vibration patterns. These become particularly noticeable in proximity to surfaces or in certain flight maneuvers.
Vibration Characteristics
Understanding vibration types helps select appropriate damping solutions:
- Frequency Ranges: Different components generate vibrations at different frequencies. Through spectrum analysis, I've identified that typical mini quad motors produce primary vibrations in the 100-300Hz range.
- Amplitude: The intensity of vibration varies based on throttle position and flight conditions. I've measured peak vibrations at around 70-80% throttle in most builds.
- Directional Components: Vibrations occur along different axes (X, Y, Z). In my testing, vertical (Z-axis) vibrations are typically strongest in quadcopters.
- Harmonics: Vibrations at multiples of the fundamental frequency. These higher-frequency harmonics can be particularly problematic for certain components.
- Resonance Points: Frequencies at which the frame or components naturally amplify vibrations. I've mapped resonance points for my common frames to avoid operating at these throttle positions during critical maneuvers.
Effects on Different Components
Various drone components are affected differently by vibrations:
- Flight Controllers: Gyroscopes and accelerometers can misinterpret vibrations as actual movement. I've seen vibration-induced oscillations that no amount of PID tuning could fix until the vibration was addressed.
- Cameras: Both FPV and HD cameras suffer from vibration, with rolling shutter cameras particularly susceptible to "jello" effect. Some of my most frustrating video issues were solved through vibration management rather than camera upgrades.
- GPS/Navigation Sensors: Position accuracy degrades with excessive vibration. I've measured up to 3x improvement in position hold accuracy after implementing proper vibration isolation for GPS modules.
- Electronic Components: Solder joints and connections can fail prematurely under continuous vibration. I've recovered "dead" electronics simply by resoldering components loosened by vibration.
- Battery Connections: Vibration can cause intermittent power issues. After experiencing mid-air power losses, I now use soft-mounting techniques for battery connections in high-vibration builds.
Measuring Vibrations
Quantifying vibrations has been essential for my systematic approach to damping:
- Blackbox Logging: Flight controller logs provide detailed vibration data. I analyze gyro data traces to identify problematic frequency ranges and resonance points.


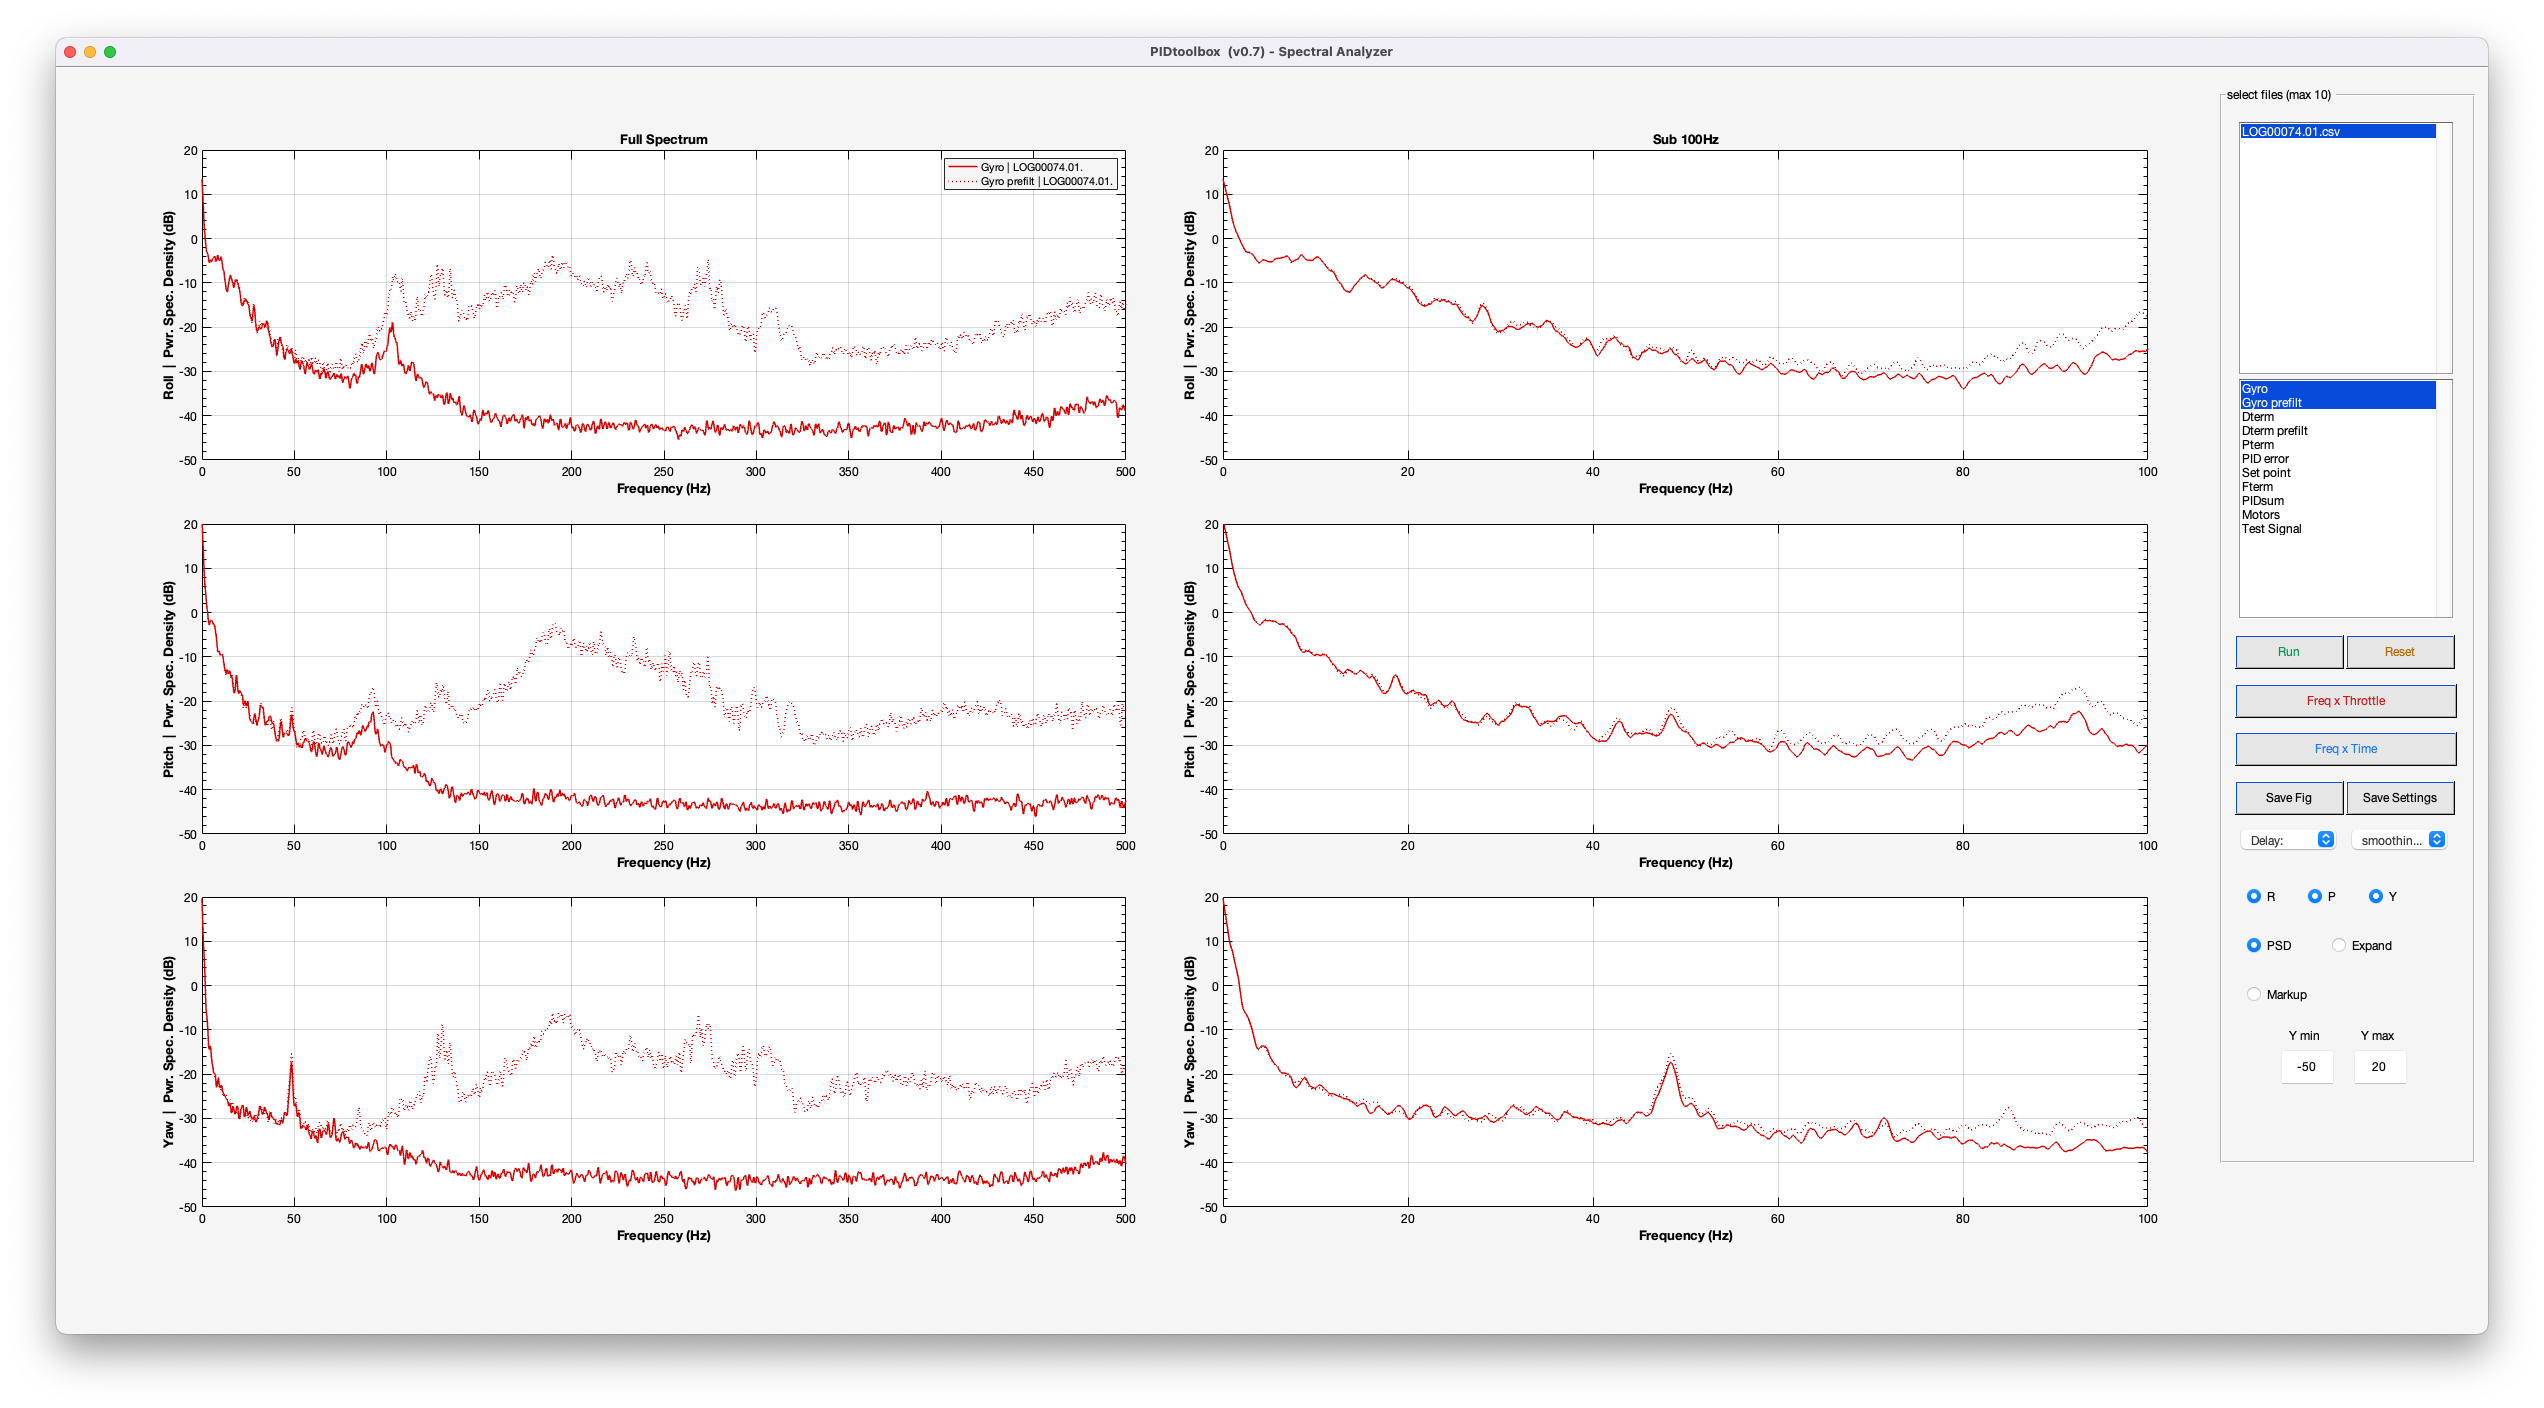
- Spectrum Analysis: Software tools to identify specific problematic frequencies. This has been invaluable for targeting damping solutions to specific vibration ranges. Even though not for beginners, PID toolbox is a power tool for performing spectrum analysis.

- Accelerometer Apps: Smartphone apps can provide basic vibration measurements. I use these for quick field assessments when blackbox logging isn't practical.
- Visual Indicators: Camera footage provides visual evidence of vibration issues. I've developed an eye for identifying specific vibration problems from their visual signatures in video.
- Touch Testing: Physically feeling vibrations during motor tests. This simple technique has helped me identify loose components and resonance issues before flight.
Vibration Damping Materials and Methods
Through years of experimentation, I've worked with numerous damping materials and methods:
Damping Materials
Different materials offer varying vibration isolation characteristics:
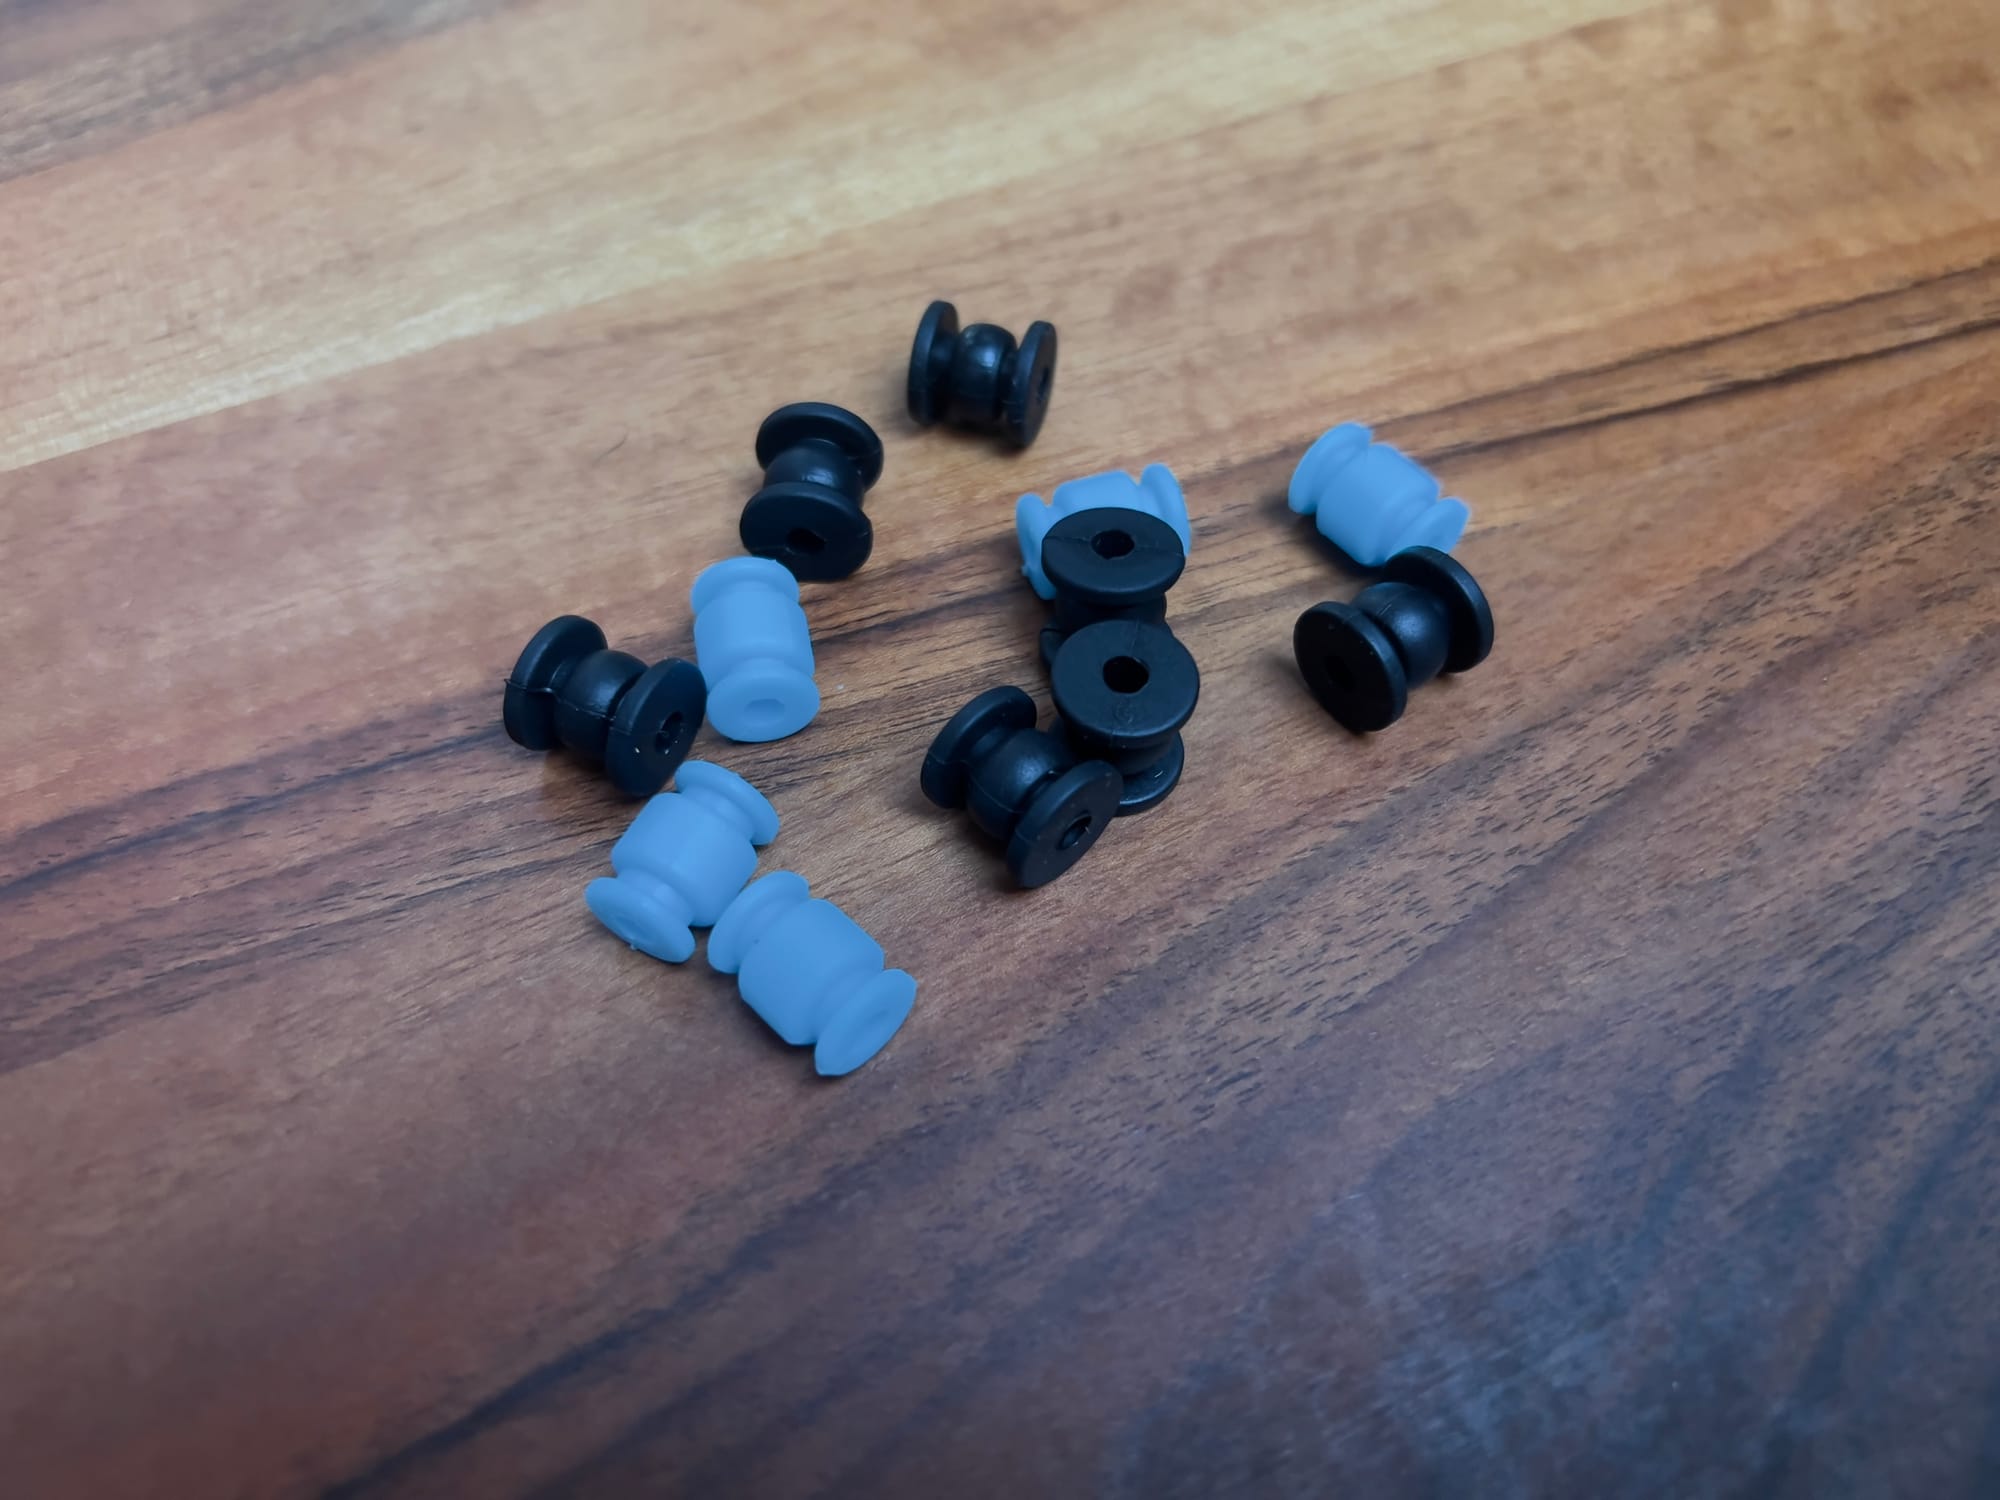
Rubber and Elastomers
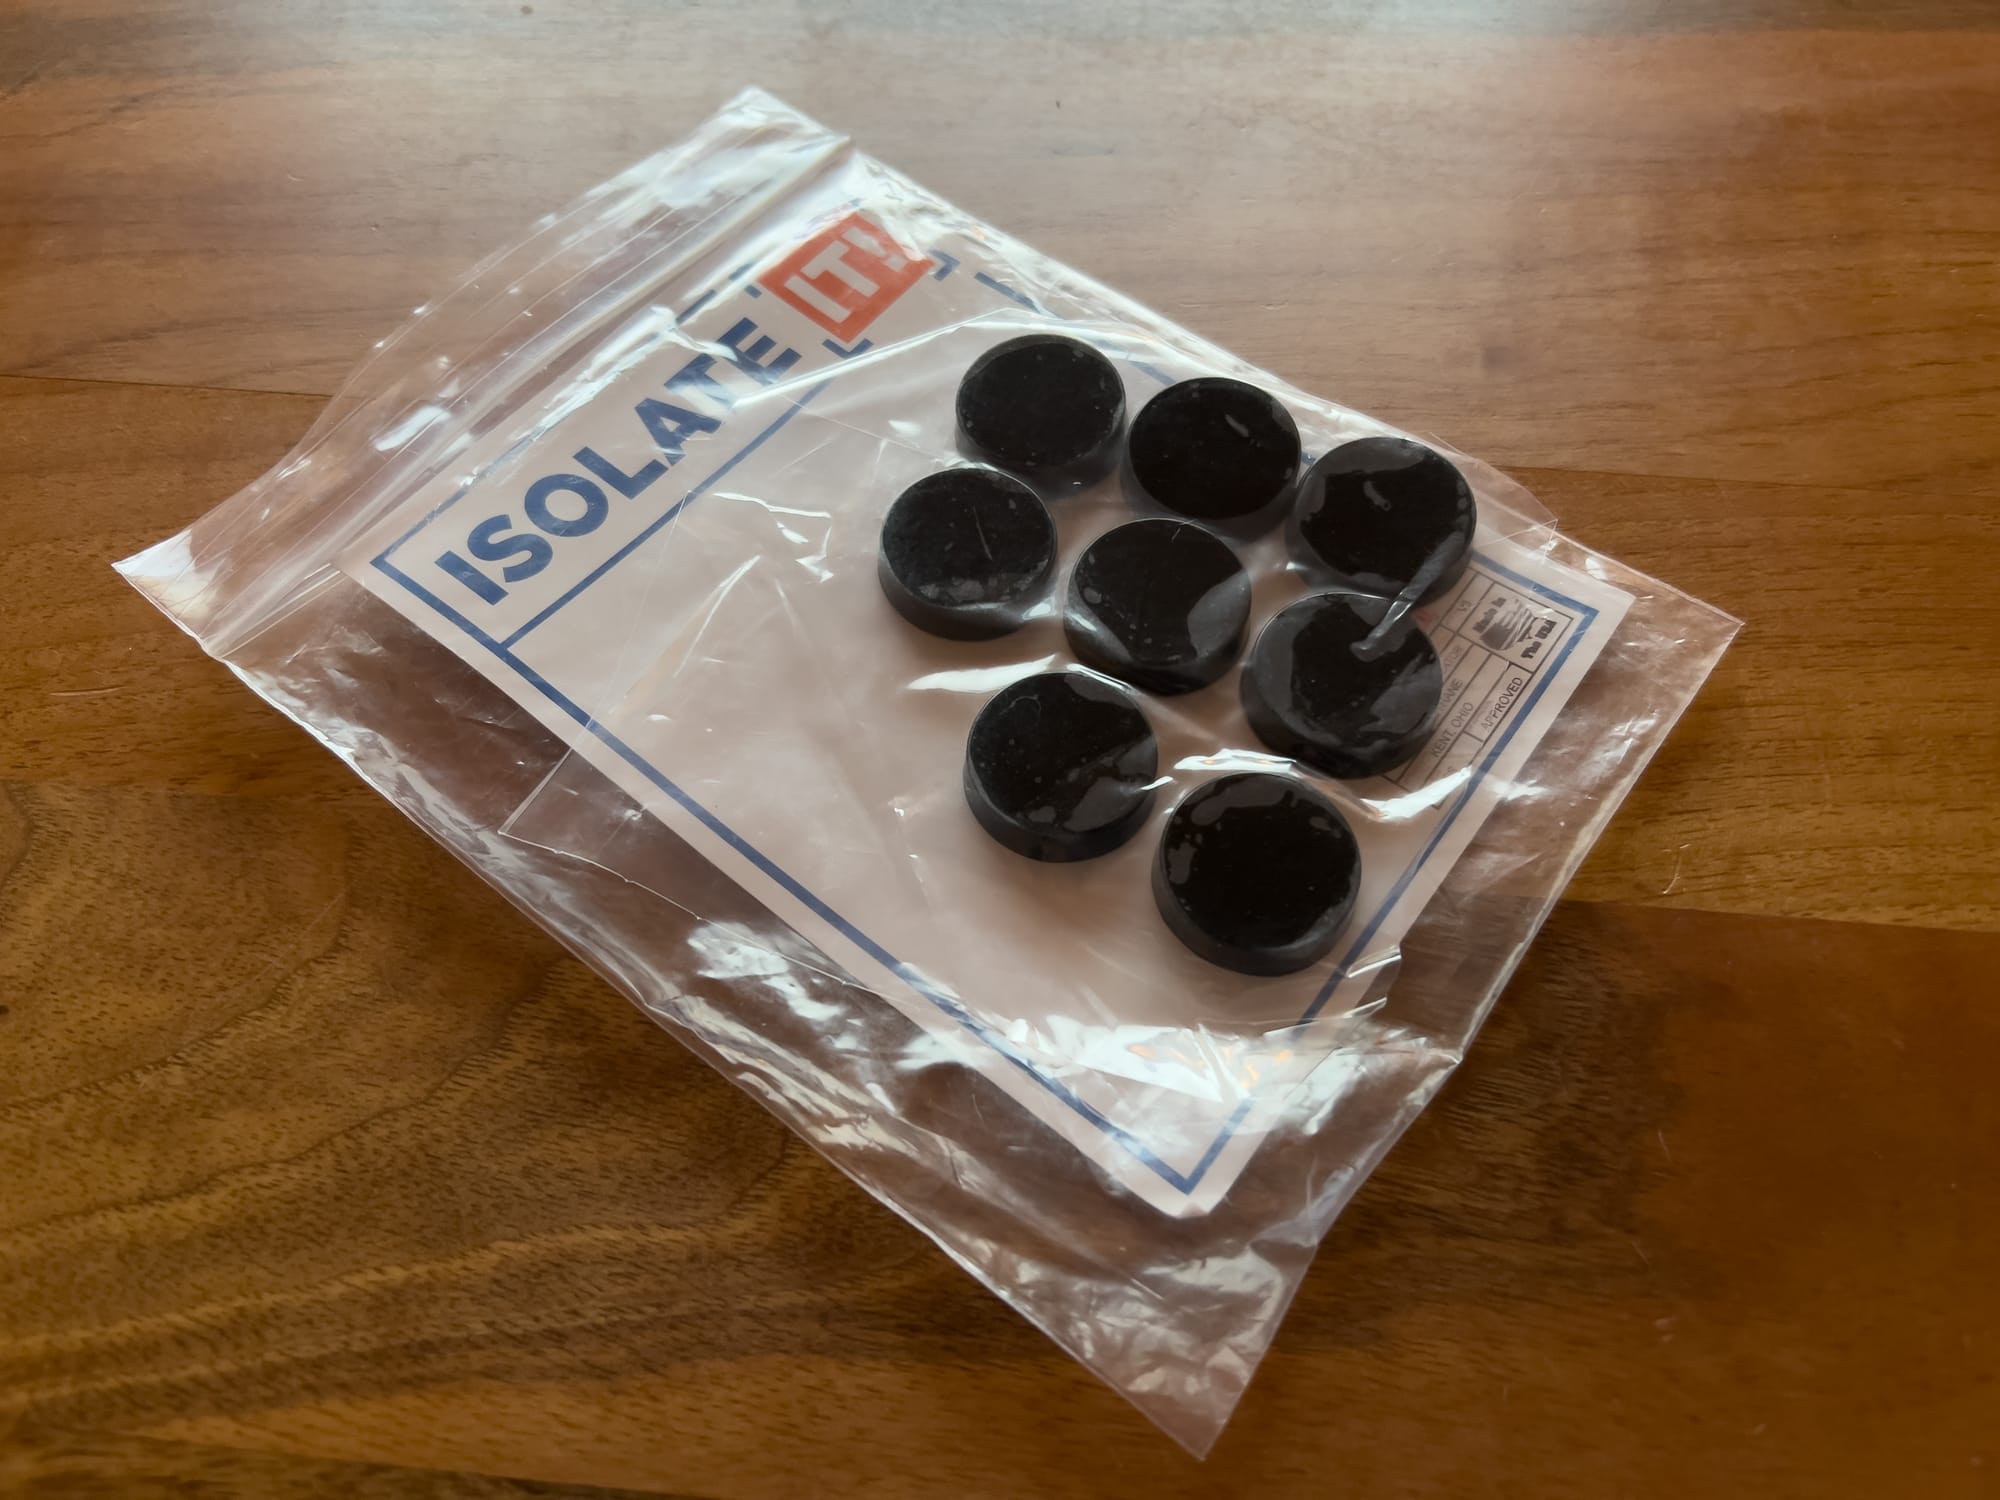
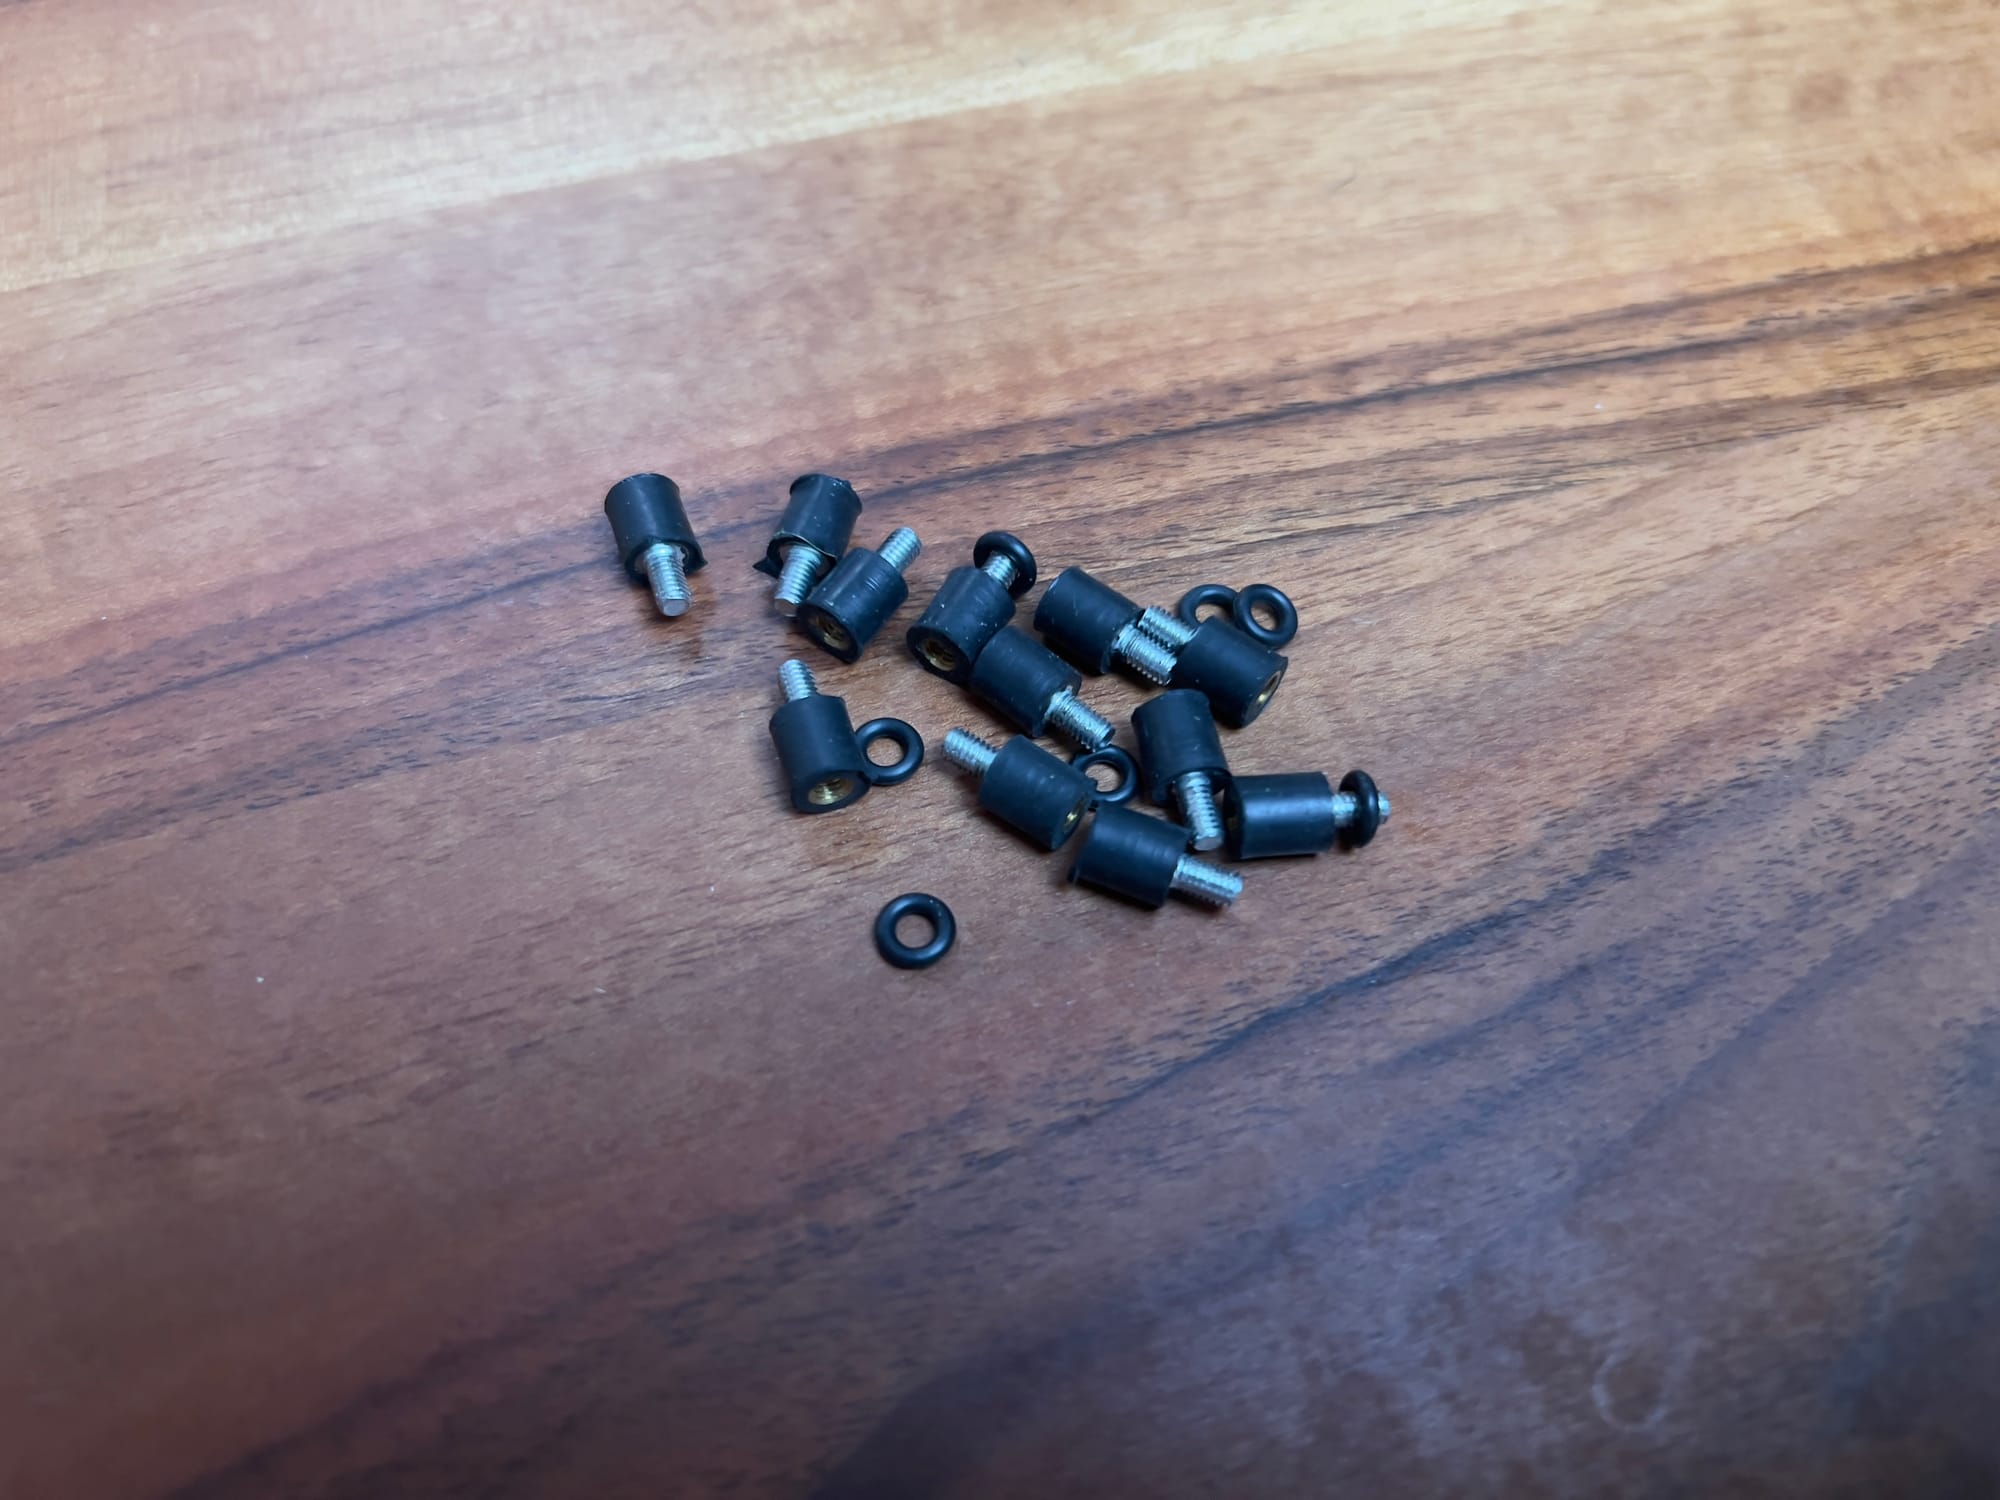
- Rubber Grommets: Simple isolation for mounting flight controllers. I still use these for budget builds, though they're less effective than more advanced options.
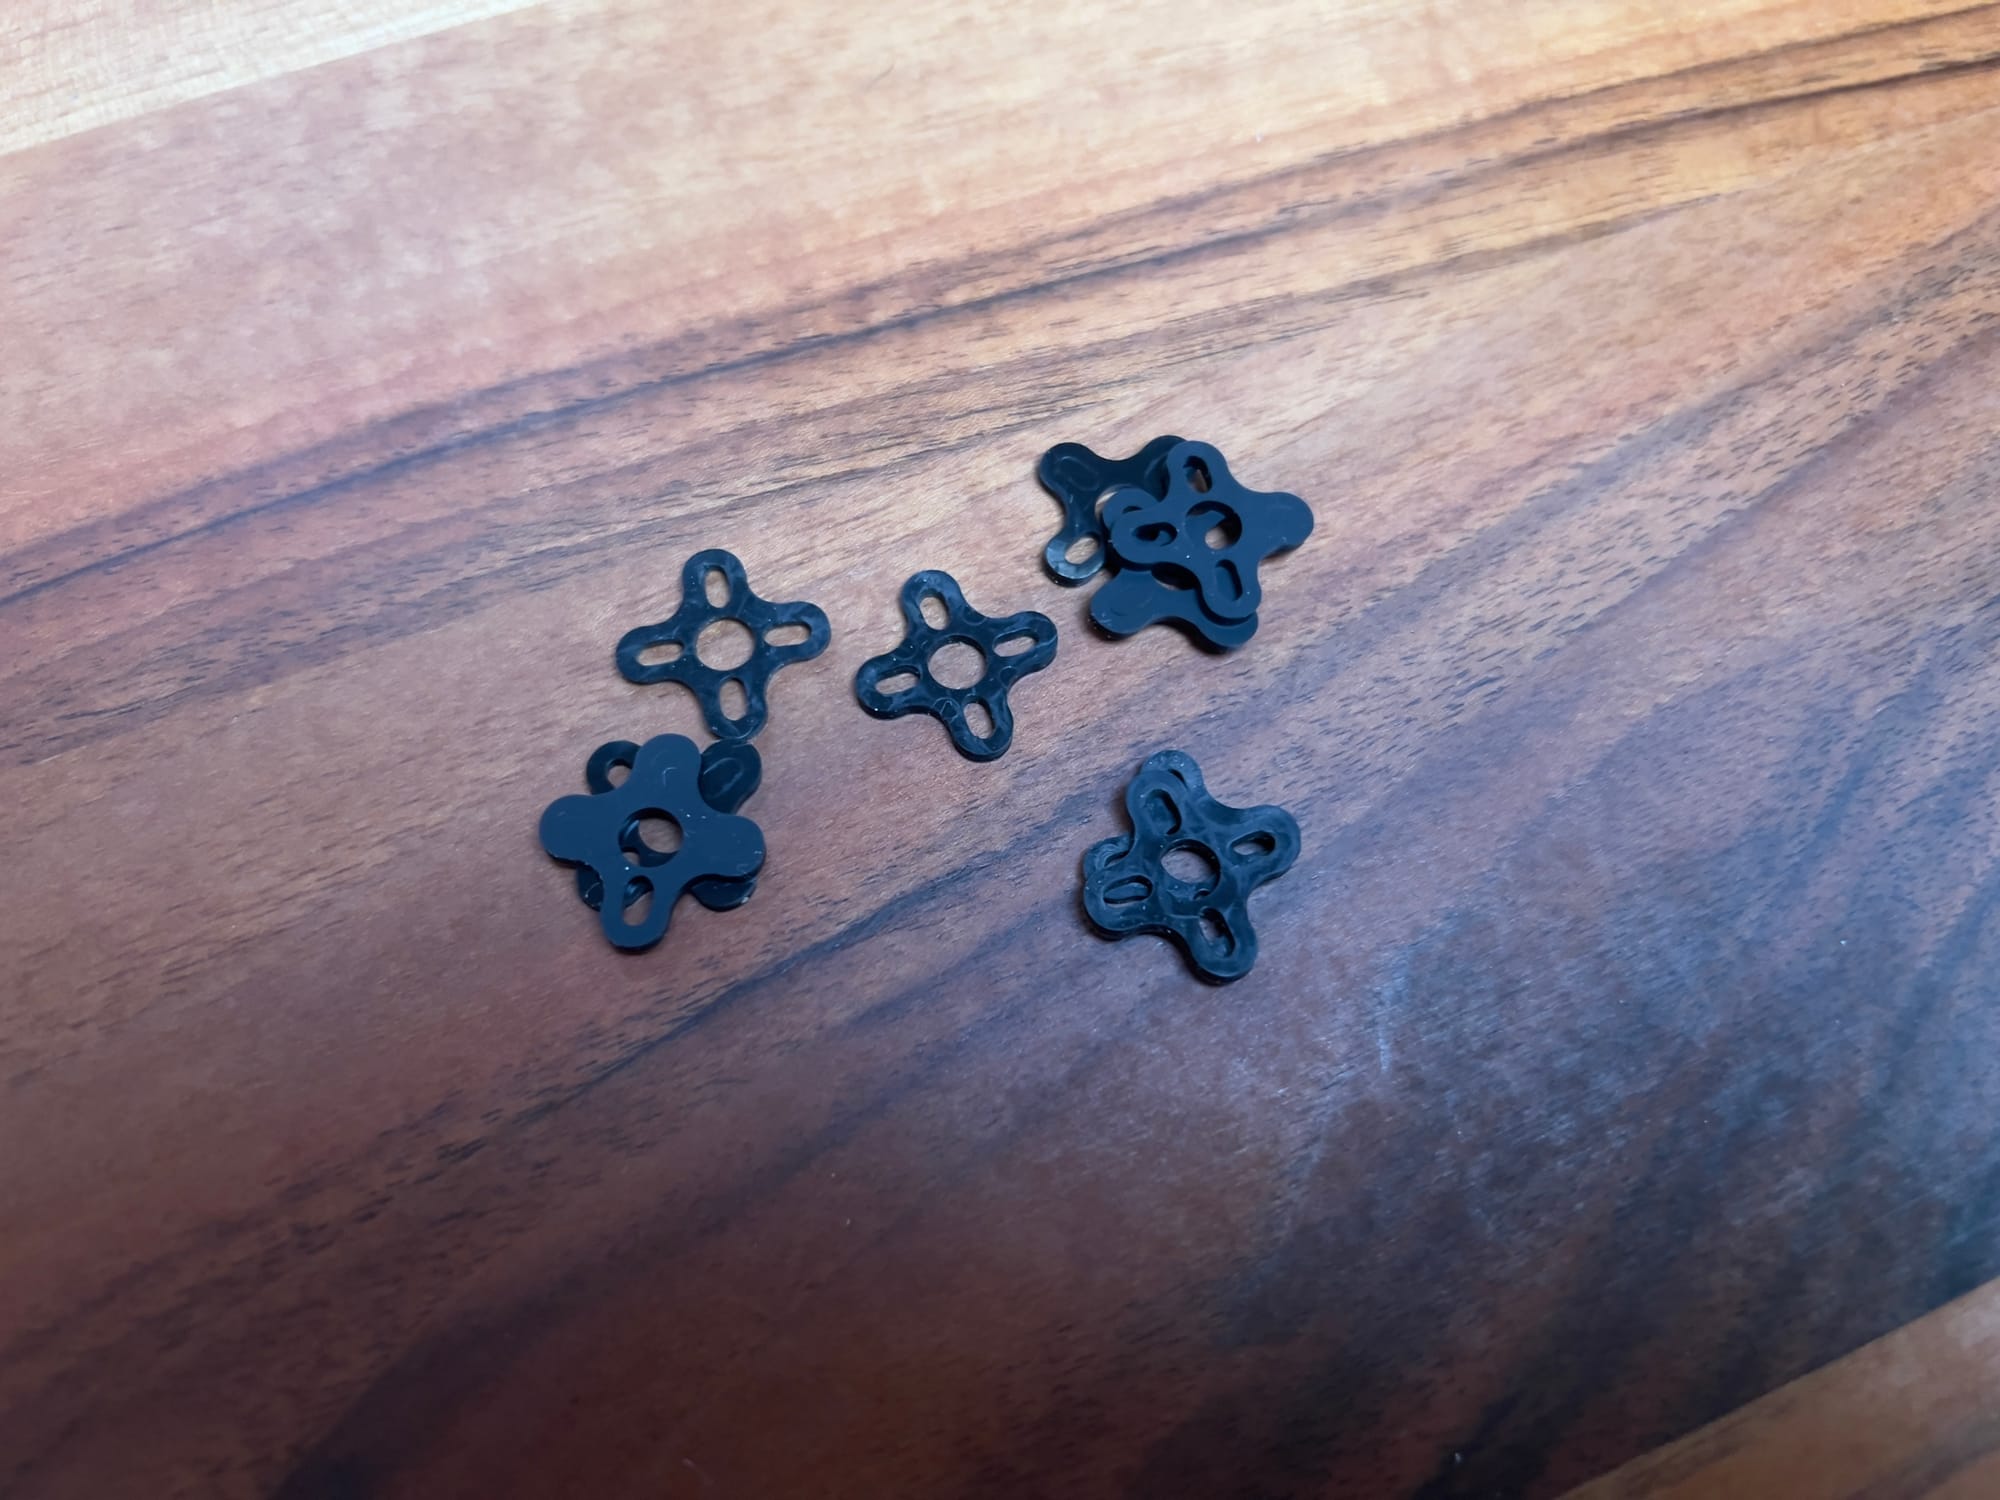
- O-rings: Effective for certain mounting configurations. I've created custom damping systems using appropriately sized O-rings for components with mounting holes.
- Elastomer Balls: Provide isolation in multiple directions. These work well for flight controllers but require secure containment to prevent ejection during crashes.
- Durometer Ratings: Hardness measurement affecting damping characteristics. Through testing, I've found that 30-40A durometer works best for flight controllers in typical 5" builds, while 50-60A is better for larger, more powerful drones.
- Personal Experience: While basic, rubber solutions are durable and reliable. I keep various durometers on hand to match different vibration profiles.
Foams and Gels
- Polyurethane Foam: Lightweight with good damping properties. I use this for camera mounts and lightweight components.
- Memory Foam: Excellent vibration absorption but less durability. I've used this successfully for short-term solutions but find it degrades too quickly for permanent installations.
- Silicone Gel Pads: Excellent isolation properties with good durability. These have become my standard for flight controller mounting in most builds.
- Adhesive-Backed Foams: Convenient for custom applications. I cut these to shape for damping specific components like video transmitters and receivers.
- Personal Experience: Gel pads offer the best combination of performance and convenience for flight controllers. I typically replace them every 6-12 months as they can harden over time.
Advanced Materials
- Sorbothane: Professional-grade vibration isolation material. I use this for my high-end cinematic builds where maximum vibration suppression is critical.
- Kyosho Zeal: Specialized RC vibration damping pads. These work exceptionally well for flight controllers in high-performance racing builds.
- 3M Damping Sheets: Adhesive damping material for reducing frame resonance. I apply these to frame arms and plates on carbon fiber frames to reduce transmission of vibrations.
- Composite Dampers: Combinations of materials with different properties. I've created custom layered dampers for specific applications, combining materials that target different frequency ranges.
- Personal Experience: Advanced materials cost more but provide superior performance. For professional applications, the investment in these materials has paid dividends in footage quality and flight reliability.
Mounting Methods
How damping materials are implemented significantly affects their performance:
Soft Mounting
- Sandwich Mounting: Component suspended between damping materials. I use this approach for most flight controllers, with damping material above and below the board.
- Corner Mounting: Isolation at mounting points only. This works well for larger components where full sandwich mounting would be impractical.
- Suspended Mounting: Component hung from elastic materials. I've used this for cameras with excellent results, though it requires careful implementation to maintain alignment.
- Compression Mounting: Component held in place by compressed damping material. This provides excellent isolation but can allow excessive movement during aggressive maneuvers.
- Personal Experience: Different mounting methods work best for different components. I typically use sandwich mounting for flight controllers and corner mounting for cameras and video transmitters.
Hard Mounting with Damping
- Constrained Layer Damping: Vibration-absorbing material sandwiched between component and rigid mount. I use this approach for components that require precise alignment.
- Mass Damping: Adding mass to reduce vibration amplitude. I've successfully used this technique for cameras by adding small weights to the mount structure.
- Tuned Mass Dampers: Specifically weighted elements that counteract specific vibration frequencies. I've experimented with these for particularly problematic resonance issues.
- Personal Experience: These approaches work well when soft mounting isn't practical. I often use constrained layer damping for GPS modules where position stability is important.
Hybrid Approaches
- Selective Frequency Isolation: Combining materials to target specific frequency ranges. My most effective builds use different materials to address different vibration sources.
- Component-Specific Solutions: Tailoring damping approach to each component's needs. I've found that no single approach works best for all components.
- Adaptive Systems: Damping that responds differently under various flight conditions. My advanced builds include damping systems that provide different characteristics during hover versus high-speed flight.
- Personal Experience: Hybrid approaches have yielded my best results. Understanding each component's sensitivity to different vibration types allows for targeted solutions.
| Material | Best For | Durability | Effectiveness | Weight | My Preference |
|---|---|---|---|---|---|
| Rubber Grommets | Budget builds, basic isolation | High | Moderate | Low | Good starter option |
| Silicone Gel Pads | Flight controllers, general use | Medium | High | Low | Go-to for most builds |
| Sorbothane | Professional builds, cameras | High | Very High | Medium | Best for cinematic drones |
| O-rings | Custom mounting solutions | High | Moderate | Very Low | Excellent for GPS modules |
| Foam Tape | Light components, VTX | Low | Moderate | Very Low | Quick solutions and repairs |
| 3M Damping Sheet | Frame vibration reduction | Very High | High | Medium | Worth the investment for carbon frames |
Comparison of vibration damping materials based on my testing and experience across dozens of builds.
Component-Specific Damping Techniques
Different drone components require specialized approaches to vibration damping:
Flight Controller Damping
The heart of your drone's control system requires careful vibration isolation:
- Stack Mounting: Modern FC stacks benefit from isolation between components. I use thin silicone pads between each board in the stack to prevent vibration transfer.
- Optimal Durometer: Matching damping material hardness to drone characteristics. For my 5" freestyle builds, 35A durometer silicone provides the best balance of isolation and stability.
- Mounting Pressure: Proper bolt tension significantly affects damping performance. I've developed a "just tight enough" approach—securing bolts until the damping material just begins to compress.
- Orientation Considerations: Some flight controllers perform better when mounted in specific orientations. I've found that mounting the FC with the sensitive gyro chip perpendicular to the motor arms often reduces vibration issues.
- Personal Experience: After hundreds of builds, I've settled on a standardized approach: silicone gel pads with nylon standoffs and just enough tension to prevent movement without compressing the gel. This provides excellent isolation while maintaining physical stability.
Camera Damping
Both FPV and HD cameras benefit from proper vibration isolation:
FPV Camera Damping
- TPU Mounts: 3D-printed thermoplastic polyurethane mounts provide excellent damping. I design these with specific flex zones to absorb vibrations while maintaining camera alignment.
- Foam Padding: Strategic placement of foam between camera and mount. I use thin strips of foam at contact points rather than fully wrapping the camera.
- Mounting Tension: Balancing security with isolation. Too tight, and vibration transfers directly; too loose, and the camera moves excessively during maneuvers.
- Personal Experience: My most effective FPV camera setup uses a semi-rigid TPU mount with 2mm foam padding at contact points and silicone O-rings for the mounting screws.
HD Camera Damping
- Gimbal Systems: Mechanical or electronic stabilization. For professional footage, I use lightweight gimbals with their own vibration isolation systems.
- Counterweight Damping: Balanced weight distribution to minimize vibration effects. I've found that properly balanced camera mounts experience significantly less vibration.
- Multi-Layer Isolation: Combining different damping materials for comprehensive isolation. My cinema builds use a three-layer approach: frame isolation, mount isolation, and camera-to-mount isolation.
- Personal Experience: For non-gimbal HD cameras, I've achieved the best results with a combination of soft silicone mounting for high-frequency vibrations and weighted damping for low-frequency movement.
GPS and Navigation Sensors
Position-sensing components require stable mounting with moderate vibration isolation:
- Extended Mounts: Raising GPS away from main vibration sources. My GPS masts incorporate damping material at the base to prevent vibration transfer.
- Carbon Fiber Isolation: CF plates can transmit vibrations efficiently. I never mount GPS directly to carbon fiber without vibration isolation.
- Magnetic Consideration: Ensuring motors and power cables don't interfere with compass. My GPS mounts include magnetic isolation in addition to vibration damping.
- Personal Experience: For GPS modules, I've found that firmer damping materials (50-60A durometer) provide better position stability while still offering adequate vibration isolation.
Video Transmitter Damping
Often overlooked, VTX units can benefit from vibration isolation:
- Heat Considerations: Balancing vibration damping with thermal management. I use silicone mounting that maintains some thermal contact with the frame for heat dissipation.
- Cable Strain Relief: Preventing vibration transfer through cables. All my VTX installations include soft mounting for cable connection points.
- Antenna Mount Isolation: Reducing vibration transfer to antennas. I use flexible antenna mounts that absorb vibration rather than transmitting it to the antenna.
- Personal Experience: After experiencing video issues from vibration-induced connector problems, I now soft-mount all VTX units with particular attention to isolating the connector areas.
Battery and Power System Damping
Reducing vibration in power delivery components improves reliability:
- Battery Pad Materials: Foam or silicone pads under batteries. I use 3mm closed-cell foam under all my batteries to reduce vibration transfer in both directions.
- Power Distribution Damping: Soft mounting PDBs when possible. In builds where the PDB is separate from the flight controller, I use thin silicone pads for mounting.
- Cable Management: Securing wires to prevent vibration-induced wear. I use soft silicone tie-downs rather than rigid zip ties for cable management in high-vibration areas.
- Personal Experience: Battery damping serves a dual purpose—it protects the battery from frame vibrations and prevents the battery's mass from influencing frame resonance. My standardized approach uses closed-cell foam with silicone-backed hook-and-loop straps.
Installation Best Practices
Proper implementation is crucial for effective vibration damping:
Preparation and Planning
- Vibration Analysis: Identifying specific issues before applying solutions. I perform baseline vibration testing on all new builds before implementing damping.
- Component Mapping: Understanding which components need what type of isolation. I create a damping plan specific to each build based on its components and intended use.
- Material Selection: Choosing appropriate materials for each application. My parts bin includes at least five different damping materials to address various needs.
- Weight Considerations: Balancing effective damping with weight constraints. For racing builds, I calculate the weight impact of damping solutions and prioritize the most critical components.
- Personal Experience: Planning damping strategy before building saves significant time and rework. I sketch damping approaches as part of my initial build planning.
Installation Techniques
- Clean Surfaces: Ensuring proper adhesion for damping materials. I clean all contact surfaces with isopropyl alcohol before applying adhesive-backed damping materials.
- Compression Control: Managing how much damping materials are compressed. I use nylon spacers of specific heights to control compression of damping materials.
- Layering Approach: Combining materials for enhanced performance. Some of my builds use layers of different materials to address various frequency ranges.
- Temperature Considerations: Accounting for how materials perform in different conditions. I select different damping solutions for drones operated in extreme temperatures.
- Personal Experience: Precision in installation makes a significant difference. I use digital calipers to measure and cut damping materials for consistent results.
Common Installation Mistakes
Errors I've made and observed that compromise damping effectiveness:
- Over-Tightening: Compressing damping materials too much reduces their effectiveness. I've developed a "quarter turn past initial compression" rule for most mounting bolts.
- Under-Securing: Insufficient security allows excessive movement. After experiencing a flight controller that shifted position mid-flight, I ensure all damped components have movement limiters.
- Inconsistent Application: Uneven damping creates new vibration issues. I ensure damping materials are uniformly applied and compressed.
- Ignoring Resonance Transfer: Damping one component can shift resonance to others. I approach damping holistically, considering how changes to one area affect others.
- Material Interference: Some damping materials can react with drone components. I learned this lesson after a foam pad partially dissolved against a hot ESC.
Maintenance and Monitoring
- Regular Inspection: Checking damping materials for wear or degradation. I inspect all damping components during routine maintenance.
- Replacement Schedule: Some materials lose effectiveness over time. I replace silicone gel pads every 6-12 months depending on usage.
- Post-Crash Assessment: Evaluating damping systems after impacts. I've developed a quick post-crash checklist that includes checking all damping components.
- Ongoing Vibration Monitoring: Using blackbox logs to track vibration changes over time. This has helped me identify developing issues before they cause problems.
- Personal Experience: Proactive maintenance of damping systems prevents performance degradation. I keep a log of when damping materials were installed and schedule replacements.
Testing and Tuning Vibration Damping
Systematic evaluation ensures optimal vibration management:
Initial Testing
- Motor-by-Motor Testing: Isolating vibration sources. I test each motor individually to identify any that generate abnormal vibrations.
- Throttle Sweep Test: Identifying resonance points across throttle range. This reveals specific throttle positions that generate problematic vibrations.
- Tap Tests: Evaluating how vibrations propagate through the frame. I gently tap different frame components and observe how vibrations travel to sensitive components.
- Baseline Logging: Establishing vibration profiles before damping. I capture blackbox logs before implementing damping solutions to provide a comparison baseline.
- Personal Experience: Methodical testing saves time by targeting specific issues. My testing protocol takes about 30 minutes but saves hours of troubleshooting later.
Evaluation Methods
- Blackbox Analysis: Examining gyro data for vibration signatures. I look for specific patterns in the gyro traces that indicate different types of vibration issues.
- Video Quality Assessment: Evaluating footage for vibration artifacts. I have a standard test flight pattern that helps identify video issues related to vibrations.
- A/B Comparison: Testing different damping solutions under identical conditions. I often build test rigs that allow quick swapping of damping solutions for direct comparison.
- Frequency Analysis: Using FFT tools to identify problematic frequency ranges. This advanced technique has helped me target specific vibration frequencies with appropriate materials.
- Personal Experience: Combining subjective and objective evaluation methods provides the most complete picture. I use both data analysis and flight feel to assess damping effectiveness.
Iterative Improvement
- Incremental Changes: Modifying one element at a time. This methodical approach allows me to identify exactly which changes provide benefits.
- Documentation: Recording changes and their effects. My build logs include detailed notes on damping modifications and resulting performance changes.
- Material Experimentation: Testing different durometers and materials. I maintain a collection of damping materials with different properties for experimentation.
- Combination Approaches: Finding synergies between different damping methods. Some of my most effective solutions combine multiple techniques that address different aspects of the vibration profile.
- Personal Experience: Patience with the iterative process yields the best results. My most refined builds have gone through 3-5 iterations of vibration damping optimization.
Advanced Damping Techniques
For situations requiring exceptional vibration management:
Harmonic Damping
- Tuned Mass Dampers: Adding specific weights to counteract resonant frequencies. I've used this technique to address stubborn resonance issues in camera mounts.
- Frequency-Specific Materials: Selecting damping materials that target specific frequency ranges. My professional builds use different materials to address motor frequencies versus frame resonance.
- Resonance Mapping: Identifying and addressing frame resonance points. I've developed a technique for mapping resonance nodes in frames and applying targeted damping.
- Personal Experience: Harmonic damping approaches require more effort but solve problems that basic methods cannot. I reserve these techniques for professional applications where performance justifies the additional time investment.
Structural Damping
- Frame Damping Layers: Adding vibration-absorbing materials to the frame itself. I apply thin damping sheets to the interior of carbon fiber frames to reduce resonance.
- Motor Soft Mounting: Isolating motors from the frame. For extremely vibration-sensitive applications, I use specialized motor soft mounts despite their complexity.
- Arm Damping: Techniques to reduce vibration transmission through frame arms. I've experimented with internal damping materials inside hollow frame arms with excellent results.
- Personal Experience: Structural damping addresses vibrations at their source. While more involved to implement, these techniques can reduce the need for extensive component damping.
Active Damping Systems
- Electronic Vibration Cancellation: Using flight controller filtering to counteract vibrations. I carefully tune software filters to complement physical damping measures.
- Adaptive Damping: Systems that adjust to different flight conditions. My advanced builds include damping solutions that provide different characteristics during different flight phases.
- Feedback-Based Systems: Using sensor data to dynamically adjust damping. While experimental, I've tested systems that modify filter parameters based on real-time vibration analysis.
- Personal Experience: Active systems represent the cutting edge of vibration management. I combine these with physical damping for the most demanding applications.
Pro Tips from My Experience
After years of refining vibration damping approaches, here are some of my hard-earned insights:
- Balance Your Props: This simple step eliminates a major vibration source. I use a magnetic balancer for all my props and have measured up to 70% reduction in certain vibration frequencies from balancing alone.
- The Center-Mass Principle: Mount flight controllers as close as possible to the drone's center of mass. I've found that FCs mounted at the exact center of mass experience significantly less vibration during aggressive maneuvers.
- The Durometer Hierarchy: Use softer materials (30A) for flight controllers, medium (50A) for cameras, and firmer (70A) for GPS and other position-sensitive components. This targeted approach addresses each component's specific needs.
- The Nylon Advantage: Use nylon bolts and standoffs for mounting vibration-sensitive components. Beyond their weight advantage, I've found they transmit significantly less vibration than metal hardware.
- The Double-Sided Tape Trick: For quick field repairs of damping systems, quality double-sided foam tape can work wonders. I keep 3M VHB tape in my field kit for emergency damping repairs.
- The Resonance Test: Identify frame resonance by running motors at increasing throttle while touching the frame lightly. I can feel resonance points with my fingertips and mark throttle positions to avoid during critical maneuvers.
- The Wire Management Factor: Secure wires without transferring vibrations. I route wires with gentle curves rather than tight bends and use soft silicone tie-downs rather than rigid zip ties.
- The Temperature Effect: Damping materials perform differently at various temperatures. I select softer durometers for cold-weather flying and firmer options for hot conditions.
- The Crash Resilience Principle: Design damping systems to survive crashes. I use captive designs for flight controller damping that prevent the FC from being ejected during impacts.
- The Weight Distribution Rule: Distribute weight evenly to minimize vibration-inducing imbalances. I balance my builds along all three axes, sometimes adding small weights to achieve perfect balance.
FAQ: Common Questions About Drone Vibration Damping
Do all drones need vibration damping?
Based on my experience with hundreds of builds:
- Racing Drones: Minimal but strategic damping is beneficial. I focus on flight controller isolation while accepting some vibration in less critical components to save weight.
- Freestyle Drones: Moderate damping improves performance and video quality. My freestyle builds use comprehensive FC damping and moderate camera isolation.
- Cinematic Drones: Extensive damping is essential for quality footage. These builds receive my most comprehensive vibration management, often including multiple damping techniques.
- Long-Range Drones: Focused damping for navigation components improves reliability. I prioritize GPS and compass isolation alongside flight controller damping.
- Micro Drones: Simplified approaches due to space and weight constraints. For these, I focus on basic flight controller isolation using the lightest effective materials.
Every drone benefits from some level of vibration management, but the extent and focus should match the drone's purpose and performance requirements.
What are the signs of vibration problems?
Indicators I look for that suggest vibration issues:
- Flight Performance: Oscillations, twitches, or wobbles during flight. I pay particular attention to behavior during throttle changes and when holding steady throttle.
- Blackbox Data: Noisy gyro traces with regular patterns. I look for consistent high-frequency noise or specific spikes at certain throttle positions.
- Video Quality: "Jello" effect, micro-jitters, or horizontal lines in footage. Different vibration issues create distinctive visual artifacts that I've learned to recognize.
- Unusual Sounds: High-pitched whines or irregular motor sounds. After hundreds of builds, my ears have become sensitive to the subtle sounds of vibration issues.
- Hot Components: Electronics running hotter than normal. Excessive vibration can cause increased power consumption and heat generation in flight controllers and ESCs.
How do I choose the right damping material?
My selection process based on application:
- Flight Controllers: Silicone gel pads (30-40A durometer) for most builds. The specific durometer depends on the drone's size and power—larger, more powerful builds need slightly firmer materials.
- Cameras: TPU mounts with strategic foam padding for FPV cameras; multi-layer systems for HD cameras. The exact approach depends on the camera weight and flight style.
- GPS/Compass: Firmer materials (50-60A) that provide stability while still offering vibration isolation. Position accuracy benefits from more stable mounting with moderate vibration isolation.
- General Components: Adhesive foam for lighter components; silicone mounts for heavier items. I match the damping material's strength to the component's weight and vibration sensitivity.
- Frame Damping: Constrained layer materials like 3M damping sheet applied to carbon fiber elements. These work best when applied to areas identified as resonance points.
Can software replace physical vibration damping?
Based on my testing of various flight controller firmware:
- Not Entirely: Software filtering helps but has limitations. I've never achieved with software alone what proper physical damping accomplishes.
- Complementary Approach: Best results come from combining physical damping with appropriate software filtering. I tune filters based on the residual vibrations that make it past physical damping.
- Filtering Tradeoffs: Aggressive filtering introduces latency and reduces control responsiveness. Finding the right balance requires understanding both physical damping and software capabilities.
- Dynamic Filtering: Modern flight controllers offer dynamic filtering that adapts to changing conditions. These work best when physical damping has already addressed the worst vibration sources.
- My Approach: Implement effective physical damping first, then fine-tune software filters to address any remaining issues. This provides the best performance without sacrificing responsiveness.
How often should damping materials be replaced?
Maintenance schedule based on my experience:
- Silicone Gel Pads: Replace every 6-12 months of regular use. These gradually harden and lose effectiveness, with the timeline depending on exposure to heat and UV.
- Foam Materials: Inspect every 3 months, replace as needed. Foam typically compresses permanently and loses damping effectiveness faster than silicone.
- O-rings and Grommets: Replace if visible deformation or cracking occurs. These rubber components typically last 1-2 years but should be inspected regularly.
- TPU Printed Mounts: Replace if flexibility changes or cracks develop. Well-designed TPU mounts can last the life of the drone if not damaged in crashes.
- After Crashes: Always inspect all damping components after significant impacts. Crashes can damage damping materials in ways that aren't immediately obvious.
Conclusion
Effective vibration damping represents one of the most underappreciated aspects of drone building and tuning. Through years of experimentation and hundreds of builds, I've found that proper vibration management often makes a more significant difference to performance than expensive component upgrades.
The art and science of vibration damping continues to evolve, with new materials and techniques emerging regularly. What remains constant is the fundamental approach: identify vibration sources, understand their characteristics, select appropriate damping solutions, implement them properly, and test the results systematically.
Whether you're building a racing drone where every gram matters, a freestyle quad that needs to handle aggressive maneuvers, or a cinematic platform for professional footage, appropriate vibration damping will enhance performance, reliability, and results. The specific approach will vary based on your drone's purpose and components, but the principles remain the same.
I've learned most of these lessons through trial and error—sometimes expensive error involving crashed drones and damaged components. Hopefully, this guide helps you avoid some of those painful lessons and achieve better results more quickly. Remember that vibration management is an iterative process; don't be afraid to experiment, measure, and refine your approach based on results.


Comments ()