Drone Frames: Sizes, Materials, and Selection
The frame is the backbone of any FPV drone—the foundation upon which all other components are mounted. After building and flying dozens of drones across various frame sizes and designs, I've found that frame selection is one of the most consequential decisions in the build process. This comprehensive guide will walk you through everything you need to know about FPV drone frames, from basic principles to advanced considerations.
Introduction to FPV Drone Frames
The frame of an FPV drone serves multiple critical functions:
- Structural support for all components
- Protection for electronics in crashes
- Weight distribution affecting flight characteristics
- Aerodynamics influencing efficiency and handling
- Mounting points for components and accessories
- Aesthetic appeal reflecting your personal style
Whether you're building your first drone or your fiftieth, understanding frame design principles is essential for creating a setup that matches your flying goals.
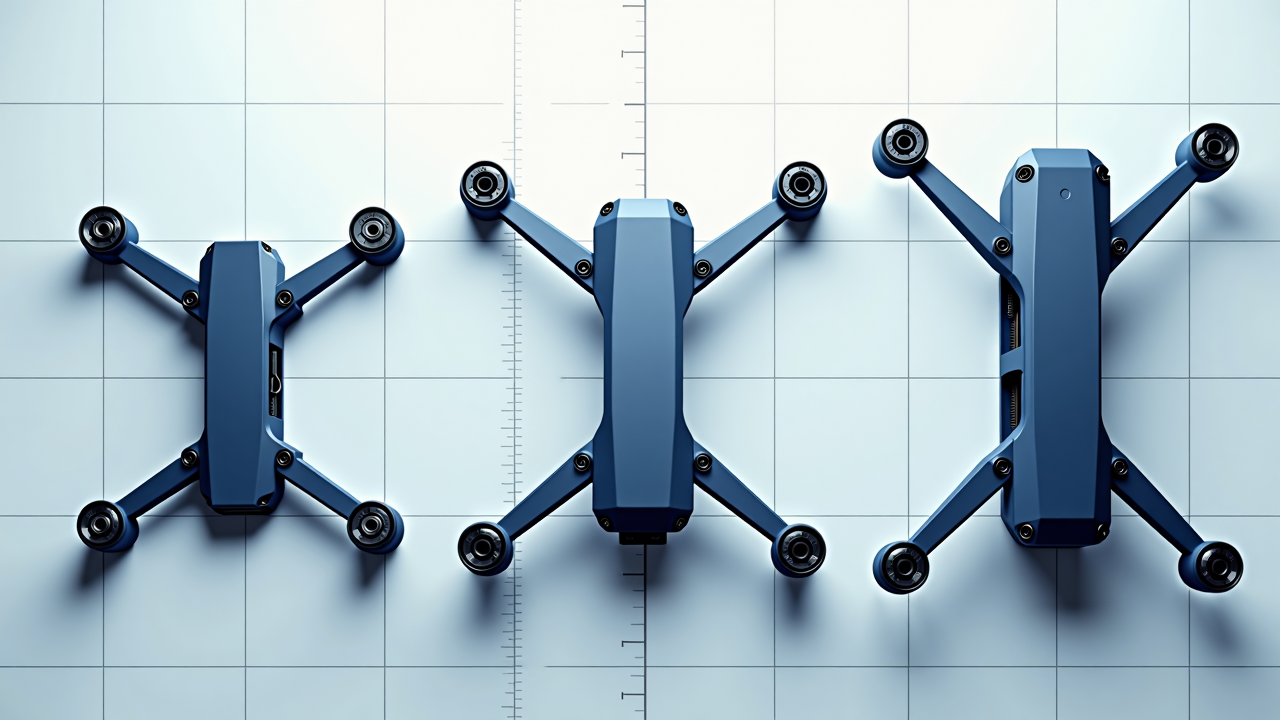
Frame Size Categories
FPV drone frames are primarily categorized by their size, which is measured by the maximum propeller diameter they can accommodate. This measurement is typically expressed in inches.

Micro Frames (1-3")
Micro frames are designed for the smallest propellers, typically 1-3 inches in diameter:
- Tiny Whoops (1-2"): Ducted propeller designs, often with prop guards, ideal for indoor flying
- Toothpicks (2.5-3"): Ultralight open designs focused on agility and efficiency
- Micro Freestyle (3"): Slightly more robust frames for outdoor acrobatic flying
These frames prioritize portability, lightweight design, and often feature prop guards for safety. They're perfect for indoor flying, beginners, and situations where larger drones aren't practical.
I've found that micro frames offer some of the most accessible and pure fun in the hobby. My 2.5" toothpick build weighs just 68 grams all-up and provides over 6 minutes of aggressive flying on a tiny battery.
Mini Frames (3-4")
Mini frames sit between micro and standard sizes:
- Cinewhoops (3-3.5"): Protected propeller designs for safe flying near people and objects
- Technical Racers (4"): Compact racing frames for technical courses
- Mini Freestyle (3.5-4"): Smaller freestyle frames offering agility and portability
These frames offer a good balance of portability and performance, with flight characteristics that can approach 5" builds but in a smaller package.
Standard Frames (5")
The 5" frame size is the most popular in the FPV hobby:
- Freestyle: Balanced designs for acrobatic flying
- Racing: Streamlined, lightweight frames for competition
- All-around: Versatile frames suitable for multiple flying styles
This size has become the standard due to its excellent balance of power, agility, and practicality. Most components are designed with 5" builds in mind, making parts widely available.
After trying nearly every frame size, I still find myself returning to 5" builds for their versatility. They're large enough to handle outdoor conditions well but small enough to transport easily and fly in reasonably confined spaces.
Medium Frames (6-7")
Medium frames offer advantages for specific use cases:
- Extended Freestyle: Longer flight times with similar handling to 5"
- Mid-range: Good efficiency for medium-distance flying
- Light Payload: Can carry small cameras or other lightweight equipment
These frames provide a step up in stability and flight time compared to 5" builds, while still maintaining reasonable agility.
Large Frames (7"+)
Large frames are specialized for particular applications:
- Long Range: Maximum efficiency for distance flying
- Heavy Payload: Ability to carry larger cameras or other equipment
- Endurance: Designed for maximum flight time
- Cinematic: Stable platforms for professional-quality footage
These larger frames sacrifice some agility for stability, efficiency, and payload capacity.
Frame Materials
The choice of frame material significantly impacts durability, weight, and flight characteristics.
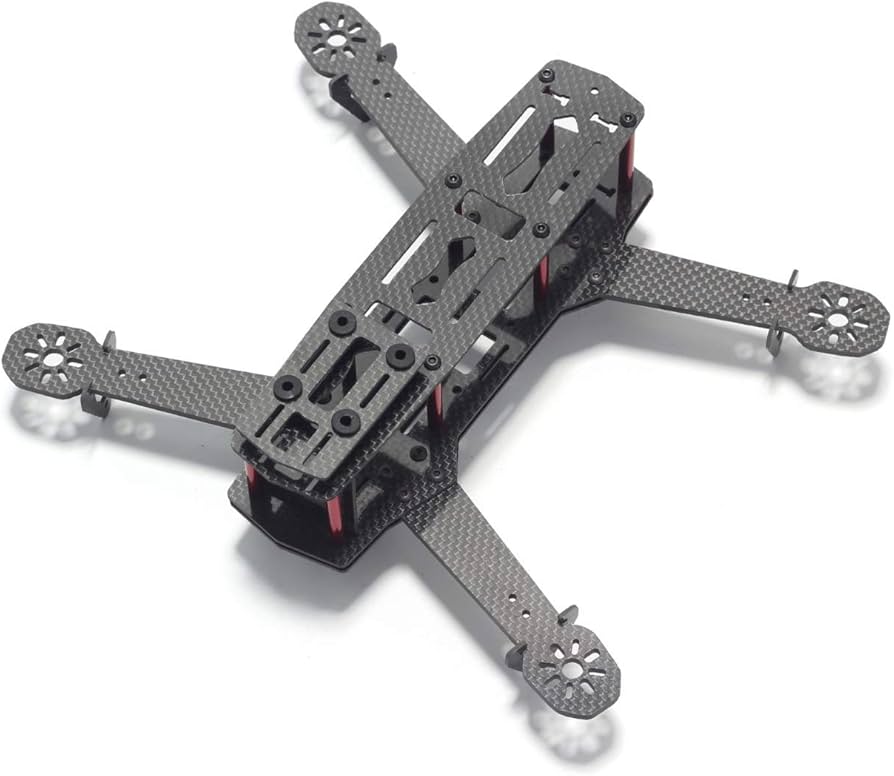
Carbon Fiber
Carbon fiber is the most popular material for FPV frames due to its excellent strength-to-weight ratio:
- Pros: Extremely strong, lightweight, rigid, vibration-dampening
- Cons: Expensive, can block RF signals, brittle failure mode
- Best for: Most applications where performance is a priority
Carbon fiber comes in different qualities and thicknesses:
- 1.5mm: Lightweight racing frames, less durable
- 2-3mm: Standard for freestyle frames, good balance of weight and durability
- 4mm+: Heavy-duty applications, maximum durability
I've found that 3mm carbon fiber offers the sweet spot for freestyle flying—durable enough to survive significant crashes while not adding excessive weight.
Glass Fiber (Fiberglass)
Fiberglass offers an alternative to carbon fiber:
- Pros: Less expensive, RF transparent, more flexible (can absorb impacts)
- Cons: Heavier than carbon fiber, less rigid, can delaminate
- Best for: Budget builds, applications where RF transparency is important
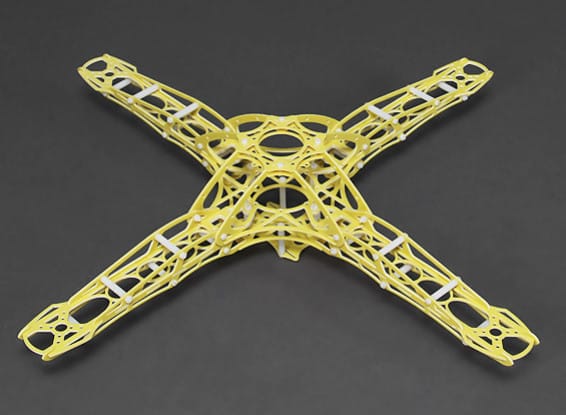
Plastic/Polymers
Various plastics and polymers are used, particularly for micro builds:
- Pros: Inexpensive, can be flexible and durable, easily molded into complex shapes
- Cons: Less rigid, can deform under stress or heat
- Best for: Micro builds, ducted designs, beginner drones
TPU (Thermoplastic Polyurethane) is commonly used for protective elements and mounting components due to its flexibility and impact resistance.
Aluminum/Metal Components
Metal components are sometimes used in hybrid construction:
- Pros: Excellent heat dissipation, good for structural elements
- Cons: Heavier than carbon fiber, can bend permanently
- Best for: Standoffs, motor mounts, heat-dissipating elements
Frame Design Types
Beyond size and material, frames can be categorized by their design philosophy and construction approach.
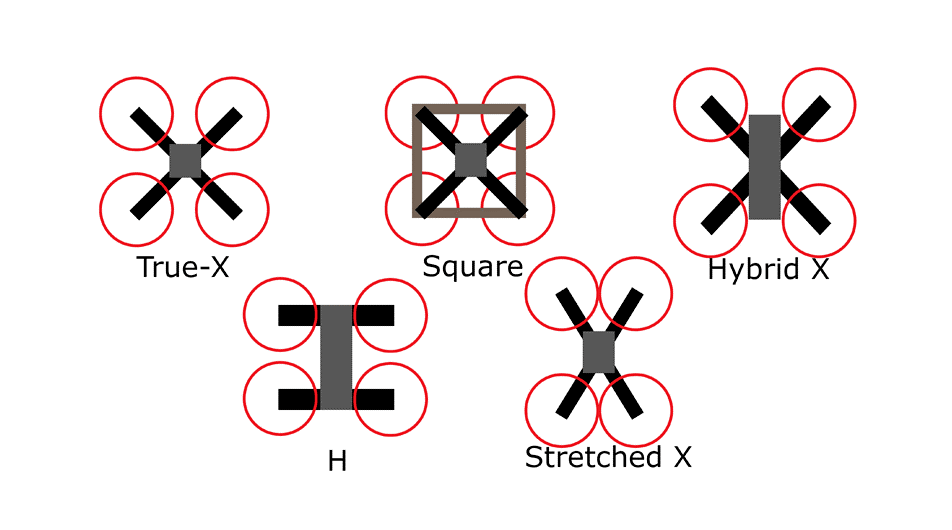
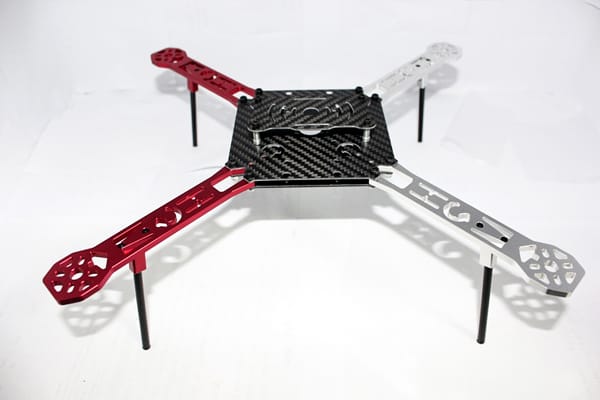
X vs. H Configuration
The two primary frame configurations are X and H:
- X Configuration: Motors form an X pattern when viewed from above
- More responsive handling
- Better for freestyle and racing
- More compact
- H Configuration: Motors form an H pattern with a longer body section
- More space for components
- Better for carrying payloads
- Often used in larger builds
Most modern 5" frames use variations of the X configuration, while larger long-range builds often adopt H configurations for their component space and stability.
True X vs. Stretched X
Within the X configuration, there are variations:
- True X: Equal distance between all motors
- Perfectly balanced handling
- Equal thrust in all directions
- Often used in racing
- Stretched X: Longer front-to-back than side-to-side
- More stable forward flight
- Better for freestyle and cinematic flying
- Reduced prop wash in forward flight
I prefer a slightly stretched X for freestyle flying—around 5-10mm of stretch provides noticeably improved forward flight stability without sacrificing too much agility.
Stack Mounting Styles
How the electronics stack mounts to the frame affects maintenance and protection:
- Traditional Sandwich: Electronics mounted between top and bottom plates
- Maximum protection
- More difficult to access components
- Better for freestyle and crashes
- Open Pod: Electronics mounted on top of the bottom plate
- Easier access to components
- Less protection
- Better for racing and maintenance
- Unibody: Single-piece frame with integrated mounting
- Lightweight design
- Often used in micro builds
- Limited customization
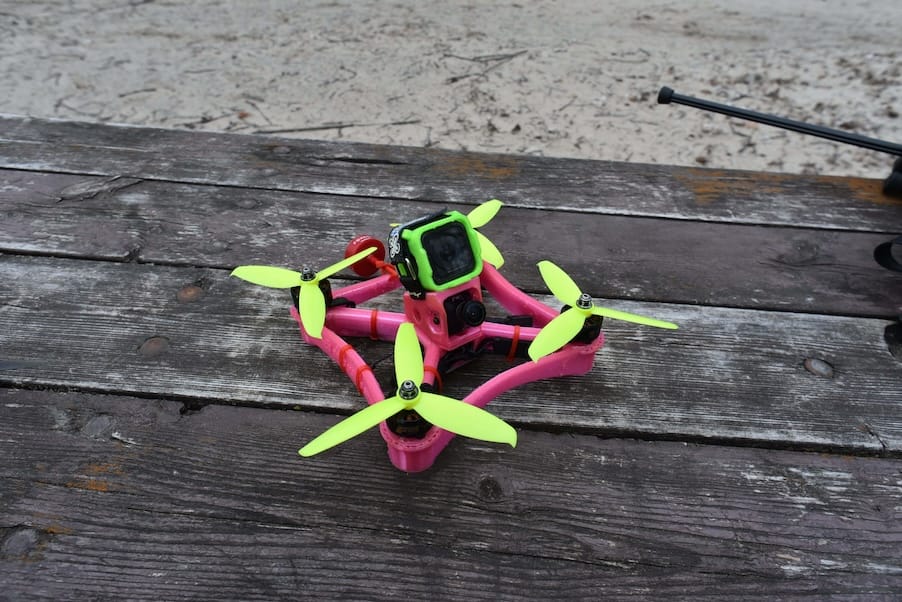
Specialized Frame Types
Several specialized frame designs serve specific purposes:
- Cinewhoop: Protected propellers for flying near people/objects
- Toothpick: Ultra-lightweight, minimalist design
- Split-X: Motors slightly rotated from true X for improved handling
- Deadcat: Front arms wider than rear for camera view and stability
- Hybrid X/H: Combines elements of both configurations
Frame Components and Features
Understanding the various components and features of frames helps in evaluating their suitability for your needs.
Arm Design
The arms of a frame are critical structural elements:
- Individual Arms: Separate pieces that attach to a central plate
- Easier to replace after crashes
- Can introduce weak points at connections
- Good for racing where quick repairs are important
- Unibody/Integrated Arms: Arms and main plate cut from a single piece
- Stronger overall structure
- Entire frame must be replaced if one arm breaks
- Better for freestyle and durability
- Bottom-mounted Motors: Motors attached to the bottom of arms
- Lower center of gravity
- Better protection for motors in crashes
- Standard in most modern designs
- Top-mounted Motors: Motors attached to the top of arms
- Easier maintenance
- Less protection in crashes
- Used in some specialized designs
Plate Design
The main plates of the frame provide structural integrity and mounting options:
- Top Plate: Protects components from top impacts
- Thickness affects durability and weight
- Often includes camera mount
- May include accessory mounting points
- Bottom Plate: Primary structural element
- Usually the thickest part of the frame
- Supports all components
- Often includes battery mounting
- Middle Plates/Camera Plates: Additional structural elements
- Provide mounting for FC stack and camera
- Add rigidity to the frame
- Allow for customization of component placement
Camera Mounting
How the FPV camera mounts affects durability and video quality:
- Fixed Mount: Camera directly attached to the frame
- Simplest design
- Limited adjustability
- Less protection in crashes
- Adjustable Mount: Allows camera angle adjustment
- Better for different flying styles
- May introduce vibration
- Standard in most frames
- TPU Mount: Flexible mount that absorbs vibration
- Better protection in crashes
- Reduces video jello effect
- Can dampen minor vibrations
I've found that a good TPU camera mount is one of the most important features for both video quality and crash survival. My cameras have survived impacts that would have destroyed them with rigid mounts.
Battery Mounting
How the battery attaches affects weight distribution and crash protection:
- Bottom Mount: Battery attached to bottom of frame
- Lower center of gravity
- Better protection for electronics
- Standard in most designs
- Top Mount: Battery attached to top of frame
- Better protection for battery
- Higher center of gravity
- Used in some racing designs
- Strap vs. TPU Mount: Method of securing battery
- Straps are lightweight and simple
- TPU mounts provide better security and crash protection
- Many frames use a combination of both
Additional Features
Modern frames often include specialized features:
- Antenna Mounts: Dedicated mounting points for video and control antennas
- HD Camera Mounts: Provisions for mounting action cameras
- Wire Management: Channels or guides for clean wire routing
- Accessory Rails: Mounting points for additional components
- Skids/Landing Gear: Protection for bottom-mounted components
Frame Selection Guide
Choosing the right frame involves matching its characteristics to your specific needs and flying goals.
Matching Frame to Flying Style
Different flying styles demand different frame characteristics:
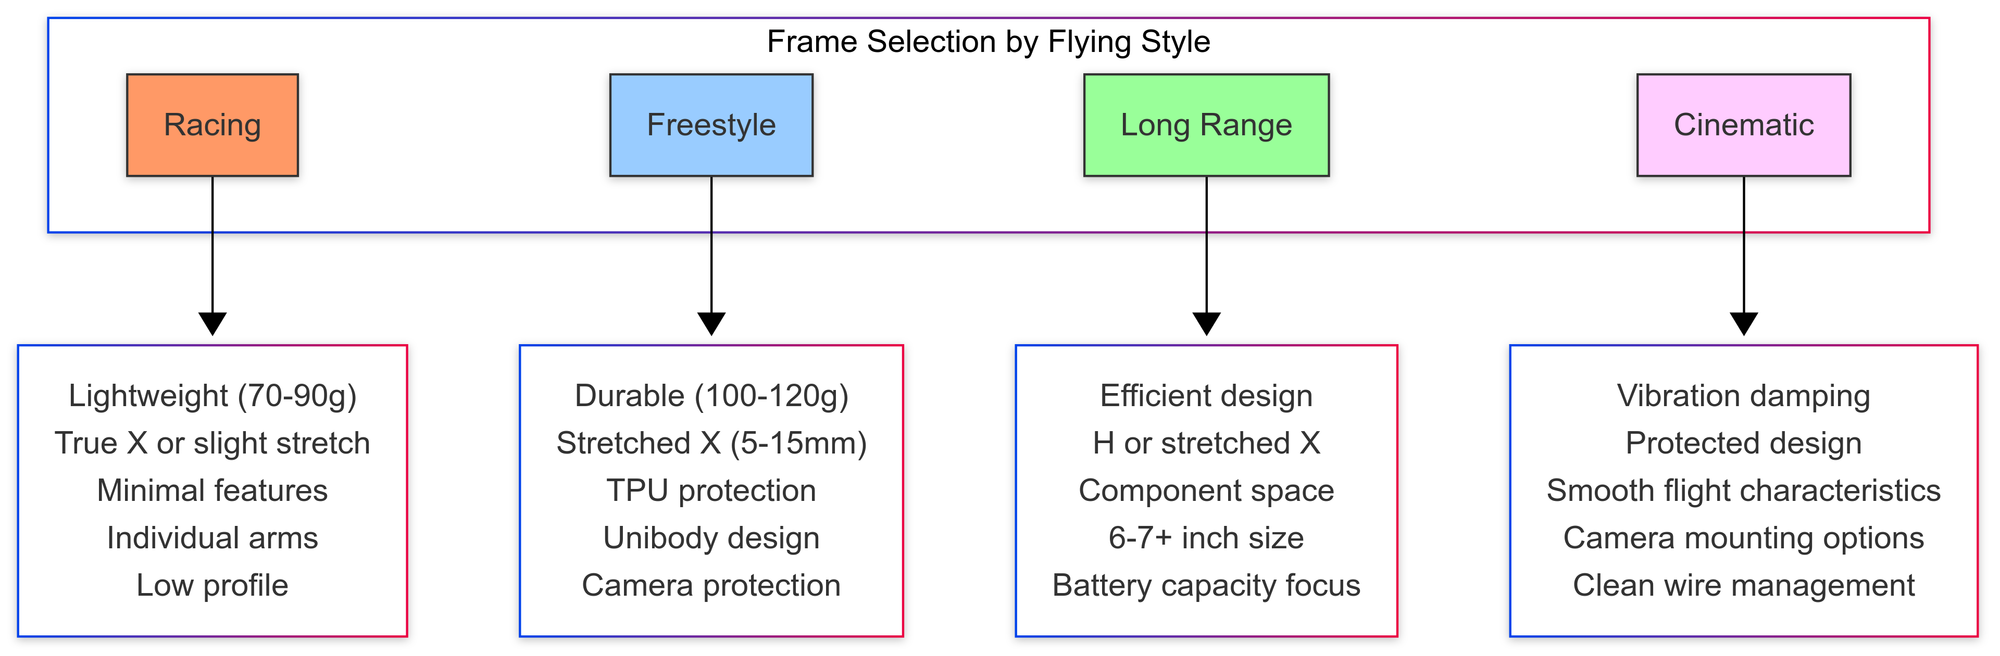
Racing
- Priority: Lightweight, aerodynamic, crash-resistant
- Recommended: True X or slight stretch, 5" size, individual arms
- Material: Thinner carbon fiber (2-2.5mm)
- Features: Minimal, focused on weight reduction
For racing, I prefer frames under 80g with replaceable arms. The ability to quickly swap a broken arm at the track is worth the slight weight penalty of the connecting hardware.
Freestyle
- Priority: Durability, balanced handling, protection
- Recommended: Stretched X (5-15mm), 5-6" size, unibody design
- Material: Thicker carbon fiber (3-4mm)
- Features: TPU protection, secure stack mounting, camera protection
For freestyle, I've found that frames in the 100-110g range offer the best balance of durability and agility. Too light, and they don't survive crashes; too heavy, and they lose the responsive feel that makes freestyle fun.
Long Range
- Priority: Efficiency, stability, component space
- Recommended: H design or stretched X, 6-7"+ size
- Material: Medium carbon fiber (2.5-3mm)
- Features: Battery capacity focus, clean aerodynamics, antenna mounting
Cinematic
- Priority: Smooth flight, vibration damping, protection
- Recommended: Stretched X or H, 5-7" size
- Material: Medium-thick carbon fiber (3mm)
- Features: Camera mounting options, vibration isolation, prop protection
Comprehensive Frame Selection Table
Here's a detailed table to help you select the right frame based on your requirements:
| Flying Style | Frame Size | Weight Range | Configuration | Arm Design | Plate Thickness | Key Features |
|---|---|---|---|---|---|---|
| Indoor Micro | 1-2" | 20-40g | X or Whoop | Unibody | 1.5-2mm | Prop guards, durability, portability |
| Outdoor Micro | 2.5-3" | 30-60g | X | Unibody | 2mm | Lightweight, efficiency, agility |
| Cinewhoop | 3-3.5" | 70-120g | X | Ducted | 2-3mm | Prop protection, stability, camera mount |
| Technical Racing | 4" | 60-80g | True X | Individual | 2-2.5mm | Lightweight, agility, replaceable arms |
| Racing | 5" | 70-90g | True X | Individual/Unibody | 2-3mm | Aerodynamics, weight reduction, durability |
| Freestyle | 5" | 90-120g | Stretched X | Unibody | 3-4mm | Crash resistance, balanced handling, protection |
| Lightweight Freestyle | 5" | 80-100g | Stretched X | Unibody | 2.5-3mm | Agility, moderate durability, responsiveness |
| Mid-range | 6" | 110-140g | Stretched X/H | Unibody | 3mm | Efficiency, stability, moderate payload |
| Long Range | 7"+ | 130-180g | H | Unibody/Individual | 2.5-3mm | Efficiency, component space, stability |
| Heavy Lift | 7"+ | 150-250g+ | H/X | Reinforced | 3-4mm | Strength, payload capacity, stability |
Component Compatibility Considerations
When selecting a frame, consider compatibility with your other components:
- Motor Mounting: Ensure the frame supports your motor size and mounting pattern
- Stack Mounting: Check that your FC stack mounting matches the frame (20x20, 30.5x30.5, etc.)
- Camera Compatibility: Verify that your FPV camera will fit the mounting provisions
- Battery Size: Ensure the frame can accommodate your preferred battery dimensions
- Prop Clearance: Check that your props will have adequate clearance from the frame and each other
I once made the mistake of building on a frame that couldn't properly fit my preferred battery size, resulting in compromised flight times and balance issues. Always verify component compatibility before committing to a frame.
Frame Maintenance and Customization
Proper maintenance and thoughtful customization can extend the life of your frame and improve its performance.
Inspection and Maintenance
Regular inspection prevents issues:
- Check for cracks - Especially near motor mounts and arm joints
- Verify hardware tightness - Vibration can loosen screws over time
- Inspect for delamination - Carbon fiber can separate in layers after impacts
- Clean debris - Dirt and grass can affect balance and cooling
- Check TPU components - They can tear or degrade over time
I make it a habit to inspect my frames after every flying session, particularly after crashes. A small crack can quickly become a catastrophic failure if not addressed. A slightly bent arm can dramatically impact drone balance and performance resulting in vibrations that are very difficult to tune out on a software level.
Common Modifications
Popular frame modifications include:
- TPU Additions: 3D printed bumpers, antenna mounts, and protectors
- Weight Reduction: Drilling non-structural areas, removing unnecessary features
- Wire Management: Adding guides, channels, or 3D printed solutions
- Camera Protection: Additional guards or mounts
- Battery Mounting: Improved straps or TPU holders
- Vibration Damping: Soft mounting motors or electronics
- Spacers: can be used to increase useful area for components
3D Printing for Frames
3D printing has revolutionized frame customization:
- TPU Parts: Flexible components for protection and mounting
- Hybrid Designs: Carbon fiber main structure with printed accessories
- Complete Micro Frames: Entirely 3D printed frames for smaller builds
- Prototype Testing: Testing designs before cutting carbon fiber
I've found that a good 3D printer is an invaluable tool for FPV pilots. My custom TPU camera mounts and antenna holders have saved me hundreds in replacement parts after crashes.
Pro Tips and Expert Insights
After years of building and flying dozens of frames, I've gathered some insights that go beyond the specifications.
Evaluating Frame Quality
Not all carbon fiber is created equal:
- Weave quality: Tighter weaves generally indicate better quality
- Machining precision: Clean cuts with no fraying or rough edges
- Hardware quality: Good frames include quality screws and standoffs
- Design thoughtfulness: Look for attention to detail in wire routing, protection, etc.
- Weight consistency: Parts should match specified weights
I've learned to be skeptical of ultra-lightweight claims. Some manufacturers achieve low weights by using lower-quality carbon fiber that won't survive real-world flying conditions.
Frame Tuning Considerations
The frame significantly impacts flight controller tuning:
- Rigidity affects PID tuning: Stiffer frames can handle more aggressive PIDs
- Vibration characteristics: Some frames naturally dampen vibrations better
- Motor mounting affects handling: Soft-mounted motors may require different filtering
- Weight distribution impacts responsiveness: Center-weighted frames respond differently
Racing Secrets
Competitive racers often:
- Remove unnecessary components: Every gram counts
- Use specialized hardware: Titanium or aluminum for weight reduction
- Optimize wire routing: Clean builds have better aerodynamics
- Consider center of gravity: Balanced frames handle better in technical sections
- Carry spare arms/plates: Quick repairs keep you in the competition
Freestyle and Cinematic Tips
For smooth, controlled flying:
- Prioritize durability over weight: A slightly heavier, more durable frame is better long-term
- Consider camera protection: Good camera mounts prevent expensive replacements
- Look for vibration damping features: Cleaner video comes from frames that manage vibration
- Balance weight distribution: Even weight distribution improves handling
- Consider prop clearance in view: Frames that keep props out of HD camera view are preferred
FAQ: Common Questions About Drone Frames
How do I know what size frame to choose?
Start with your intended use. For all-around flying and freestyle, 5" frames are the most versatile and have the widest component selection. For indoor flying or extreme portability, consider micro frames (1-3"). For long-range or cinematic work, larger frames (6-7"+) offer better efficiency and stability. Your experience level also matters—5" frames offer a good balance of performance and durability for most pilots.
What's the difference between frame weight and all-up weight?
Frame weight refers only to the carbon fiber and hardware components of the bare frame. All-up weight (AUW) includes everything: frame, motors, electronics, battery, and all accessories. When comparing frames, look at both—a lighter frame might allow for better components while staying within your target AUW, but an ultra-light frame might sacrifice durability unnecessarily.
How important is carbon fiber quality?
Very important. Higher-quality carbon fiber offers better strength-to-weight ratio, improved vibration characteristics, and greater durability. Quality carbon fiber has a tight, consistent weave, clean machining with no fraying at the edges, and often uses higher-modulus materials. Budget frames often use lower-grade carbon that may be heavier for the same strength or more prone to delamination after impacts.
Should I choose individual arms or a unibody design?
It depends on your priorities. Individual arms are easier to replace after crashes and can be more convenient for racing or situations where quick field repairs are important. Unibody designs (where arms are integrated with the main plate) offer better overall rigidity and often better flight characteristics, but require replacing the entire frame if an arm breaks. For freestyle, I prefer unibody designs for their flight feel; for racing, individual arms can be more practical.
How does frame design affect flight characteristics?
Significantly. A true X configuration offers balanced handling in all directions, while a stretched X (longer front-to-back than side-to-side) provides more stable forward flight. H configurations offer more component space and stability but less agility. Frame rigidity affects how directly your inputs translate to movement—stiffer frames feel more precise but may transmit more vibration. Weight distribution impacts how the drone rotates and responds to throttle changes.
How much should I spend on a frame?
For beginners, a quality mid-range frame ($40-70) offers the best value, providing good durability without breaking the bank. Budget frames ($20-40) can be false economy, as they may break more easily and require replacement. Premium frames ($70-150+) offer maximum durability and features but with diminishing returns on investment. I recommend spending enough to get a frame with quality carbon fiber and thoughtful design, as the frame is literally the foundation of your build.
Can I 3D print an entire frame?
For micro builds (under 3"), entirely 3D printed frames can work well, especially with materials like carbon-fiber infused filaments. For larger builds, a hybrid approach works better—carbon fiber for structural elements with 3D printed components for protection, mounting, and customization. The strength-to-weight ratio of even the best 3D printing materials still can't match quality carbon fiber for main structural components in larger drones.
How do I know if a frame will fit all my components?
Check the specifications carefully. Key compatibility points include:
- Stack mounting pattern (20x20mm, 30.5x30.5mm, etc.)
- Motor mounting pattern (16x16mm, 19x19mm, etc.)
- Camera mounting provisions (size and style)
- Battery dimensions (length, width, height)
- VTX antenna mounting options
- HD camera mounting if applicable
When in doubt, look for builds using similar components or contact the manufacturer.
How does frame size affect flight time?
Generally, larger frames allow for larger props, which are more efficient and can provide longer flight times with the same battery capacity. A 7" build might fly 50-100% longer than a comparable 5" build with the same battery. However, larger frames also tend to be heavier and less agile. For maximum flight time, larger frames (6-7"+) with efficient components are optimal, but they sacrifice the agility and handling of smaller builds.
What's the difference between freestyle and racing frames?
Racing frames prioritize weight reduction, aerodynamics, and sometimes ease of repair, often sacrificing some durability for performance. They typically feature a true X or only slightly stretched design for balanced handling. Freestyle frames prioritize durability, protection for components, and slightly stretched X designs for better forward flight stability. They're usually a bit heavier but can withstand more abuse. Racing frames might be 70-90g, while freestyle frames of the same size might be 90-120g but with significantly better crash survival rates.
Conclusion
Selecting the right frame for your FPV drone is a critical decision that affects every aspect of flight performance and durability. The perfect frame isn't necessarily the lightest or the most expensive—it's the one that best matches your specific requirements, flying style, and component choices.
For beginners, I recommend starting with a quality 5" freestyle frame from a reputable manufacturer. These offer the best versatility, component availability, and community support. As you develop your skills and preferences, you can explore more specialized options tailored to your evolving flying style.
Remember that the frame is the foundation of your build—it's worth investing in quality here, as it affects everything from flight characteristics to component protection. A good frame will serve you well through many flights and crashes, while a poor one will lead to frustration and unnecessary rebuilds.
The FPV frame landscape continues to evolve rapidly, with manufacturers constantly pushing the boundaries of what's possible in terms of design, materials, and features. By understanding the fundamental principles and considerations covered in this guide, you'll be well-equipped to navigate these changes and make informed decisions for your builds.
Whether you're building your first drone or your fiftieth, I hope this guide helps you find the perfect frame to match your flying dreams. Happy building and flying!
References and Further Reading
- Drone Motors: Selection, Performance, and Optimization
- Drone Propellers: Selection, Performance, and Optimization
- Drone Vibration Damping
External Resources
- Rotorbuilds - Database of community drone builds
- Joshua Bardwell's YouTube Channel - Detailed frame reviews and build guides
- GetFPV Frame Guide - Additional frame selection resources


Comments ()