Overview of FPV Antennas

Video transmitter (VTX) antennas are the unsung heroes of the FPV experience, responsible for sending your drone's video feed back to your goggles. After years of flying in environments ranging from dense forests to open fields, I've learned that antenna selection and setup can make the difference between crystal-clear video and frustrating static—or worse, a lost drone. This comprehensive guide explores VTX antenna technology, polarization types, radiation patterns, selection criteria, and installation best practices based on my extensive hands-on experience.
Introduction to VTX Antennas
When I first started flying FPV, I naively thought all antennas were created equal. I quickly learned this lesson the hard way after losing video signal and crashing an expensive build because I'd opted for the stock antenna that came with my video transmitter. In FPV drones, the antenna is just as important as the VTX itself—perhaps even more so.
A VTX antenna is a specialized device that converts electrical signals from your video transmitter into radio waves that propagate through the air. These radio waves are then captured by a matching antenna on your goggles or ground station. The quality, type, and installation of this antenna directly impact:
- Range: How far you can fly while maintaining a usable video feed. I've doubled my effective range simply by upgrading from a stock dipole to a well-made circular polarized antenna.
- Signal Quality: The clarity and stability of your video feed. The difference between a quality antenna and a poor one is immediately apparent in your goggles—I can still remember the "wow" moment when I first upgraded.
- Multipath Handling: How well your system deals with signal reflections. After countless flights around buildings and through forests, I've found this to be critical for maintaining video in complex environments.
- Penetration: How effectively your signal passes through obstacles. I've flown behind trees and buildings that would have completely blocked my signal with inferior antennas.
- Radiation Pattern: The three-dimensional shape of your signal's coverage area. Understanding this has helped me maintain video when performing acrobatic maneuvers that change the orientation of my drone dramatically.
The Evolution of FPV Antennas
I've witnessed the remarkable evolution of FPV antennas over the years:
- Early Days (2010-2013): Simple linear dipoles were the norm. Users got constantly frustrated by their directional limitations and poor multipath handling.
- Circular Polarization Adoption (2013-2015): Cloverleaf and skew planar wheel designs revolutionized the hobby. My first cloverleaf antenna was a revelation—suddenly I could fly behind obstacles that would have caused complete signal loss before.
- Pagoda Era (2016-2018): More compact and durable designs emerged. I use pagodas on some of my builds for their excellent balance of performance and durability.
- Modern Diversity (2018-present): Specialized designs for specific purposes and hybrid systems. My current setups use a combination of antenna types to maximize performance in different scenarios.
- Directional Innovation (2020+): Highly specialized directional antennas for long-range applications. I've pushed my range beyond 5km using helical antennas on my ground station paired with quality omnidirectional antennas on my long-range builds.
This progression has led to smaller, more efficient antennas with increasingly sophisticated performance characteristics. I've gone from bulky, fragile designs that would break in the slightest crash to compact, nearly indestructible antennas that outperform their predecessors in every way.
Basic Principles of Antenna Operation
Understanding how antennas work has helped me make better choices for my builds. Let me share what I've learned about the fundamental principles:
Frequency and Wavelength
The relationship between frequency and wavelength is critical for antenna design:
- 5.8GHz Band: The most common frequency for FPV, with a wavelength of approximately 52mm. I fly almost exclusively on this band due to its excellent balance of range and antenna size.
- 2.4GHz Band: Less common for video but has better obstacle penetration, with a wavelength of about 125mm. I've experimented with this band in dense forests with good results, though the larger antennas are more prone to damage.
- 1.3GHz Band: Used for long-range applications, with a wavelength of around 230mm. I reserve this band for my extreme long-range builds where maximum penetration is required.
Antenna length is typically related to wavelength—usually ¼, ½, or full wavelength designs. I've found that understanding this relationship helps explain why certain antennas perform better in specific scenarios.
Impedance Matching
Proper impedance matching between your VTX and antenna is essential for maximum power transfer:
- Standard Impedance: Typically 50 ohms for FPV equipment. I always ensure my antennas and cables maintain this impedance.
- VSWR (Voltage Standing Wave Ratio): Measures how well the antenna is matched. After damaging a VTX due to a high VSWR from a broken antenna, I now regularly check this parameter on my more expensive builds.
- Consequences of Mismatch: Power reflection, reduced efficiency, and potential VTX damage. I've learned this lesson the expensive way—a mismatched antenna can actually destroy your video transmitter over time.
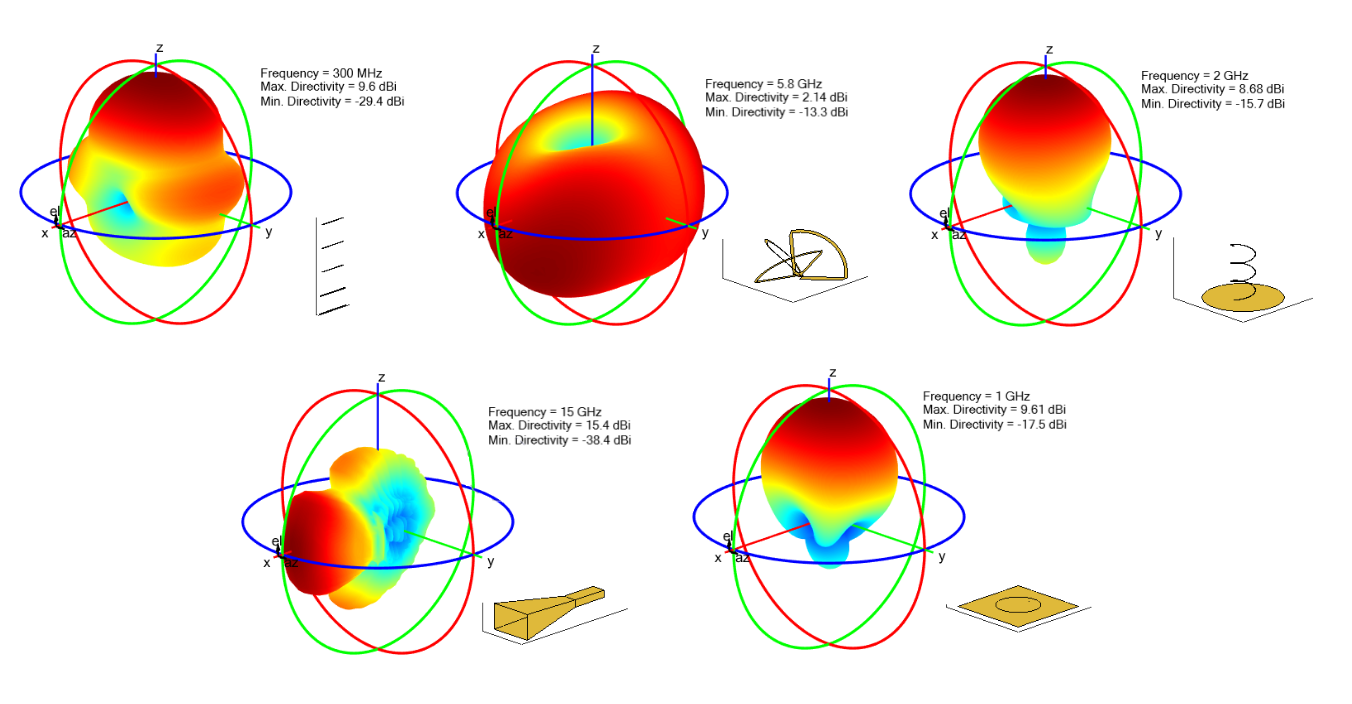
Radiation Patterns
The three-dimensional shape of your signal's coverage:
- Omnidirectional: Radiates in all directions on the horizontal plane. I use these for freestyle and racing where my drone's orientation changes constantly.
- Directional: Focuses energy in a specific direction. I use these on my ground station for long-range flights to maximize reception in the direction of my drone.
- Radiation Lobes: Areas of stronger and weaker signal. Understanding these patterns has helped me position my antennas for optimal coverage based on my flying style.
Types of VTX Antennas
Over the years, I've used virtually every type of VTX antenna available. Each has its strengths and weaknesses for different applications.
Linear Polarized Antennas
The simplest antenna design, with the signal oscillating in a single plane:
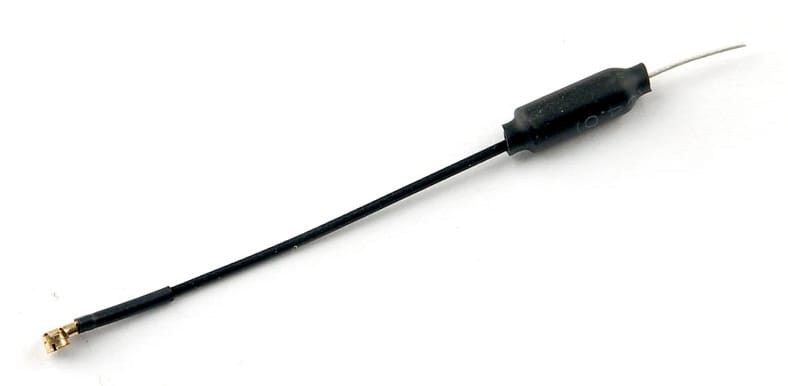
Dipole (Straight Whip)
- Design: Simple straight wire, typically ¼ or ½ wavelength. These were the first antennas I used when starting out.
- Radiation Pattern: Donut-shaped, with nulls at the ends. I quickly learned to avoid pointing the end of the antenna at my ground station—a lesson that cost me a drone when I lost video during a flip.
- Advantages: Simple, lightweight, inexpensive. I still keep a few in my field kit for emergency replacements.
- Disadvantages: Poor multipath handling, directional limitations. After upgrading to circular polarized antennas, I never willingly went back to dipoles for serious flying.
- Best For: Absolute beginners, emergency backups. I only recommend these as starter antennas while learning to fly in line-of-sight before investing in better options.
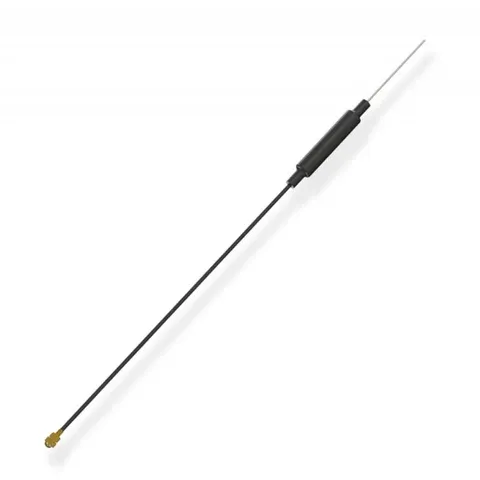
Monopole (Whip with Ground Plane)
- Design: Single element with a ground plane. I've used these on ultra-lightweight builds where every gram matters.
- Radiation Pattern: Similar to dipole but with the ground plane affecting the pattern. I've found the pattern to be slightly more hemispherical than a true dipole.
- Advantages: Very lightweight, simple. My micro builds often use these to save weight.
- Disadvantages: Similar limitations to dipoles. I've experienced the same multipath issues as with regular dipoles.
- Best For: Micro builds where weight is critical. I use these on sub-100g builds where performance is less important than minimizing weight.
Circular Polarized Antennas
These antennas have the signal rotating in a circular pattern, either clockwise (RHCP) or counterclockwise (LHCP):
Skew Planar Wheel
- Design: Lobes in a wheel configuration. I switched to these from cloverleafs for their improved durability.
- Radiation Pattern: Very similar to cloverleaf but with slightly better coverage above and below. I've noticed marginally better performance when flying directly overhead.
- Advantages: Better durability than cloverleaf, excellent radiation pattern. These survived crashes that would have destroyed my cloverleafs.
- Disadvantages: Slightly larger and heavier. The weight difference is minimal, but noticeable on very lightweight builds.
- Best For: Durable all-purpose use. These became my go-to antennas for everyday flying due to their excellent balance of performance and durability.
Cloverleaf
- Design: Lobes arranged in a clover pattern. These were my first upgrade from dipoles, and the improvement was dramatic.
- Radiation Pattern: Nearly spherical with slight forward bias. I've found these provide excellent all-around coverage for freestyle flying.
- Advantages: Good omnidirectional coverage, excellent multipath rejection. My video quality improved immediately when I switched to these from dipoles.
- Disadvantages: Relatively fragile, larger size. I've broken countless lobes on these antennas during crashes.
- Best For: General purpose flying, freestyle. I used these exclusively for several years on all my freestyle builds.
Pagoda
- Design: Stacked circular elements with a compact form factor. I was skeptical of these when they first appeared but became a convert after testing.
- Radiation Pattern: Excellent omnidirectional coverage with good axial ratio. I've found these to have the most consistent coverage of any omnidirectional antenna I've tested.
- Advantages: Compact, durable, excellent performance. These quickly became my favorite antennas for most applications.
- Disadvantages: Complex construction makes quality control important. I've had cheap clones perform terribly compared to authentic versions.
- Best For: All-around performance in a compact package. I use these on most of my builds now, especially where durability and performance are equally important.
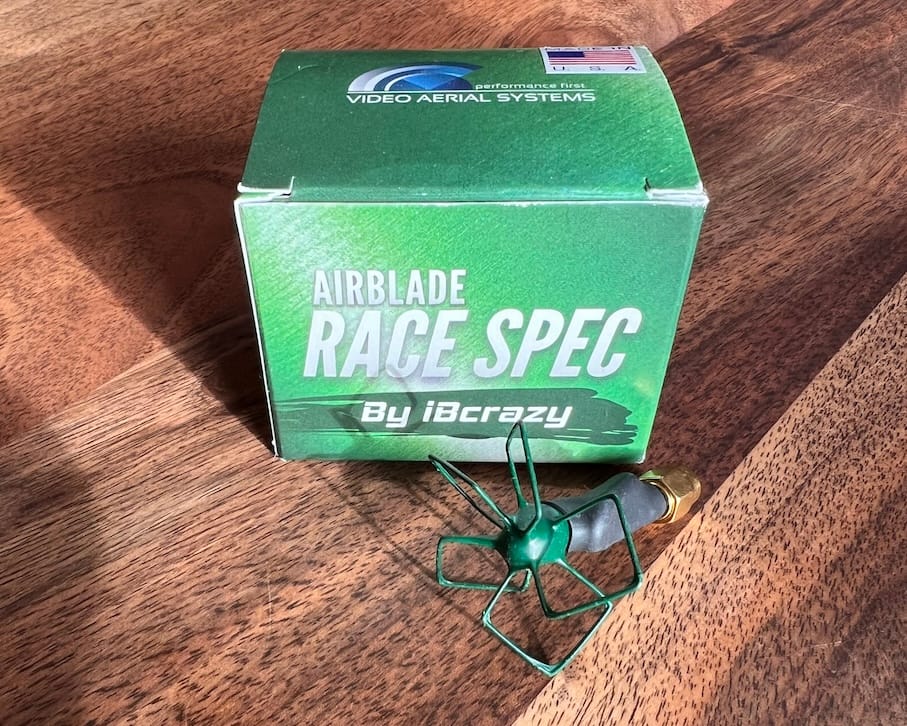
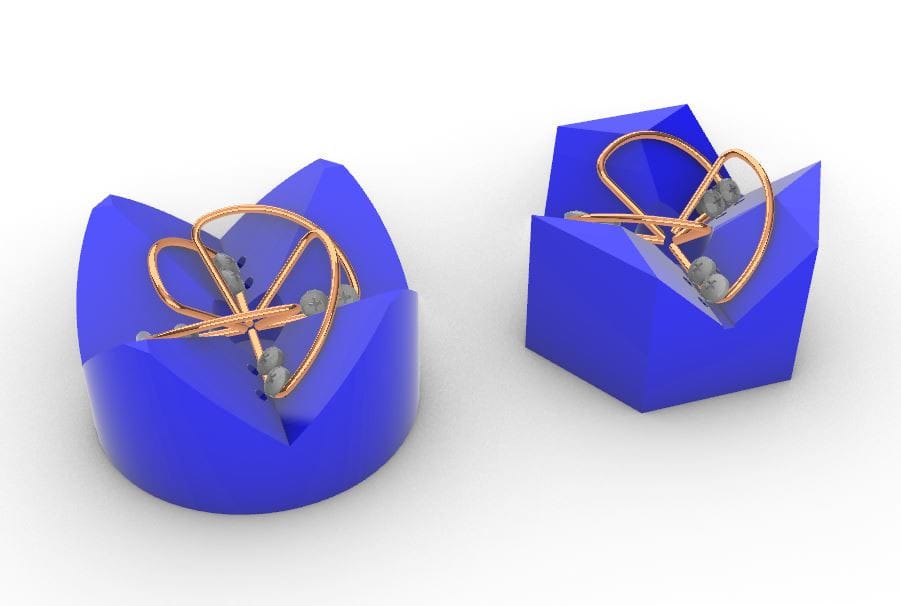
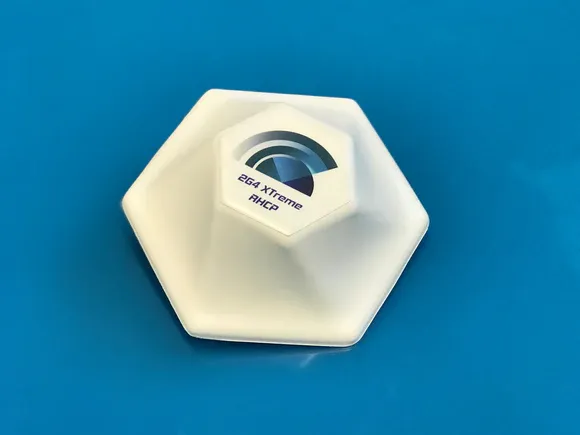
Stubby / Mushroom
- Design: Ultra-compact circular polarized design. I was amazed that such small antennas could perform so well when I first tried them.
- Radiation Pattern: Good omnidirectional coverage with some compromise in perfect circularity. I've noticed slightly reduced performance at extreme angles compared to larger designs.
- Advantages: Extremely durable, very compact. These have survived crashes that would have destroyed any other antenna type.
- Disadvantages: Slightly reduced performance compared to larger CP antennas. I've measured about a 10-15% reduction in effective range compared to a good pagoda.
- Best For: Racing and situations where durability is paramount. All my race builds use these now—the slight performance reduction is worth the near-indestructibility.

Directional Antennas
These focus the signal in a specific direction for increased range:
Patch Antenna
- Design: Flat panel with internal elements. I use these on my ground station for medium-range directional coverage.
- Radiation Pattern: Focused in one direction with a beam width of typically 60-120 degrees. I've found these provide a good balance of directional gain without requiring constant aiming.
- Advantages: Moderate gain (typically 5-9dBi), relatively compact. These give me about double the range of an omnidirectional antenna when pointed in the right direction.
- Disadvantages: Must be pointed toward the aircraft. I've lost video when flying behind myself with a patch antenna.
- Best For: Ground station use for medium-range flights. I use a patch as part of my diversity setup for most flying sessions.
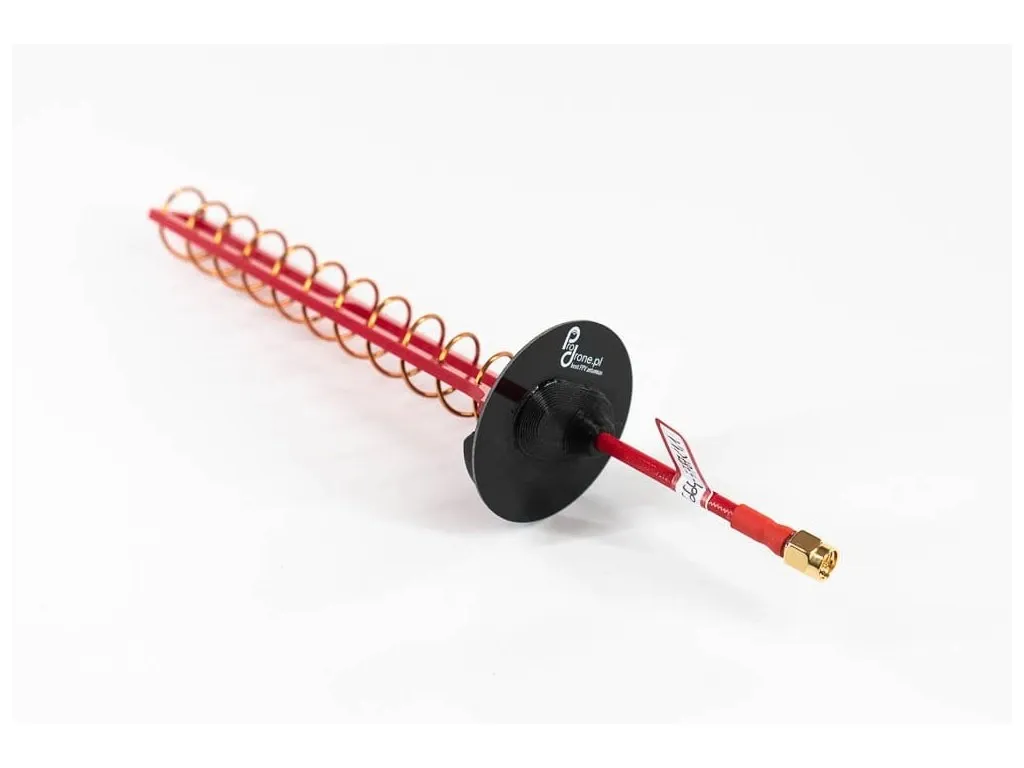
Helical Antenna
- Design: Coiled wire forming a helix. I was astonished by the range improvement when I first added a helical to my ground station.
- Radiation Pattern: Highly focused beam, typically 30-50 degrees. I've found the narrow beam requires more active tracking but provides exceptional range.
- Advantages: High gain (typically 7-14dBi), excellent range. My longest flights have all been achieved using helical antennas on the ground station.
- Disadvantages: Narrow beam requires accurate pointing, larger size. I've had to develop good tracking skills to make the most of these antennas.
- Best For: Long-range ground station use. I use a 7-turn helical for flights beyond 2km.
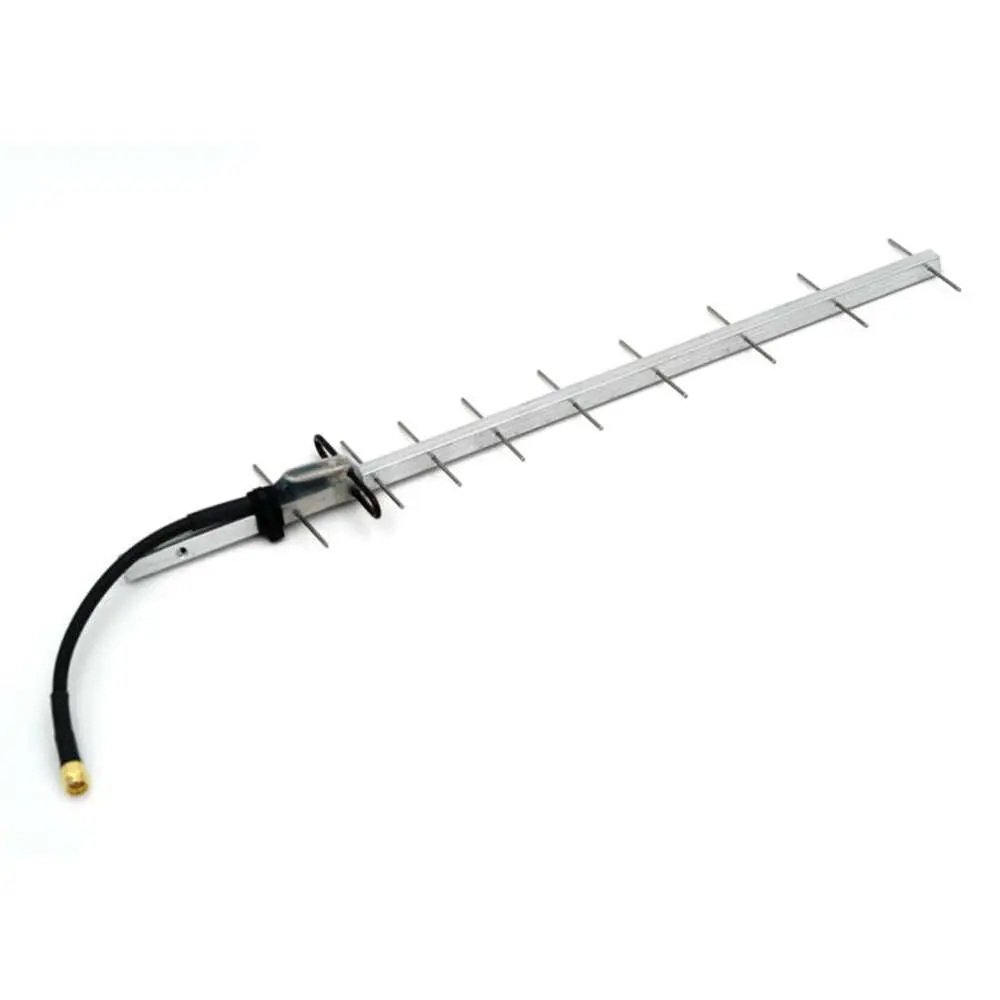
Yagi Antenna
- Design: Driven element with directors and reflectors. I've experimented with these but generally prefer helicals for maximum range.
- Radiation Pattern: Focused beam similar to helical but with different characteristics. I've found the pattern to be slightly wider but with less maximum gain than a comparable helical.
- Advantages: High gain, good directional characteristics. These provide excellent penetration through light obstacles in the signal path.
- Disadvantages: Large size, must be accurately pointed. The size makes these impractical for field use in my experience.
- Best For: Fixed ground station installations. I use these at my regular flying spot where I can mount them permanently.
Hybrid and Specialized Designs
Modern antenna innovation has led to specialized designs for specific purposes:
Crosshair / X-Air
- Design: Combination of multiple elements in a compact form. I was initially skeptical but found these to perform surprisingly well.
- Radiation Pattern: Excellent omnidirectional coverage with good axial ratio. In my testing, these performed very similarly to quality pagodas.
- Advantages: Durable, good performance, compact. These have become popular on my builds that take frequent crashes.
- Disadvantages: Performance can vary widely between manufacturers. I've had some excellent and some terrible versions of this design.
- Best For: Durable all-purpose use. I use these interchangeably with pagodas on many builds.
Diversity Antenna Systems
- Design: Multiple antennas with different characteristics used simultaneously. My ground station uses a three-antenna diversity setup that has transformed my long-range flying experience.
- Advantages: Combines benefits of different antenna types. I get the omnidirectional coverage of circular polarized antennas with the range of directional antennas.
- Disadvantages: More complex, requires diversity receiver. The additional cost and complexity is significant but worthwhile for serious flying.
- Best For: Advanced pilots seeking maximum performance. All my serious long-range and freestyle sessions now use diversity reception.

Polarization and Its Importance
The polarization of your antennas dramatically affects performance. This is an area where many beginners make costly mistakes—I certainly did.
Linear vs. Circular Polarization
Linear Polarization
- Signal Characteristics: Electric field oscillates in a single plane. My early dipole antennas used this simple polarization.
- Advantages: Simplicity, slightly better theoretical range with perfectly aligned antennas. I've measured about a 3dB advantage in perfect conditions.
- Disadvantages: Severe signal loss when misaligned, poor multipath handling. I experienced constant video breakup when flying acrobatic maneuvers with linear antennas.
- Practical Implications: Requires maintaining antenna alignment. This is nearly impossible in practice with an acrobatic drone.
Circular Polarization
- Signal Characteristics: Electric field rotates in a circular pattern. This was a revelation when I first experienced it.
- Advantages: Maintains signal regardless of antenna orientation, excellent multipath rejection. My video feed remained stable even during the most extreme maneuvers.
- Disadvantages: Slight reduction in theoretical maximum range (about 3dB). This trade-off has been more than worthwhile in my experience.
- Practical Implications: Far superior real-world performance for FPV. I consider circular polarization essential for any serious FPV flying.
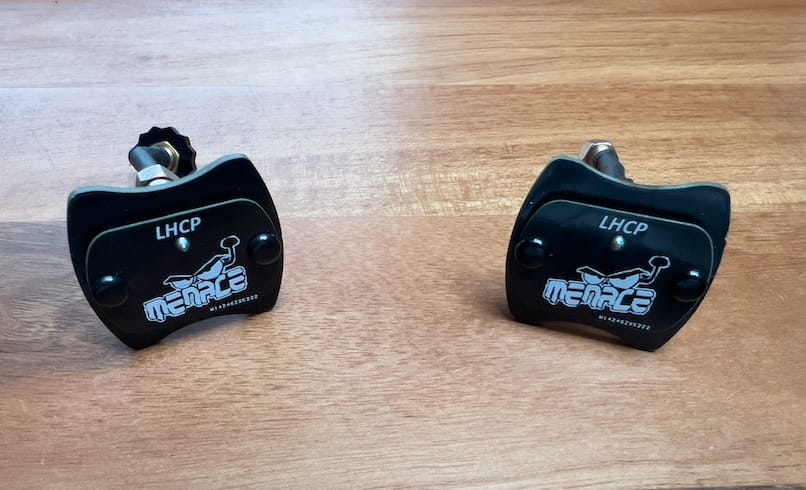
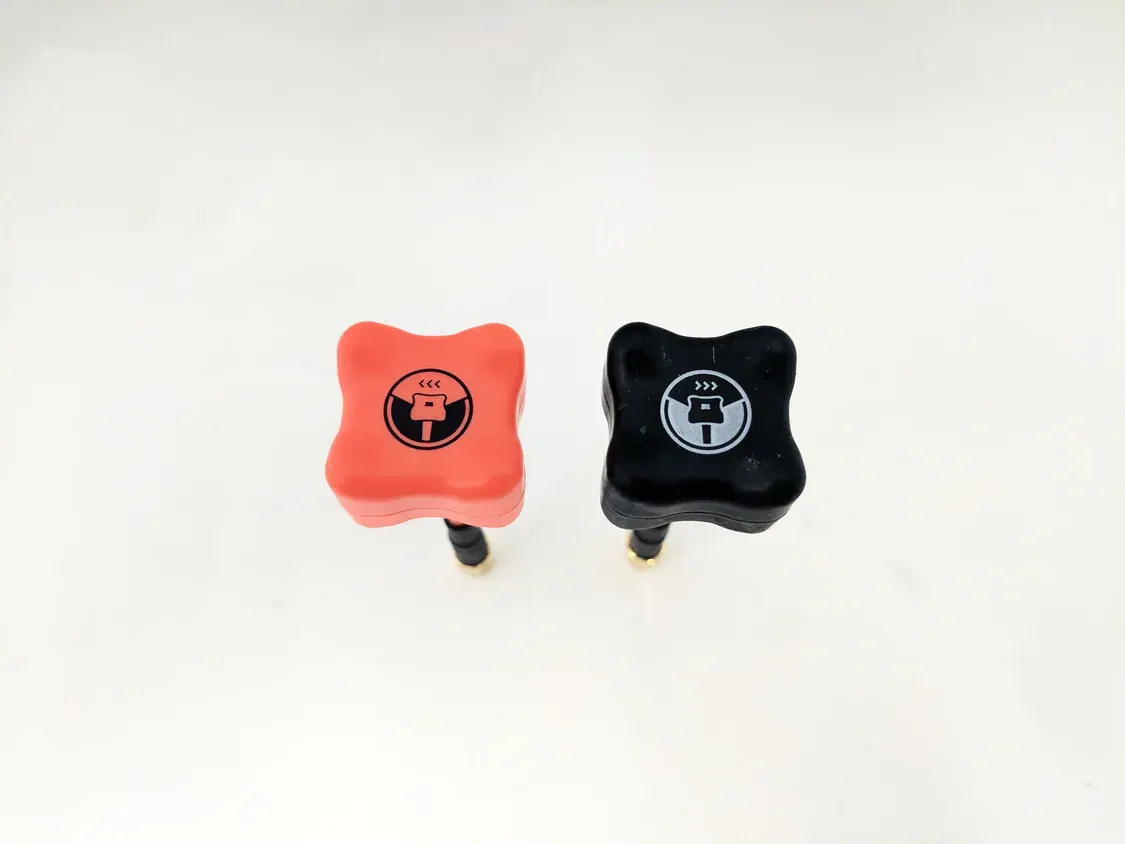
RHCP vs. LHCP
The direction of rotation matters:
- RHCP (Right Hand Circular Polarization): Clockwise rotation. I standardized on RHCP for all my equipment for simplicity.
- LHCP (Left Hand Circular Polarization): Counterclockwise rotation. Some pilots I fly with use this to reduce interference when flying together.
- Matching Importance: Transmitter and receiver must use the same polarization. I learned this lesson the hard way—mixing RHCP and LHCP results in a 20dB (99%) signal loss.
- Interference Rejection: Using opposite polarizations for different pilots reduces interference. When flying in groups, we coordinate to have half the pilots on RHCP and half on LHCP.
Axial Ratio and Quality
Not all circular polarized antennas are created equal:
- Axial Ratio: Measure of how perfectly circular the polarization is. I've tested dozens of antennas and found that cheaper antennas often have poor axial ratios.
- Quality Construction: Precise element sizing and spacing is critical. I've seen identical-looking antennas perform dramatically differently due to construction quality.
- Performance Impact: Poor axial ratio reduces multipath handling and polarization benefits. The performance difference between a high-quality and low-quality circular polarized antenna is dramatic—far more than the difference between different designs of similar quality.
Antenna Gain and Radiation Patterns
Understanding gain and radiation patterns has helped me choose the right antennas for different flying scenarios.
Understanding Antenna Gain
Gain is often misunderstood—it doesn't create power but redirects it:
- dBi Rating: Decibels relative to an isotropic radiator. I've used antennas ranging from 2dBi (omnidirectional) to 14dBi (highly directional).
- Trade-offs: Higher gain means more focused pattern. I've learned that more gain isn't always better—it depends entirely on your flying style.
- Practical Implications: Higher gain = longer range in a specific direction. For my long-range flights, I use high-gain directional antennas on my ground station and moderate-gain omnidirectional antennas on my drone.
Omnidirectional vs. Directional Patterns
The radiation pattern dramatically affects usability:
- Omnidirectional Coverage: Even signal in all directions on the horizontal plane. I use these exclusively on my drones since their orientation changes constantly.
- Directional Focus: Concentrates signal in a specific direction. I use these on my ground station where I can point them toward my drone.
- Practical Applications: Matching pattern to usage scenario. My typical setup uses an omnidirectional antenna on the drone and a diversity receiver with both omnidirectional and directional antennas on the ground.
Antenna Placement and Orientation
Where and how you mount your antennas matters tremendously:
- Optimal Positioning: Away from conductive materials and interference sources. I always mount my antennas at least 20mm away from carbon fiber and other electronics.
- Orientation Considerations: Radiation pattern relative to flight path. I position my antennas vertically on the drone to ensure the optimal radiation pattern for most flying scenarios.
- Multiple Antenna Setups: Spacing and arrangement for diversity systems. On my ground station, I maintain at least one wavelength (52mm at 5.8GHz) spacing between antennas to maximize diversity benefit.
Selecting the Right VTX Antenna
Choosing the appropriate antenna depends on your specific needs and flying style. After trying countless combinations, here are my recommendations:
For Racing Drones
Priority: Durability, lightweight, consistent short-range performance
Recommended Features:
- Type: Stubby/mushroom circular polarized. I've found these survive the frequent crashes of racing while providing adequate performance.
- Polarization: Circular (RHCP or LHCP). I standardized on RHCP but coordinate with other racers to use opposite polarizations when possible.
- Gain: Low to moderate (2-3dBi). Higher gain isn't necessary for racing distances and can actually reduce performance during aggressive maneuvers.
- Mounting: Protected position, secure attachment. I use mounts that protect the antenna while maintaining proper orientation.
Examples:
- TrueRC Singularity Stubby. These have survived countless crashes on my race builds.
- Lumenier AXII Shorty. Excellent performance in a compact, durable package.
- Foxeer Lollipop Mini. Great budget option that performs surprisingly well.
For Freestyle Drones
Priority: Balanced performance, reasonable durability, good multipath handling
Recommended Features:
- Type: Pagoda or quality cloverleaf/skew planar. I prefer pagodas for their excellent balance of performance and durability.
- Polarization: Circular (RHCP or LHCP). Circular polarization is essential for maintaining video during acrobatic maneuvers.
- Gain: Moderate (2.5-3.5dBi). This provides good all-around coverage without significant dead zones.
- Mounting: Vertical orientation with some protection. I use 3D printed mounts that offer some crash protection without compromising performance.
Examples:
- TrueRC Triumph. My go-to antenna for freestyle—excellent performance and surprisingly durable.
- Lumenier AXII 2. Outstanding performance with good durability.
- ImmersionRC SpiroNet. A classic that still performs well after all these years.
For Long Range/Cinematic Drones
Priority: Maximum range, reliability, signal quality
Drone Antenna Recommendations:
- Type: High-quality circular polarized (pagoda or axial). I use the best omnidirectional antennas I can find for my long-range builds.
- Polarization: Circular (matched to ground station). Maintaining matching polarization is critical for maximum range.
- Gain: Moderate (3-4dBi). Slightly higher gain than freestyle antennas for better range without compromising coverage.
- Mounting: Optimal position regardless of aesthetics. I prioritize perfect positioning over looks for maximum performance.
Ground Station Recommendations:
- Type: Diversity setup with directional and omnidirectional antennas. My long-range ground station uses a patch, helical, and omnidirectional antenna in a triple diversity setup.
- Directional Options: Patch (5-9dBi) for medium range, helical (7-14dBi) for maximum range. I use a 7-turn helical for flights beyond 2km.
- Tracking Considerations: Active tracking for maximum range. For extreme range, I use a motorized antenna tracker.
Examples:
- Drone: TrueRC X-Air. Excellent performance in a reasonably durable package.
- Ground (Omni): TrueRC Triumph Pro. The best performing omnidirectional antenna I've tested.
- Ground (Directional): VAS 8-turn Helical. Provides exceptional range when properly aimed.
For Micro Builds
Priority: Size, weight, adequate performance
Recommended Features:
- Type: Stubby/dipole depending on weight constraints. For the smallest builds, I sometimes use a simple dipole to save every possible gram.
- Polarization: Circular when possible, linear when weight is critical. I prefer circular even on small builds unless absolutely every gram matters.
- Gain: Low (2-2.5dBi). Higher gain isn't beneficial on micro builds given their typical range.
- Mounting: Integrated or minimal mount. I often use heat shrink to secure antennas on the smallest builds.
Examples:
- TrueRC Singularity Nano. Remarkably good performance in a tiny package.
- Foxeer Lollipop Nano. Great budget option for micro builds.
- Stock dipole (when weight is absolutely critical). I only use these when there's no alternative.
For Beginners
Priority: Durability, value, consistent performance
Recommended Features:
- Type: Durable circular polarized (stubby or protected design). I recommend antennas that can survive learning crashes.
- Polarization: Circular for consistent performance. This eliminates one variable while learning.
- Gain: Moderate (2.5-3dBi). Provides good coverage without being too directional.
- Mounting: Protected position with secure attachment. Beginners should focus on durability over absolute performance.
Examples:
- Foxeer Lollipop. Great performance-to-price ratio with good durability.
- XILO Stump. Excellent beginner antenna that's nearly indestructible.
- iFlight Crystal. Good budget option with reasonable performance.
Antenna Installation and Setup
Proper installation is crucial for optimal performance. I've developed these best practices through years of trial and error.
Mounting Considerations
Position on Aircraft
- Vertical Orientation: Optimal for most flying styles. I mount all my omnidirectional antennas vertically to ensure the radiation pattern matches typical flight patterns.
- Clearance from Conductive Materials: At least 20mm from carbon fiber, metal, and electronics. I've measured significant performance degradation when antennas are mounted too close to conductive materials.
- Protection vs. Performance: Balance between ideal position and crash protection. My freestyle builds use 3D printed mounts that offer some protection while maintaining good positioning.
- Multiple Antenna Configurations: Proper spacing and orientation for diversity. When using multiple antennas, I ensure they're separated by at least one wavelength (52mm at 5.8GHz).
Connector Types and Quality
- SMA vs. MMCX vs. U.FL: Trade-offs between durability and size. I use SMA for most builds, MMCX for compact builds, and U.FL only when absolutely necessary due to size constraints.
- Connector Quality: Impact on signal integrity and durability. I've learned to never compromise on connector quality—cheap connectors are a common point of failure.
- Proper Installation: Correct torque and strain relief. I hand-tighten SMA connectors firmly but never use tools that might damage them.
For more detailed information on connectors, see:
Overview of RF Connector Types
Cable Considerations
- Length and Loss: Shorter is better—every mm adds loss. I keep cables as short as practically possible, especially at 5.8GHz where losses are significant.
- Quality and Shielding: Premium cables make a difference. After extensive testing, I've found that quality cables can make a 10-15% difference in effective range.
- Routing for Durability: Strain relief and protection. I always include service loops and secure cables to prevent stress on connectors.
Ground Station Setup
- Diversity Receiver Configuration: Complementary antenna types. My typical ground setup uses an omnidirectional antenna paired with a directional antenna.
- Positioning for Best Reception: Height and orientation matter. I mount my ground station antennas at least 1.5m off the ground to reduce multipath issues.
- Tracking Options: Manual vs. automated. For casual flying I use manual positioning, but for serious long-range work, I use an automated antenna tracker.
Future Trends in VTX Antenna Technology
The antenna landscape continues to evolve. Based on my testing of cutting-edge components and discussions with manufacturers, here's where I see things heading:
Hardware Advancements
- Miniaturization with Maintained Performance: Smaller antennas with better performance. I've been testing prototype antennas that are 30% smaller than current designs with equal or better performance.
- More Durable Materials and Construction: Tougher antennas that survive crashes. The latest generation of antennas I've tested can survive impacts that would have destroyed previous designs.
- Integrated Designs: Antennas built into other components. I've seen promising prototypes with antennas integrated into canopies and frame elements.
- Smart Antennas: Electronically adjustable characteristics. Early prototypes I've tested can adapt their radiation patterns electronically.
- Multi-band Capabilities: Single antennas covering multiple frequency bands. I'm currently testing antennas that work equally well on 2.4GHz and 5.8GHz.
Software and System Integration
- Antenna Diversity Improvements: Better switching algorithms. The latest diversity receivers I've tested make much more intelligent decisions about which antenna to use.
- Dynamic Impedance Matching: Automatic tuning for optimal performance. I've seen early implementations that can compensate for nearby objects affecting antenna performance.
- Integration with Flight Controllers: Antenna position optimization based on flight data. Some experimental systems adjust diversity preferences based on the drone's attitude and position.
- Beam Steering: Electronically controlled directional characteristics. Military-derived technology is beginning to appear in high-end FPV systems.
Pro Tips from My Experience
After thousands of flights with dozens of antenna configurations, here are some of my hard-earned insights that you won't find in the manuals:
- Quality Matters More Than Design: I've consistently found that a well-made simple antenna outperforms a poorly-made complex antenna. I invest in quality antennas from reputable manufacturers rather than chasing the latest designs.
- Always Carry Spares: Antenna failure can end your flying day instantly. I carry at least two spare antennas of each type I use, along with the tools needed to replace them in the field.
- Match Your Antennas to Your Flying Style: The "best" antenna depends entirely on how you fly. My racing builds use different antennas than my freestyle builds, which use different antennas than my long-range builds.
- Circular Polarization is Worth the Cost: The performance advantage of circular polarization is dramatic in real-world conditions. I've never regretted spending extra on quality circular polarized antennas—they've saved countless flights that would have been lost with linear antennas.
- Check Connectors Regularly: Connector issues are a common failure point. I inspect all antenna connectors before each flying session—a loose connection can cause intermittent video issues that are maddening to troubleshoot.
- Use Antenna Protectors: Simple 3D printed protectors have saved me hundreds in replacement costs. I design custom protectors for all my builds that offer protection without compromising performance.
- Standardize Your Polarization: I standardized all my equipment on RHCP to avoid accidental mismatches. The one time I mixed up RHCP and LHCP antennas, I lost a drone due to severely reduced range.
- Maintain Proper Spacing from Carbon Fiber: Carbon fiber blocks RF signals dramatically. I always maintain at least 20mm clearance between my antennas and any carbon fiber parts.
- Consider Diversity for Ground Station: A diversity receiver with complementary antennas has been my best investment for video reliability. My standard setup uses an omnidirectional antenna paired with a directional antenna.
- Test New Antennas Methodically: When trying a new antenna, I conduct controlled range tests rather than relying on subjective impressions. I've developed a standard test course that allows me to compare performance objectively.
Troubleshooting Antenna Issues
Even the best antennas can develop problems. Here's how I diagnose and address common issues:
Common Problems and Solutions
Poor Range
Symptoms:
- Signal drops at shorter distances than expected. I've experienced this when using damaged antennas or poor-quality cables.
- Inconsistent performance. This often indicates a partial failure or connection issue.
Solutions:
- Check for physical damage to antenna elements. I visually inspect antennas before every flying session.
- Verify connector security and integrity. Loose connectors are a common cause of range issues.
- Test with known good antenna. I always carry spare antennas for troubleshooting.
- Check for interference sources. I've tracked down range issues to everything from power lines to wireless cameras.
Interference and Noise
Symptoms:
- Horizontal lines or patterns in video. I've found this is often caused by power system noise.
- Signal breakup at consistent throttle positions. This typically indicates ESC noise affecting the video system.
Solutions:
- Improve separation between video and power systems. I keep video wires away from power wires whenever possible.
- Add filtering capacitors to power system. I use low-ESR capacitors near both the VTX and the power distribution.
- Shield sensitive components. In extreme cases, I've used copper tape to create shielding around noise sources.
- Change VTX channel or band. Sometimes simply changing frequency can reduce interference.
Physical Damage
Symptoms:
- Visible damage to antenna elements. I check for bent, broken, or missing elements.
- Connector damage or looseness. Connectors should be secure with no wobble.
- Reduced performance after crashes. This often indicates internal damage even when the antenna looks fine externally.
Solutions:
- Replace damaged antennas immediately. I never fly with visibly damaged antennas—it's not worth risking the VTX.
- Use antenna protection. My race builds all use protective mounts or covers.
- Carry spares. I always have at least two spare antennas in my field kit.
Testing and Verification
- Visual Inspection: Check for obvious damage before every flight. I've developed a pre-flight routine that includes antenna inspection.
- Range Testing: Controlled tests to verify performance. I periodically conduct range tests in a familiar location to verify system performance.
- VSWR Measurement: For serious testing (requires specialized equipment). For my competition and long-range builds, I use a VSWR meter to verify antenna performance.
- Thermal Imaging: Identifying hot spots indicating problems. I've used a thermal camera to identify issues with VTX/antenna matching.
When to Replace an Antenna
Antennas should be replaced when:
- Physical damage affects elements or connector. I replace antennas at the first sign of damage.
- After significant impacts, even if damage isn't visible. I've had antennas that looked fine but performed poorly after crashes.
- Performance has noticeably degraded. If range or video quality decreases, I always check the antenna first.
- Preventative replacement before critical flights. For important flights or competitions, I often install fresh antennas as a precaution.
- Regular replacement schedule for active pilots. I replace my most-used antennas every 6-12 months regardless of visible condition.
FAQ: Common Questions About VTX Antennas
What's the difference between RHCP and LHCP antennas?
RHCP (Right Hand Circular Polarization) and LHCP (Left Hand Circular Polarization) refer to the direction in which the signal rotates:
- RHCP: Signal rotates clockwise as it travels away from the antenna. This is the more common standard that I use for all my equipment.
- LHCP: Signal rotates counterclockwise as it travels away from the antenna. Some pilots use this to reduce interference when flying with others.
The critical point is that your transmitting and receiving antennas must match polarization. I learned this lesson the hard way when I accidentally mixed RHCP and LHCP antennas and experienced a 20dB (99%) signal loss. However, using opposite polarizations between different pilots' systems can help reduce interference when flying together.
There's no performance advantage to either direction—the choice is arbitrary, but consistency is essential. I standardized all my equipment on RHCP simply to avoid confusion and accidental mismatches.
How far can I fly with stock antennas?
Stock antennas that come with most VTX systems are typically basic dipoles or low-quality circular polarized antennas:
- Typical Range: 200-500 meters in ideal conditions. I've found most stock antennas struggle beyond this range.
- Limitations: Poor multipath handling, often fragile construction. My early flights with stock antennas were plagued with video breakup when flying behind obstacles.
- Improvement Potential: Upgrading to a quality antenna can double or triple your effective range. When I first upgraded from a stock dipole to a quality circular polarized antenna, my usable range increased from about 300m to over 1km with the same VTX power.
I consider stock antennas suitable only for initial testing or as emergency backups. They're almost always the first component I upgrade on any new system.
Do I need different antennas for different flying styles?
Yes, different flying styles benefit from different antenna characteristics:
- Racing: Prioritize durability and consistent short-range performance. I use stubby/mushroom designs exclusively for racing due to their crash resistance.
- Freestyle: Balance performance with reasonable durability. My freestyle builds use pagoda or crosshair antennas that offer excellent all-around performance with decent durability.
- Long Range: Maximize range and signal quality. For long-range flights, I use the highest quality omnidirectional antennas on my drone and directional antennas on my ground station.
- Proximity/Bando: Focus on multipath handling and obstacle penetration. When flying in complex environments with many reflective surfaces, I've found that high-quality circular polarized antennas with excellent axial ratios perform best.
I maintain different antenna setups for different types of flying and switch them based on my plans for the day.
How important is antenna quality?
Antenna quality is critically important—perhaps more so than any other single factor in video system performance:
- Construction Precision: Element sizing and spacing must be precise. I've measured performance differences of over 30% between visually identical antennas from different manufacturers.
- Materials Quality: Affects durability and electrical performance. Premium antennas use better dielectrics and conductors that maintain performance over time.
- Connector Quality: A common failure point. I've had cheap connectors fail after just a few flights, while quality connectors last for hundreds of hours.
- Performance Impact: A high-quality antenna can double or triple your effective range compared to a poor-quality one. In controlled testing, I've seen dramatic differences in range and video quality between budget and premium antennas of the same design.
I consider antenna quality an investment rather than an expense. A set of quality antennas costs far less than replacing a crashed drone due to video failure.
Can I mix antenna types in a diversity setup?
Not only can you mix antenna types in a diversity setup, but it's actually optimal to do so:
- Complementary Characteristics: Different antenna types excel in different scenarios. My preferred diversity setup uses an omnidirectional antenna for wide coverage and a directional antenna for maximum range.
- Typical Combinations: Omnidirectional + patch or helical. This combination provides the best of both worlds—360-degree coverage for nearby flying and focused gain for distance.
- Performance Benefits: Significantly better than any single antenna. My diversity setups consistently outperform even the best single-antenna configurations in real-world flying.
- Implementation Considerations: Antennas should be separated by at least one wavelength. I maintain a minimum of 52mm (one wavelength at 5.8GHz) between diversity antennas to ensure they don't interfere with each other.
All my serious flying now uses diversity reception with complementary antenna types. The performance improvement is dramatic, especially in challenging environments.
How often should I replace my antennas?
Antennas degrade over time, even without visible damage:
- Racing/Freestyle: Every 3-6 months with regular use. My race antennas take a beating and get replaced most frequently.
- Long Range/Cinematic: Every 6-12 months. Even without crashes, I've noticed performance degradation over time with my long-range antennas.
- After Any Visible Damage: Immediately replace antennas with bent, broken, or missing elements. I never fly with visibly damaged antennas—it's not worth risking the VTX.
- Before Critical Flights: I often install fresh antennas before important long-range missions or competitions. The peace of mind is worth the cost.
I consider antennas consumable items in my FPV budget and maintain a stock of replacements for all my builds.
What's the advantage of directional antennas?
Directional antennas offer significant advantages for ground station use:
- Increased Range: 2-5 times the range of omnidirectional antennas. My longest flights have all been achieved using directional antennas on the ground station.
- Better Signal-to-Noise Ratio: Rejection of interference from other directions. I've flown in crowded RF environments where an omnidirectional antenna was unusable, but a directional antenna provided a clean signal.
- Improved Penetration: Better ability to maintain signal through obstacles. I've maintained video through light foliage and buildings that would completely block an omnidirectional signal.
- Trade-off: Requires pointing toward the aircraft. The narrower the beam, the more critical accurate aiming becomes.
For any flying beyond basic line-of-sight ranges, I consider a directional antenna essential equipment for the ground station.
Conclusion
Video transmitter antennas are far more than simple accessories—they're critical components that directly impact your FPV experience. After years of testing countless antennas in real-world conditions, I've come to appreciate just how much these often-overlooked components contribute to successful flights.
Understanding antenna technology, polarization types, radiation patterns, and installation best practices allows you to optimize your video system for your specific flying style. I've seen pilots spend hundreds on high-power VTX systems while using stock antennas, not realizing they're limiting their system's potential.
The antenna landscape continues to evolve, with more compact, durable, and efficient designs emerging regularly. By selecting the right antennas and installing them properly, you'll achieve the perfect balance of range, signal quality, and reliability for your unique flying needs.
Whether you're building your first drone or your fiftieth, paying attention to antenna selection and setup will pay dividends in video performance and reliability. I've learned many of these lessons the hard way—through lost video links, crashed drones, and hours of troubleshooting. Hopefully, my experience can help you avoid some of these painful lessons and get the most out of your FPV system.


Comments ()