Drone Flight Controllers: Principles and Operation

The flight controller (FC) is the brain of your FPV drone, translating your control inputs into the precise motor commands needed for flight. It processes data from various sensors, runs complex algorithms, and makes hundreds of adjustments per second to keep your drone stable and responsive. This comprehensive guide explores flight controller technology, firmware options, selection criteria, setup procedures, and advanced features to help you understand and optimize this critical component.
Introduction to Flight Controllers
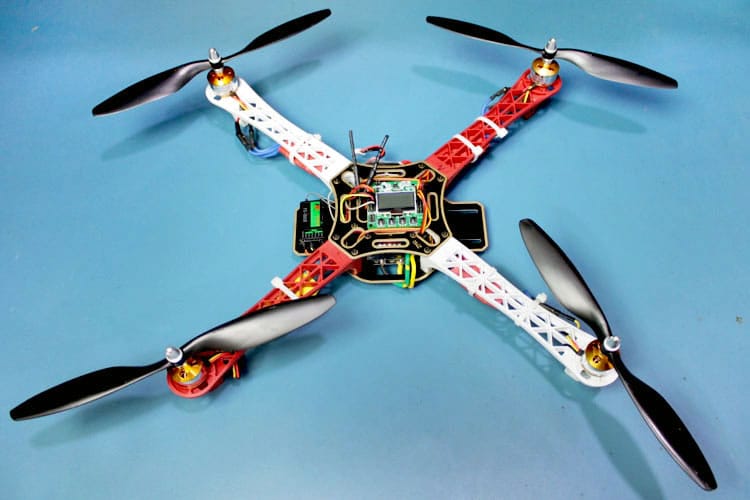
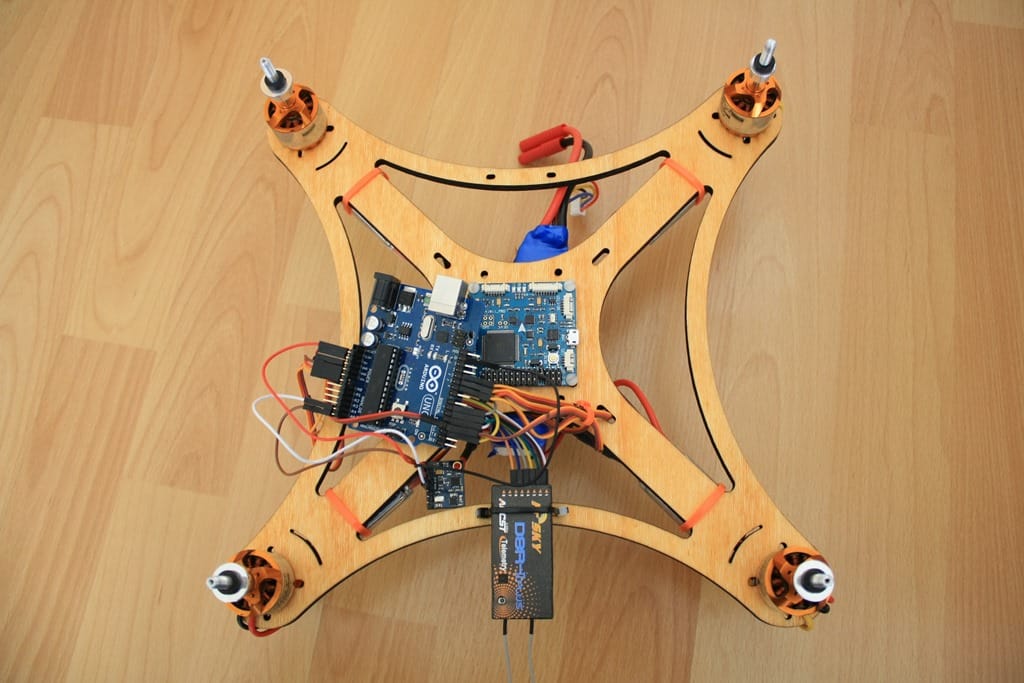
After years of building and flying FPV drones, I've come to appreciate that no single component influences your flying experience more than the flight controller. I still remember my first build with a primitive KK board that barely kept the drone stable. Fast forward to today, and the sophisticated H7 processors in modern flight controllers are performing complex calculations that would have seemed like science fiction just a few years ago.
A flight controller is a specialized circuit board containing a microprocessor, various sensors, and input/output connections. It serves as the central processing unit of your drone, performing several critical functions:
• Stabilization: Maintaining level flight and compensating for external forces
• Control Input Processing: Translating your stick movements into motor commands
• Sensor Integration: Gathering and processing data from gyroscopes, accelerometers, etc.
• Feature Management: Handling modes like acro, angle, GPS hold, and more
• Peripheral Communication: Interfacing with receivers, ESCs, cameras, and other components
The Evolution of Flight Controllers
I've witnessed the dramatic evolution of flight controllers even since 2019 when I started my hobby.
It all began with basic 8-bit processors that could barely handle simple stabilization. The leap to 32-bit controllers around 2014 was revolutionary – suddenly quads were capable of much more precise control and advanced features. The progression has been remarkable:
• Early FCs (2010-2013): Basic stabilization with limited features. Builds with a MultiWii board required constant attention just to maintain level flight.
• 32-bit Revolution (2014-2016): Faster processing and better algorithms. The Naze32 was a game-changer – suddenly quads felt like completely different machines.
• Modern Era (2017-present): Powerful F4/F7 processors and integrated components. I've found that these modern flight controllers can handle complex filtering and high loop rates that make even aggressive freestyle flying feel buttery smooth.

• Next Generation (2023+): H7 processors with machine learning capabilities and enhanced sensor fusion. These are cutting-edge controllers controllers, and the difference in flight performance is subtle but noticeable, especially in challenging conditions.
This progression has led to smaller, more capable flight controllers with increasingly sophisticated features and performance. Even I remember the times when a flight controller was the size of a credit card – now they're often smaller than a postage stamp while doing far more.
Basic Components of a Flight Controller
Modern flight controllers integrate several key components that work together to create the flying experience. Let me walk you through what I've learned about these components over years of building and troubleshooting.
Microprocessor
The central computing unit is typically an STM32 processor, and the type makes a significant difference in performance. I've flown everything from F1 to H7 processors, and here's what I've found:
• F1 processors: Older 32-bit chips that are now obsolete. I flew these a few times for fun, and while they got the job done, the limitations were frustrating.
• F3 processors (72MHz): Largely obsolete now, but they were a solid step up from F1. I flew one F3-based build and it was actually pretty satisfying.
• F4 processors (168-216MHz): Still common and perfectly capable for most flying styles. I still use an F4 board in an education build because they offer a great balance of performance and cost.
• F7 processors (216-400MHz): The current standard, with extra processing power that's noticeable in demanding situations. When I switched my main freestyle quad to an F7, I immediately noticed the improved handling of complex filtering and higher loop rates.
• H7 processors (400-480MHz): Emerging as the high-end option. I've been testing one in my racing build, and while the differences are subtle, the headroom for future features is significant.
The processor determines the flight controller's computing power, affecting its ability to run complex algorithms and maintain high loop times. I've learned that while the processor isn't everything, it sets the ceiling for what your flight controller can achieve.
Sensors
The sensors on a flight controller are essential for flight stability and feature implementation. I've crashed more than a few drones due to sensor issues, so I've learned to pay close attention to this aspect.
• Gyroscope: Measures rotation rates around three axes (pitch, roll, yaw). This is the most critical sensor, and I've found that the quality of the gyro makes a noticeable difference in flight performance. A noisy gyro leads to twitchy, unpredictable behavior that no amount of tuning can fully fix.
• Accelerometer: Measures linear acceleration and is crucial for angle mode. I rarely use angle mode these days, but when I'm letting a friend try flying one of my drones, I'm grateful for a well-calibrated accelerometer.
• Barometer: Measures atmospheric pressure for altitude estimation. I've found these to be hit-or-miss in terms of reliability – they're affected by propwash and changing weather conditions. For serious altitude hold, I prefer GPS.
• Magnetometer (Compass): Determines orientation relative to magnetic north. In my experience, these are highly susceptible to interference from power systems and motors. I always mount them as far from power wires as possible.
• GPS: Provides position data for navigation features. I've learned the hard way that not all GPS modules are created equal – spending a bit more for a module with better satellite reception has saved me from losing drones on long-range flights. See also: Drone GNSS Technology
Input/Output Interfaces
The connections for peripherals and other components are what make a flight controller versatile. I've built everything from minimalist race quads to complex long-range machines, and the available interfaces make all the difference.
• UART Ports: Provide serial communication with receivers, GPS, telemetry, etc. I've found that having at least 4-5 UARTs gives me the flexibility I need for most builds. Running out of UARTs is frustrating and often requires compromises.
• I2C Bus: Enables communication with certain peripherals and sensors. I've had mixed experiences with I2C – it's convenient but can be prone to noise issues if not properly implemented.
• SPI Bus: Offers high-speed communication with gyros and other devices. This is critical for performance, and I've noticed that flight controllers with well-implemented SPI buses tend to have cleaner gyro signals.
• Motor Outputs: Connect to ESCs for motor control. The trend toward DShot protocols has been a game-changer in my experience – the digital precision eliminates many of the calibration headaches I used to deal with. See also: FPV Drone Motors and FPV Drone ESCs
• USB Port: Used for configuration and firmware updates. I've learned to check the quality of this connection – a flimsy USB port is often the first thing to break on a flight controller.
Power Management
The power circuitry provides clean, regulated power, and I've learned not to underestimate its importance. Early in my FPV journey, I experienced mysterious flight issues that were ultimately traced to power problems.
• Voltage Regulators: Convert battery voltage to 5V and 3.3V for electronics. I've found that quality regulators make a significant difference in overall system reliability, especially on high-power builds.
• Filtering Capacitors: Smooth power delivery and reduce noise. I always add additional capacitors to my builds – it's cheap insurance against electrical noise that can affect sensor readings.
• Protection Circuits: Prevent damage from voltage spikes or reversed polarity. I've fried more than one flight controller by connecting a battery backward, so I now look for boards with robust protection.
For more detailed information on powering your drone, see:
Overview of Drone Battery Types and Chemistry
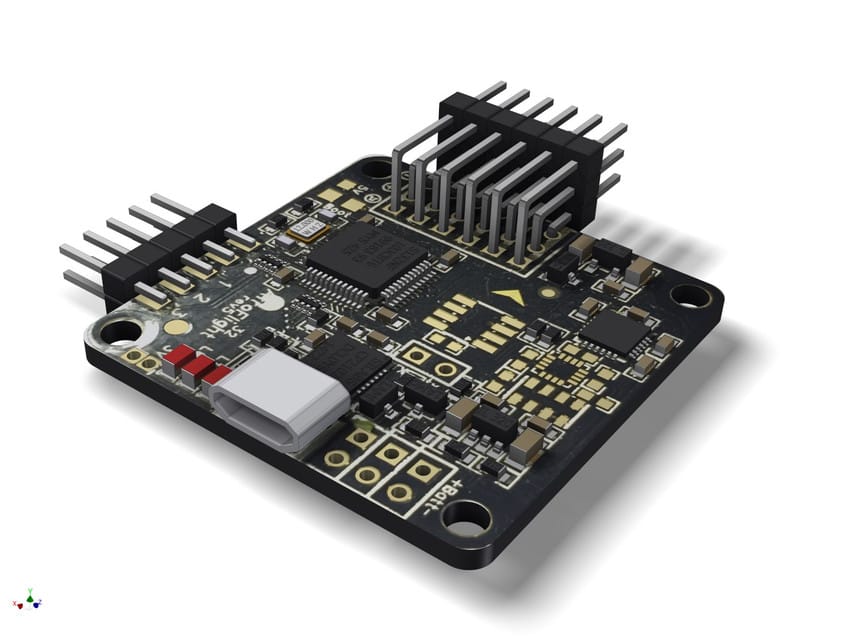
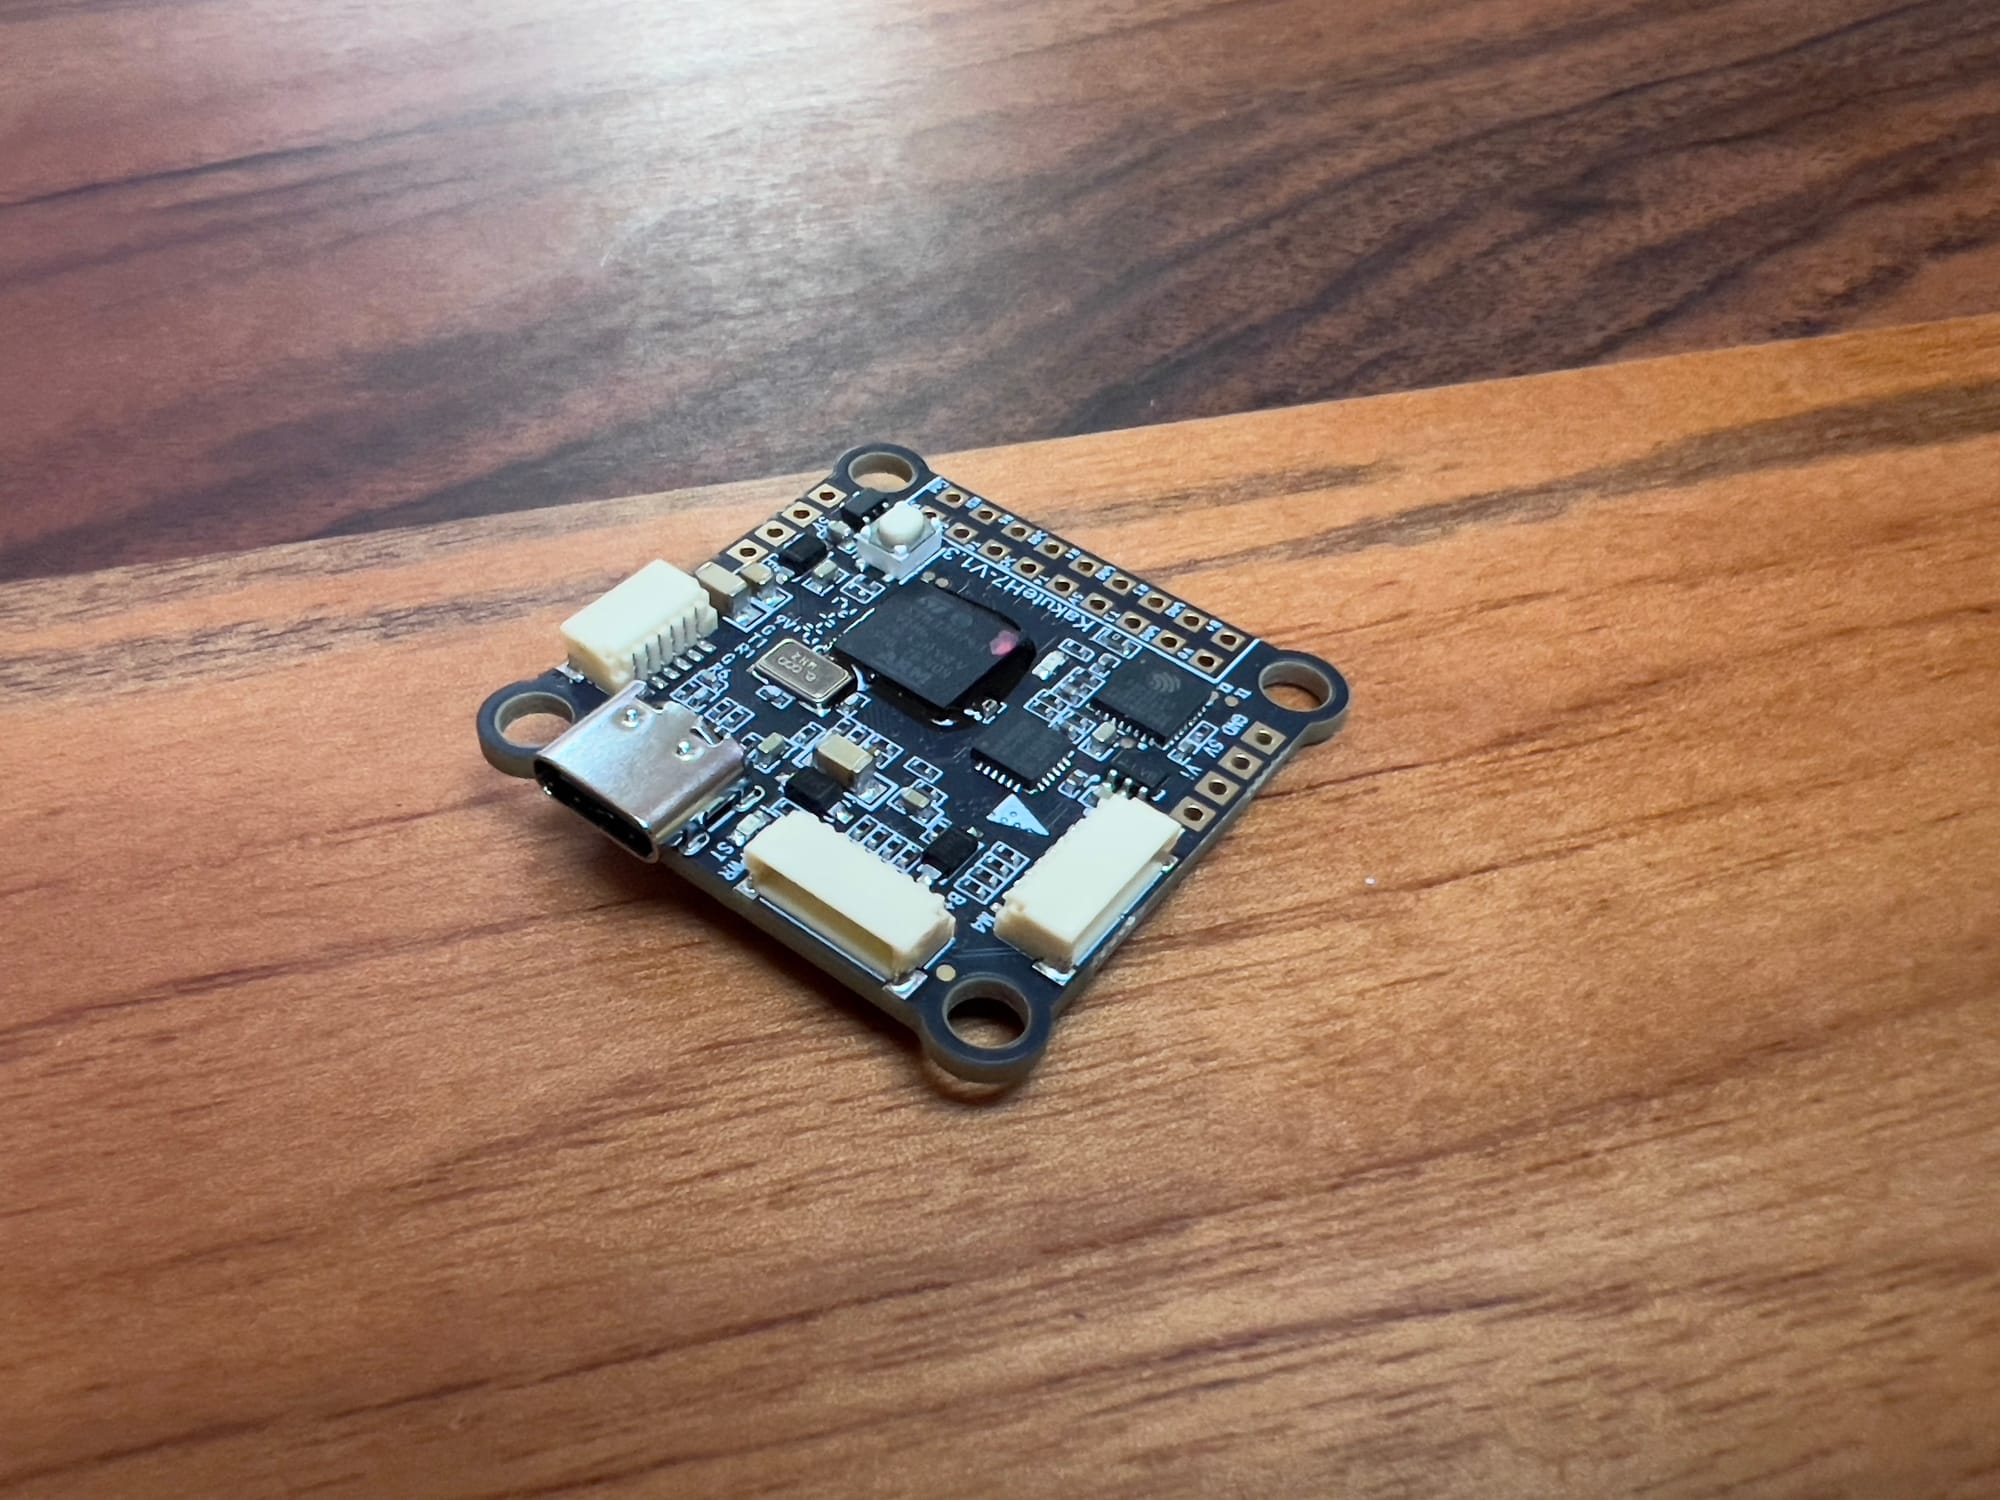
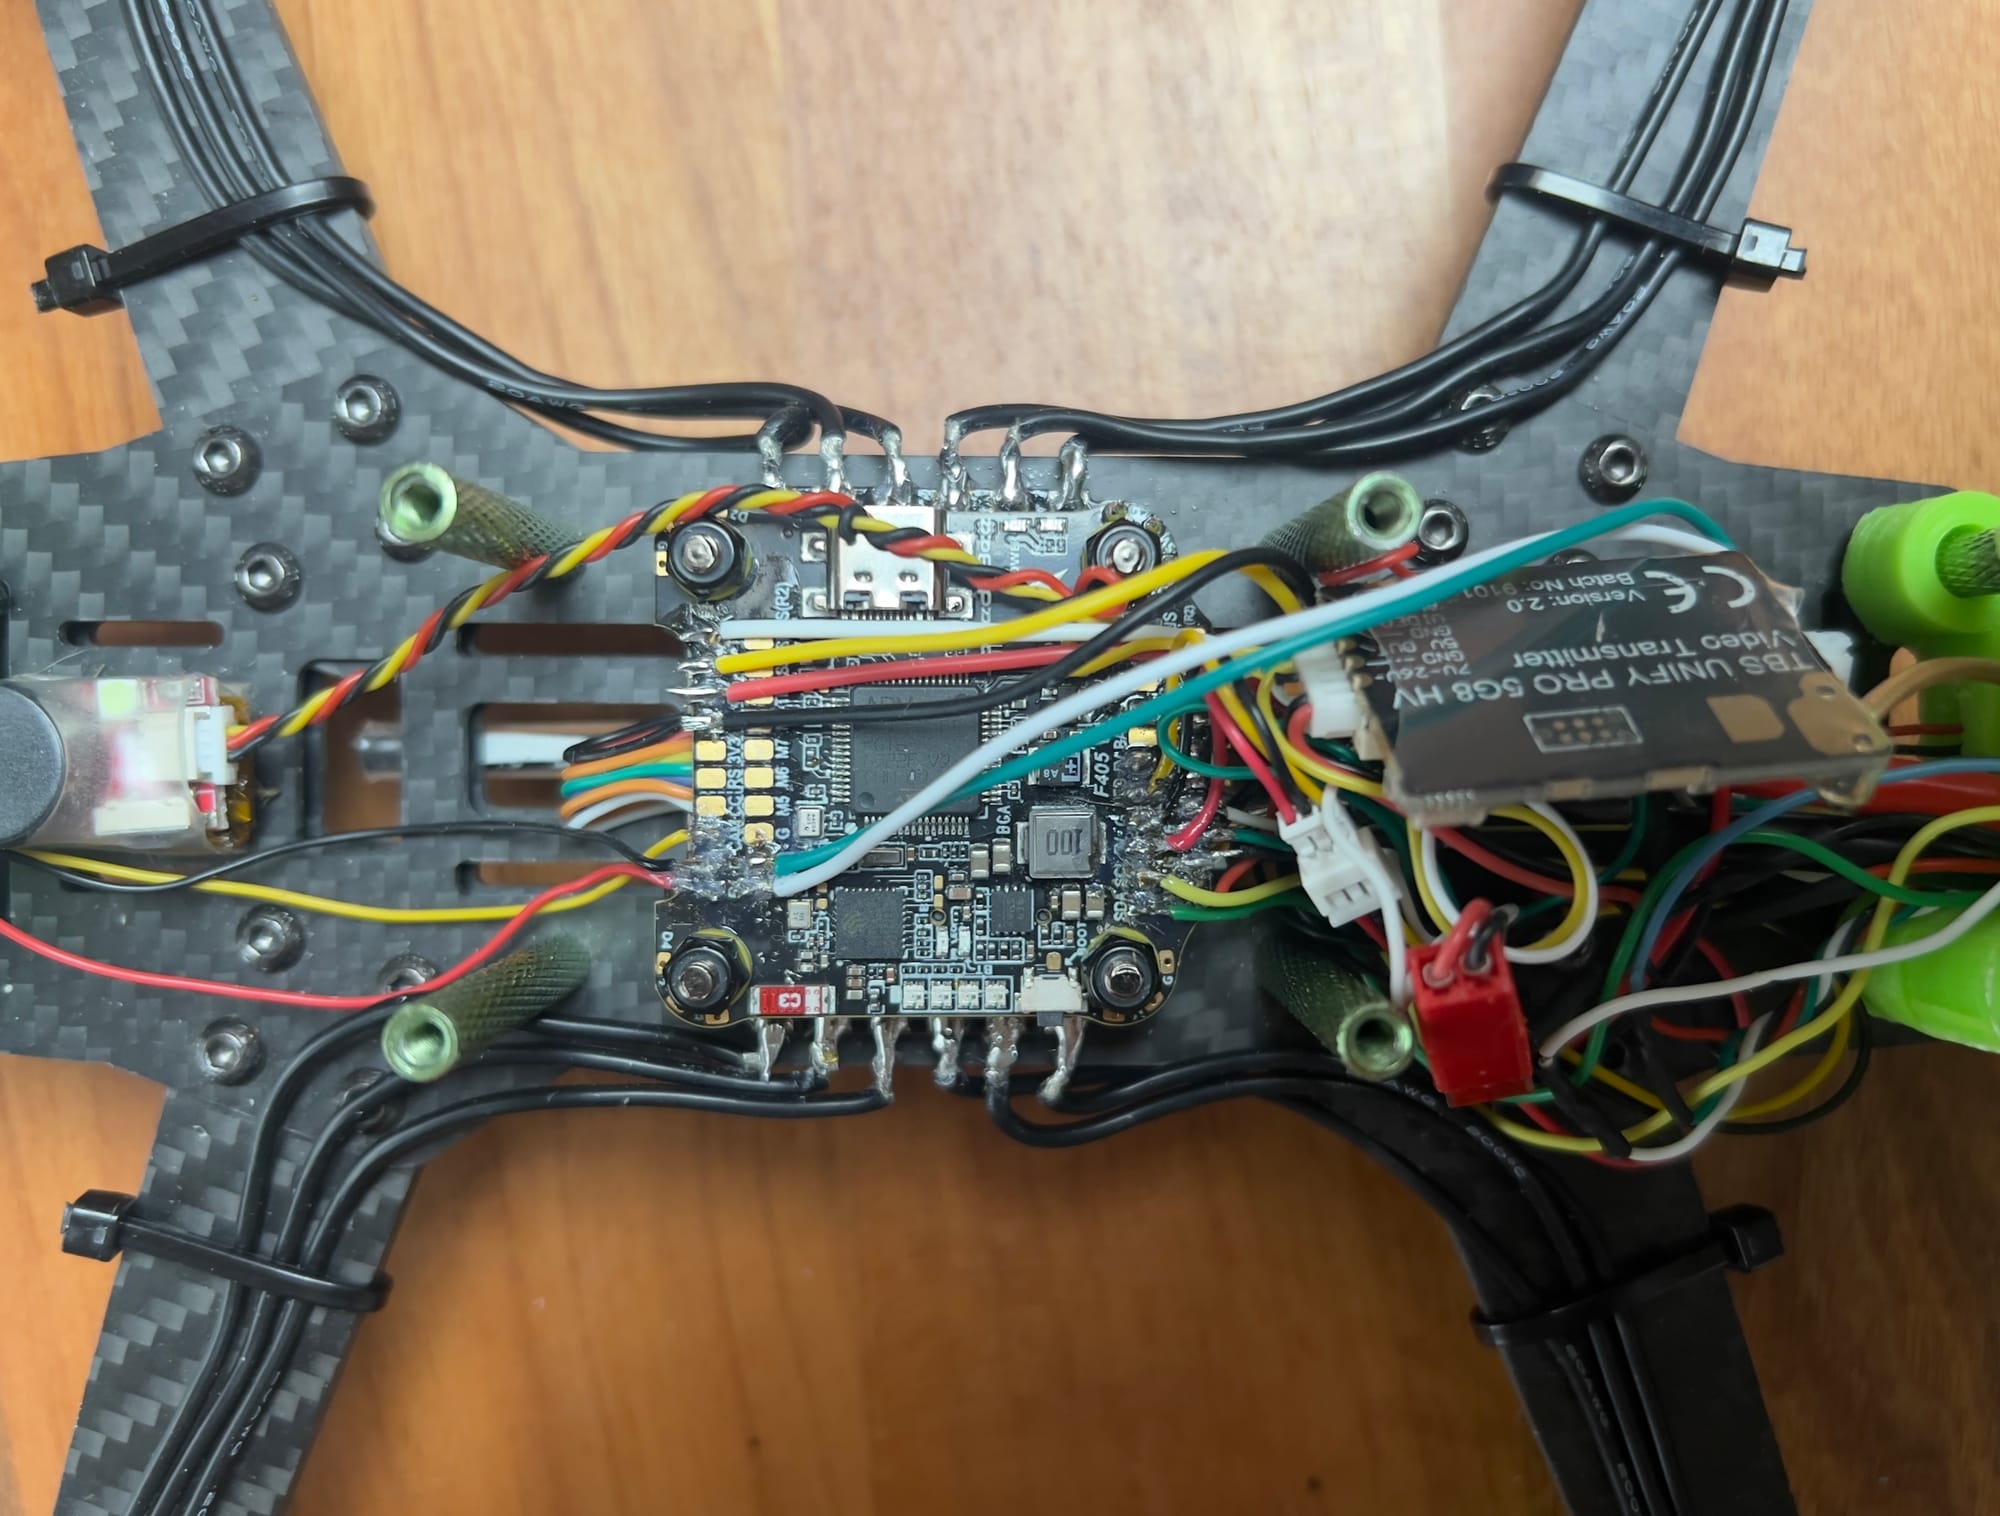
Flight Controller Hardware
Over the years, I've used dozens of different flight controllers across various builds, and I've developed some strong opinions about what works best for different applications.
Flight Controller Classifications
By Processor Type
The processor is the most common way to classify flight controllers, and I've found that choosing the right processor for your needs is crucial.
F4 Flight Controllers (168-216MHz) offer a good balance of performance and cost. I use these in most of my builds because they're sufficient for all but the most demanding applications. The Betaflight F4, Matek F405, and iFlight SucceX-E F4 have all served me well.
F7 Flight Controllers (216-400MHz) provide more UARTs and features. I use these in builds where I need to connect multiple peripherals or want the best possible filtering performance. The Matek F722, SpeedyBee F7, and iFlight SucceX-E F7 are among my favorites.
H7 Flight Controllers (400-480MHz) represent the cutting edge with maximum processing capability. I've been testing the SpeedyBee H7 and Matek H743, and while the performance improvements over F7 are subtle, they're definitely future-proof for advanced features.
By Form Factor
Flight controllers come in standardized mounting patterns, and choosing the right size is critical for your build.
Standard Mount (30.5×30.5mm) is the most common size for 5" and larger builds. I use these in most of my freestyle and long-range quads because they offer the most features and connectivity options.
20×20mm Mount is common in 3" and smaller builds. I've found that these smaller boards have come a long way in terms of features, though you'll typically have fewer UARTs and connection options.
16×16mm Mount is used in micro builds and tiny whoops. These are incredibly compact, and I'm always amazed at how much functionality manufacturers can pack into such a small space.
AIO (All-In-One) combines the FC with other components like ESCs. I've grown to appreciate these for certain builds – they simplify wiring and can reduce weight, though they're a single point of failure.
By Feature Integration
Modern flight controllers often integrate additional components, and I've found that choosing the right level of integration can make building much easier.
FC Only boards just provide the flight controller functionality. I still use these in most of my builds where I want maximum flexibility in component selection.
FC+PDB combinations include power distribution. These save space and simplify wiring.
FC+ESC (4-in-1) stacks combine the FC with ESCs. They dramatically reduce build time and create a cleaner, more reliable setup.
FC+ESC+VTX all-in-one solutions include the video transmitter. I've had mixed experiences with these – they're convenient but can run hot, and if one component fails, you're replacing everything.
FC+ESC+VTX+RX complete flight stacks include the receiver. These offer maximum integration, and while I was skeptical at first, some of the newer implementations work surprisingly well.
Key Hardware Features to Consider
When selecting a flight controller, I've learned to pay attention to several hardware features that can make or break your flying experience.
UART Count and Availability
UARTs are serial ports used to connect peripherals, and I've found that having enough of them is crucial for flexibility.
I consider 3 UARTs the absolute minimum (receiver, telemetry, and one spare). I've built quads with just 3 UARTs, but it always feels limiting.
4-5 UARTs provides a comfortable setup for most builds. This gives me enough connections for a receiver, telemetry, GPS, and perhaps camera control or LED control.
6+ UARTs offers maximum flexibility for complex setups. My long-range builds typically use this many connections for various peripherals and backup systems.
I've learned the hard way that not all UARTs are created equal – some may be shared with other functions or have limitations. Always check the documentation carefully.
Gyro Type and Implementation
The gyroscope is critical for flight performance, and I've developed strong preferences based on years of testing.
The MPU6000 series gyros are reliable with a lower noise floor. I prefer these for racing builds where every bit of performance matters. They're getting harder to find on newer boards, but they're still my first choice when available.
ICM20602/ICM20689 gyros offer good performance and are common in modern FCs. I've found them to be perfectly adequate for most flying styles, though slightly more susceptible to noise than the MPU6000.
The BMI270 is a newer sensor with excellent performance. I've been impressed with its noise handling in my recent builds, and it seems to be becoming the new standard.
The mounting method matters too – soft-mounted vs. hard-mounted gyros handle vibration differently. I prefer flight controllers with well-isolated gyros, as they're less affected by the vibrations that are inevitable in high-performance quads.
Current Sensor Rating
For builds with integrated current sensing, choosing the right rating is important for accurate battery management.
Racing drones typically need a 30-60A rating. I've found that going too high reduces resolution and accuracy for these lighter builds.
Freestyle drones work best with a 50-100A rating. My freestyle builds can pull significant current during aggressive maneuvers, so having headroom is important.
Long-range and cinematic setups generally need a 40-80A rating. These builds tend to have more consistent power draw, so accuracy is more important than extreme range.
The resolution (bit depth) provides more precise readings. I've found that higher resolution current sensors make a noticeable difference in the accuracy of my battery warnings and telemetry.
Blackbox Recording
For logging and tuning, blackbox capability is essential, and I've used various approaches depending on the build.
Onboard flash (usually 8-16MB) is convenient but limited in capacity. I use this for quick tuning sessions, but it fills up quickly at high logging rates.
SD card slots provide much larger storage capacity but add complexity. For serious tuning work, I prefer flight controllers with SD card support – the ability to log entire flights at high rates is invaluable.
Some FCs have no storage and require an external logger for blackbox data. I avoid these when possible, as the external logger adds weight and complexity.
Additional Hardware Features
Over the years, I've come to appreciate several other features that enhance the flying experience.
Built-in OSD (on-screen display) for the FPV feed is something I now consider essential. Being able to see battery voltage, flight time, and other critical information while flying has saved many of my drones from crashes or battery damage.
A barometer for altitude hold can be useful in certain situations. I don't use this feature often, but when filming cinematic footage, a reliable altitude hold is valuable.
LED control outputs for LED strips make night flying and drone identification easier. I've grown fond of having addressable LEDs on my builds – they're not just for show, they're genuinely useful for orientation and status indication.
Buzzer outputs for locating crashed drones have saved me hours of searching. I never build a quad without a buzzer now – it's too easy to lose sight of a dark drone in tall grass or trees.

Camera control for adjusting camera settings mid-flight is a luxury I've come to appreciate. Being able to adjust exposure or other settings without landing is particularly useful for changing light conditions.
Flight Controller Firmware
The firmware is the software that runs on the flight controller hardware, determining its capabilities and behavior. I've tried most of the available options, and each has its strengths and weaknesses.
Major Firmware Options
Several firmware options are available, and I've spent time with each of them to understand their unique characteristics.
Betaflight
Betaflight is the most popular firmware for FPV drones, and it's what I use on most of my builds. It focuses on racing and freestyle performance, with excellent flight characteristics and active development.
The strengths of Betaflight include its outstanding flight performance, active development community, and large user base. When I have a problem with Betaflight, I can usually find someone who's already solved it.
Its weaknesses include limited autonomous features and a steeper learning curve. I've spent countless hours in the Betaflight Configurator tweaking settings, which can be intimidating for newcomers.
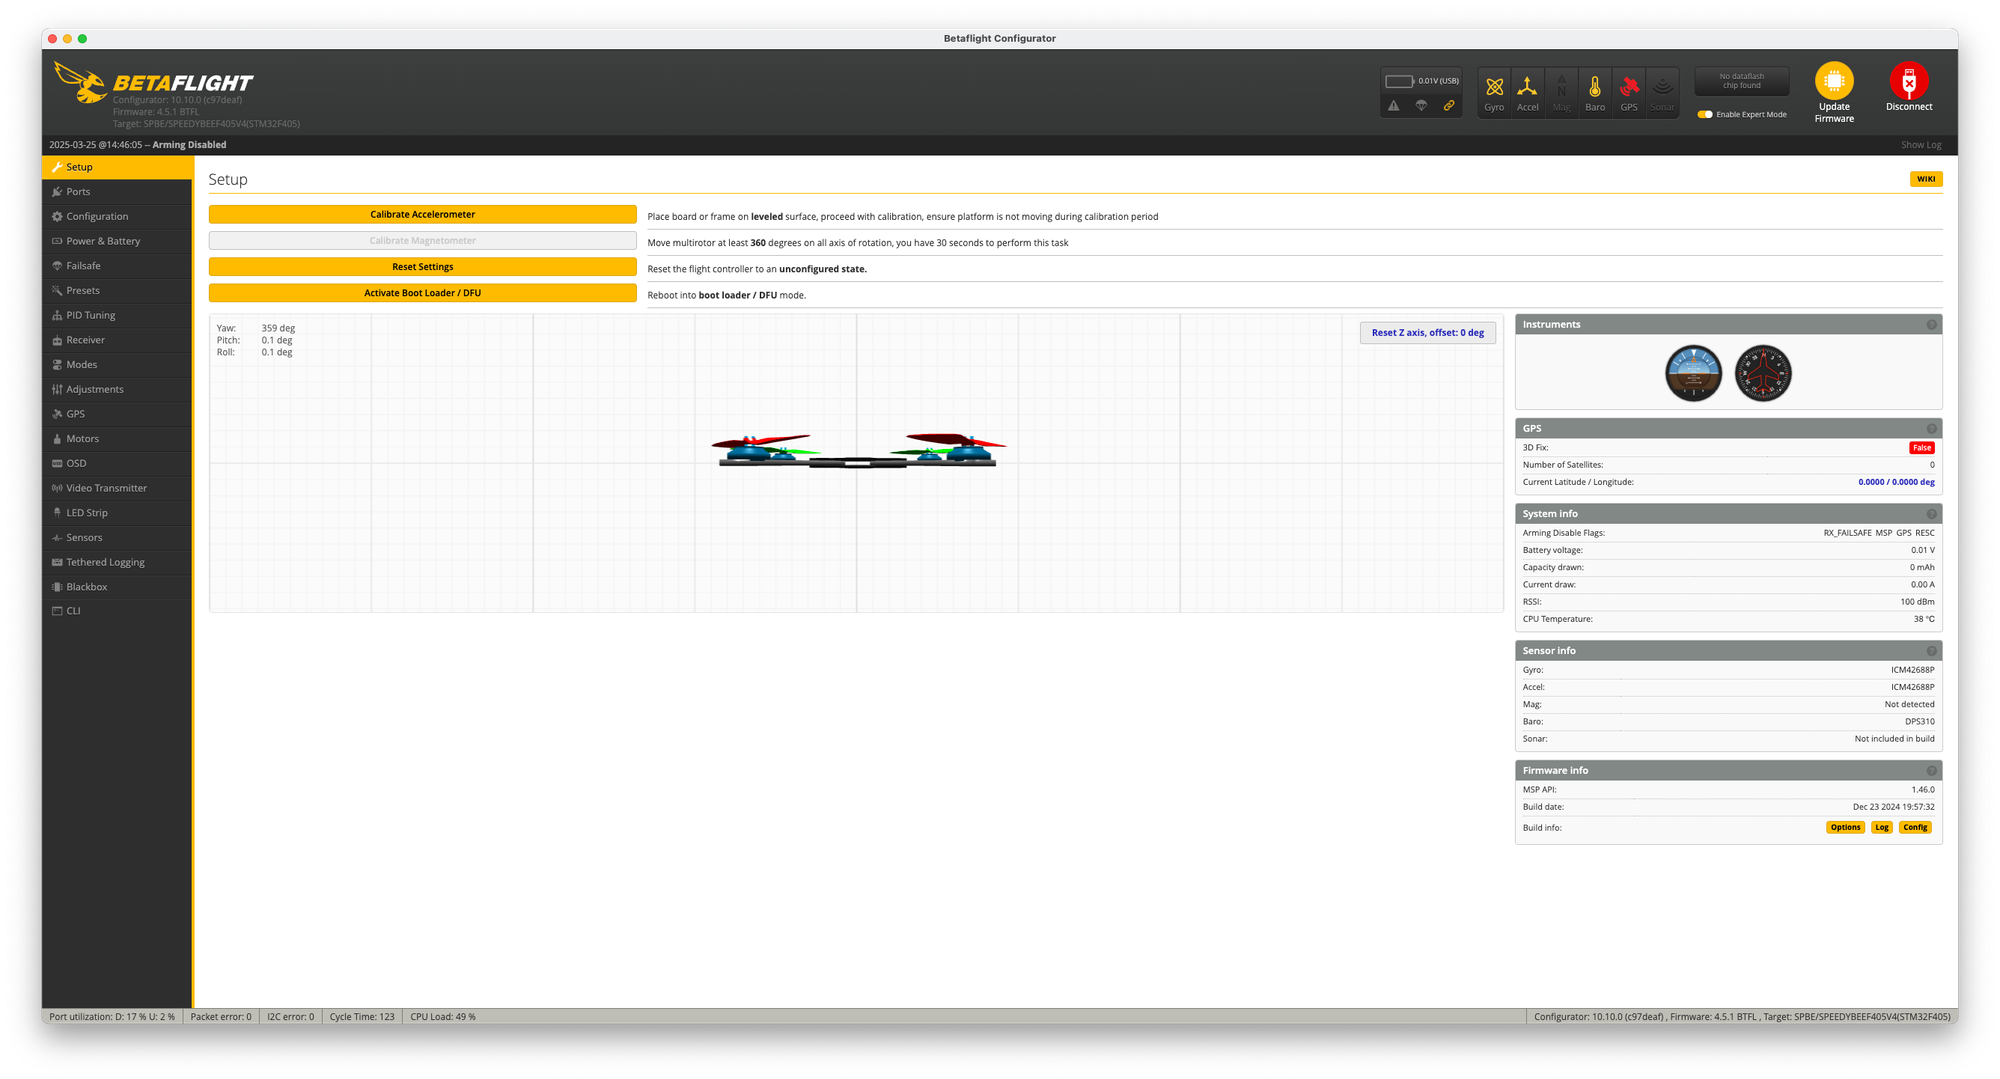
Betaflight is best for racing, freestyle, and general FPV flying. If you're primarily interested in acrobatic flight or racing, it's hard to beat.
INAV
INAV focuses on navigation and autonomous features, and I use it on my long-range and mapping builds. Its GPS modes, return-to-home, and waypoint capabilities are excellent.
The strengths of INAV are its comprehensive navigation features and reliable autonomous flight. I've had INAV bring drones back from kilometers away when I've lost video signal.
Its weaknesses include being less optimized for pure performance flying. While INAV has improved its acro performance, it still doesn't quite match Betaflight for racing or freestyle.
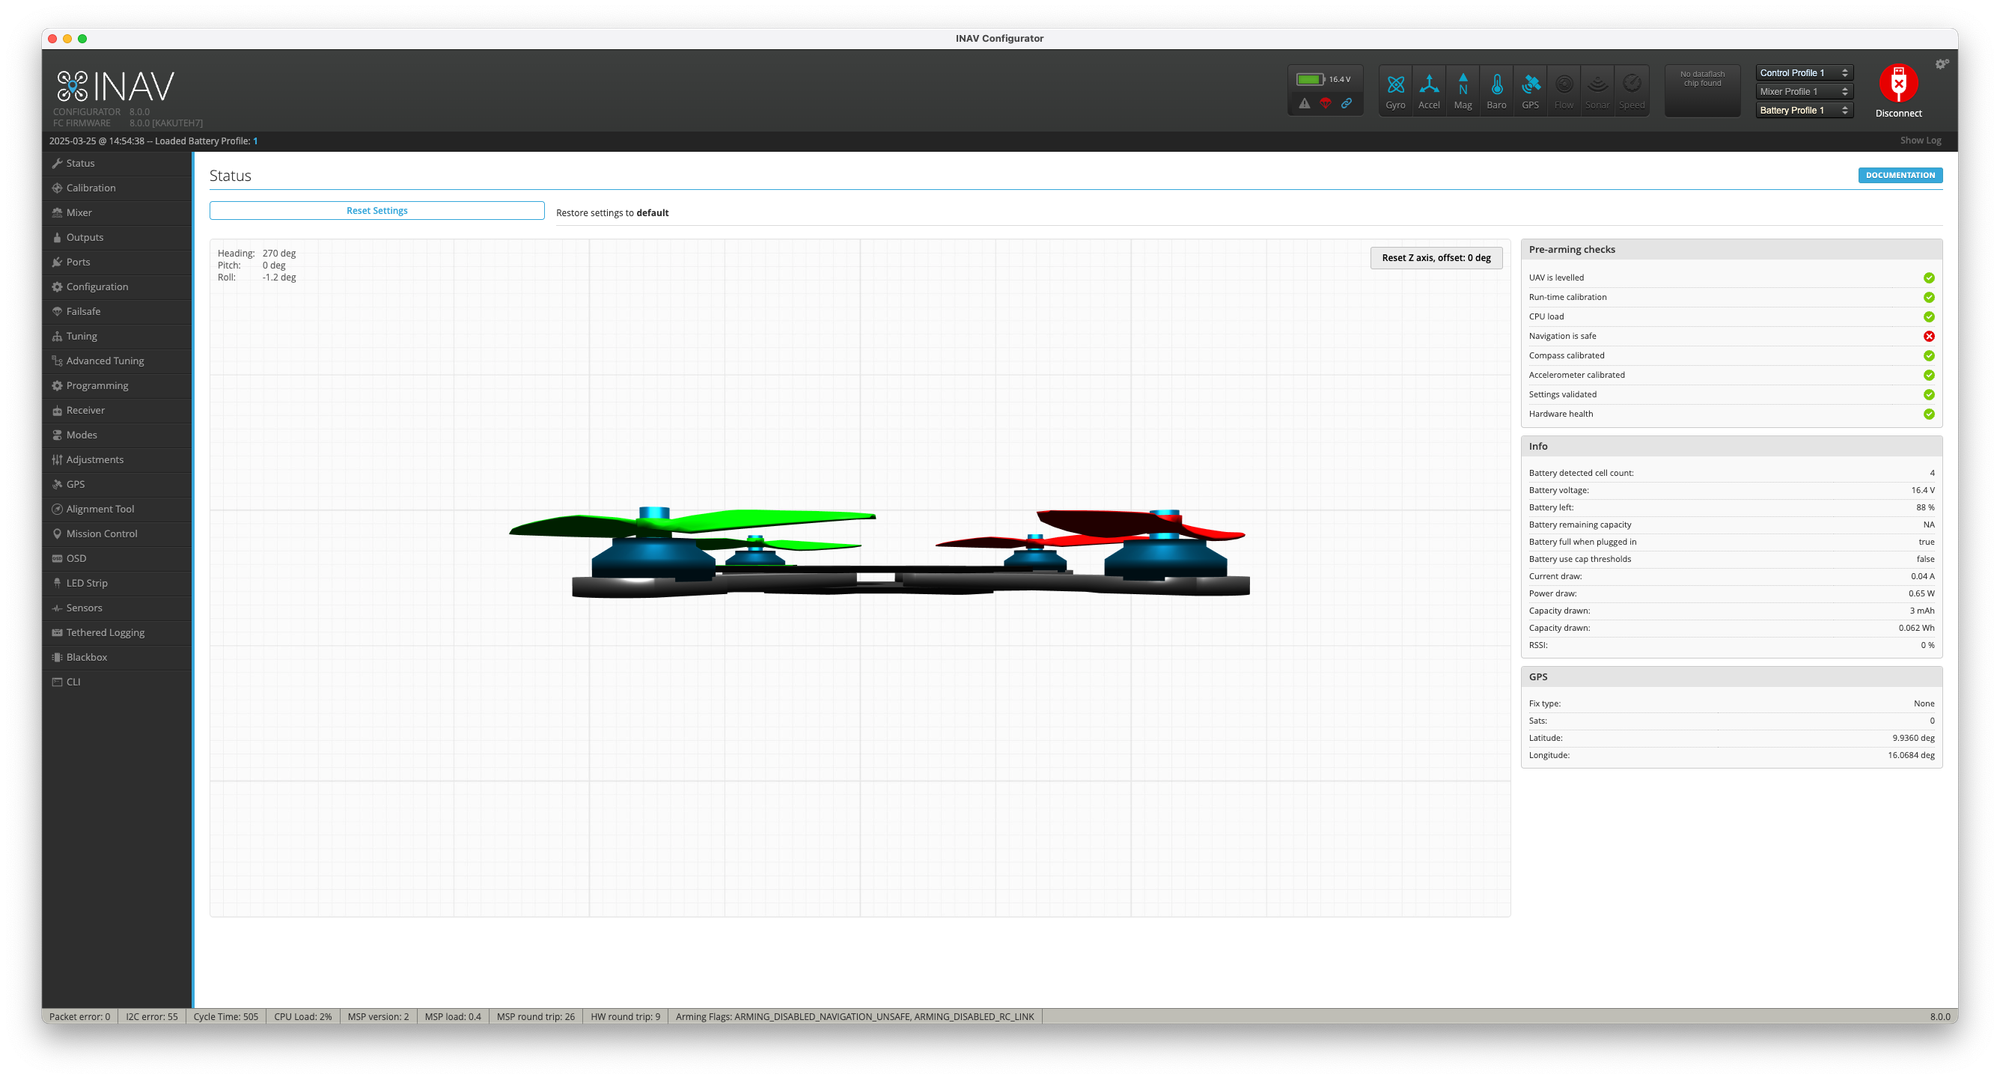
INAV is best for long-range flying, mapping, and autonomous missions. If you're interested in exploration rather than acrobatics, INAV is worth considering.
KISS
KISS takes a simplified approach with an emphasis on clean code. I've used KISS on a few builds, and its simplicity is refreshing.
The strengths of KISS include easy setup and good flight characteristics out of the box. I was impressed by how little tuning was needed to get a KISS-powered quad flying well.
Its weaknesses include being closed source and having limited hardware options. The ecosystem is smaller, which means fewer resources when problems arise.
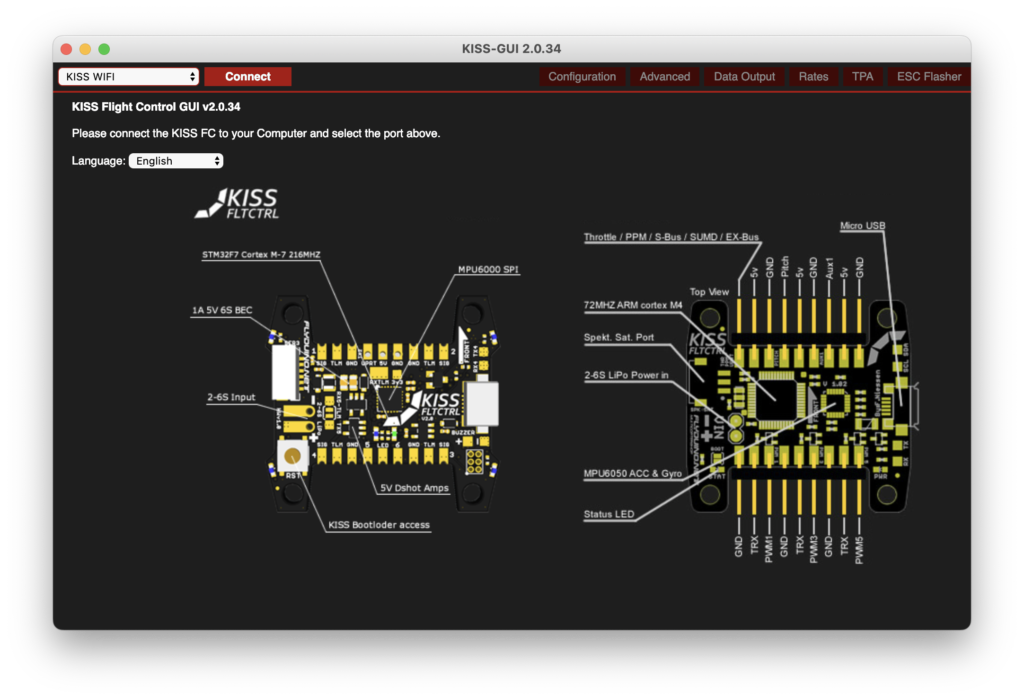
KISS is best for pilots seeking simplicity with good performance. If you want to spend more time flying and less time configuring, KISS is worth a look.
Emuflight
Emuflight is a fork of Betaflight with alternative approaches to flight control. I've experimented with it on a couple of builds, particularly for cinematic flying.
The strengths of Emuflight include its unique flight feel and good performance for certain flying styles. I found it particularly good for smooth, flowing freestyle.
Its weaknesses include a smaller community and less frequent updates. When issues arise, there are fewer resources available compared to Betaflight.
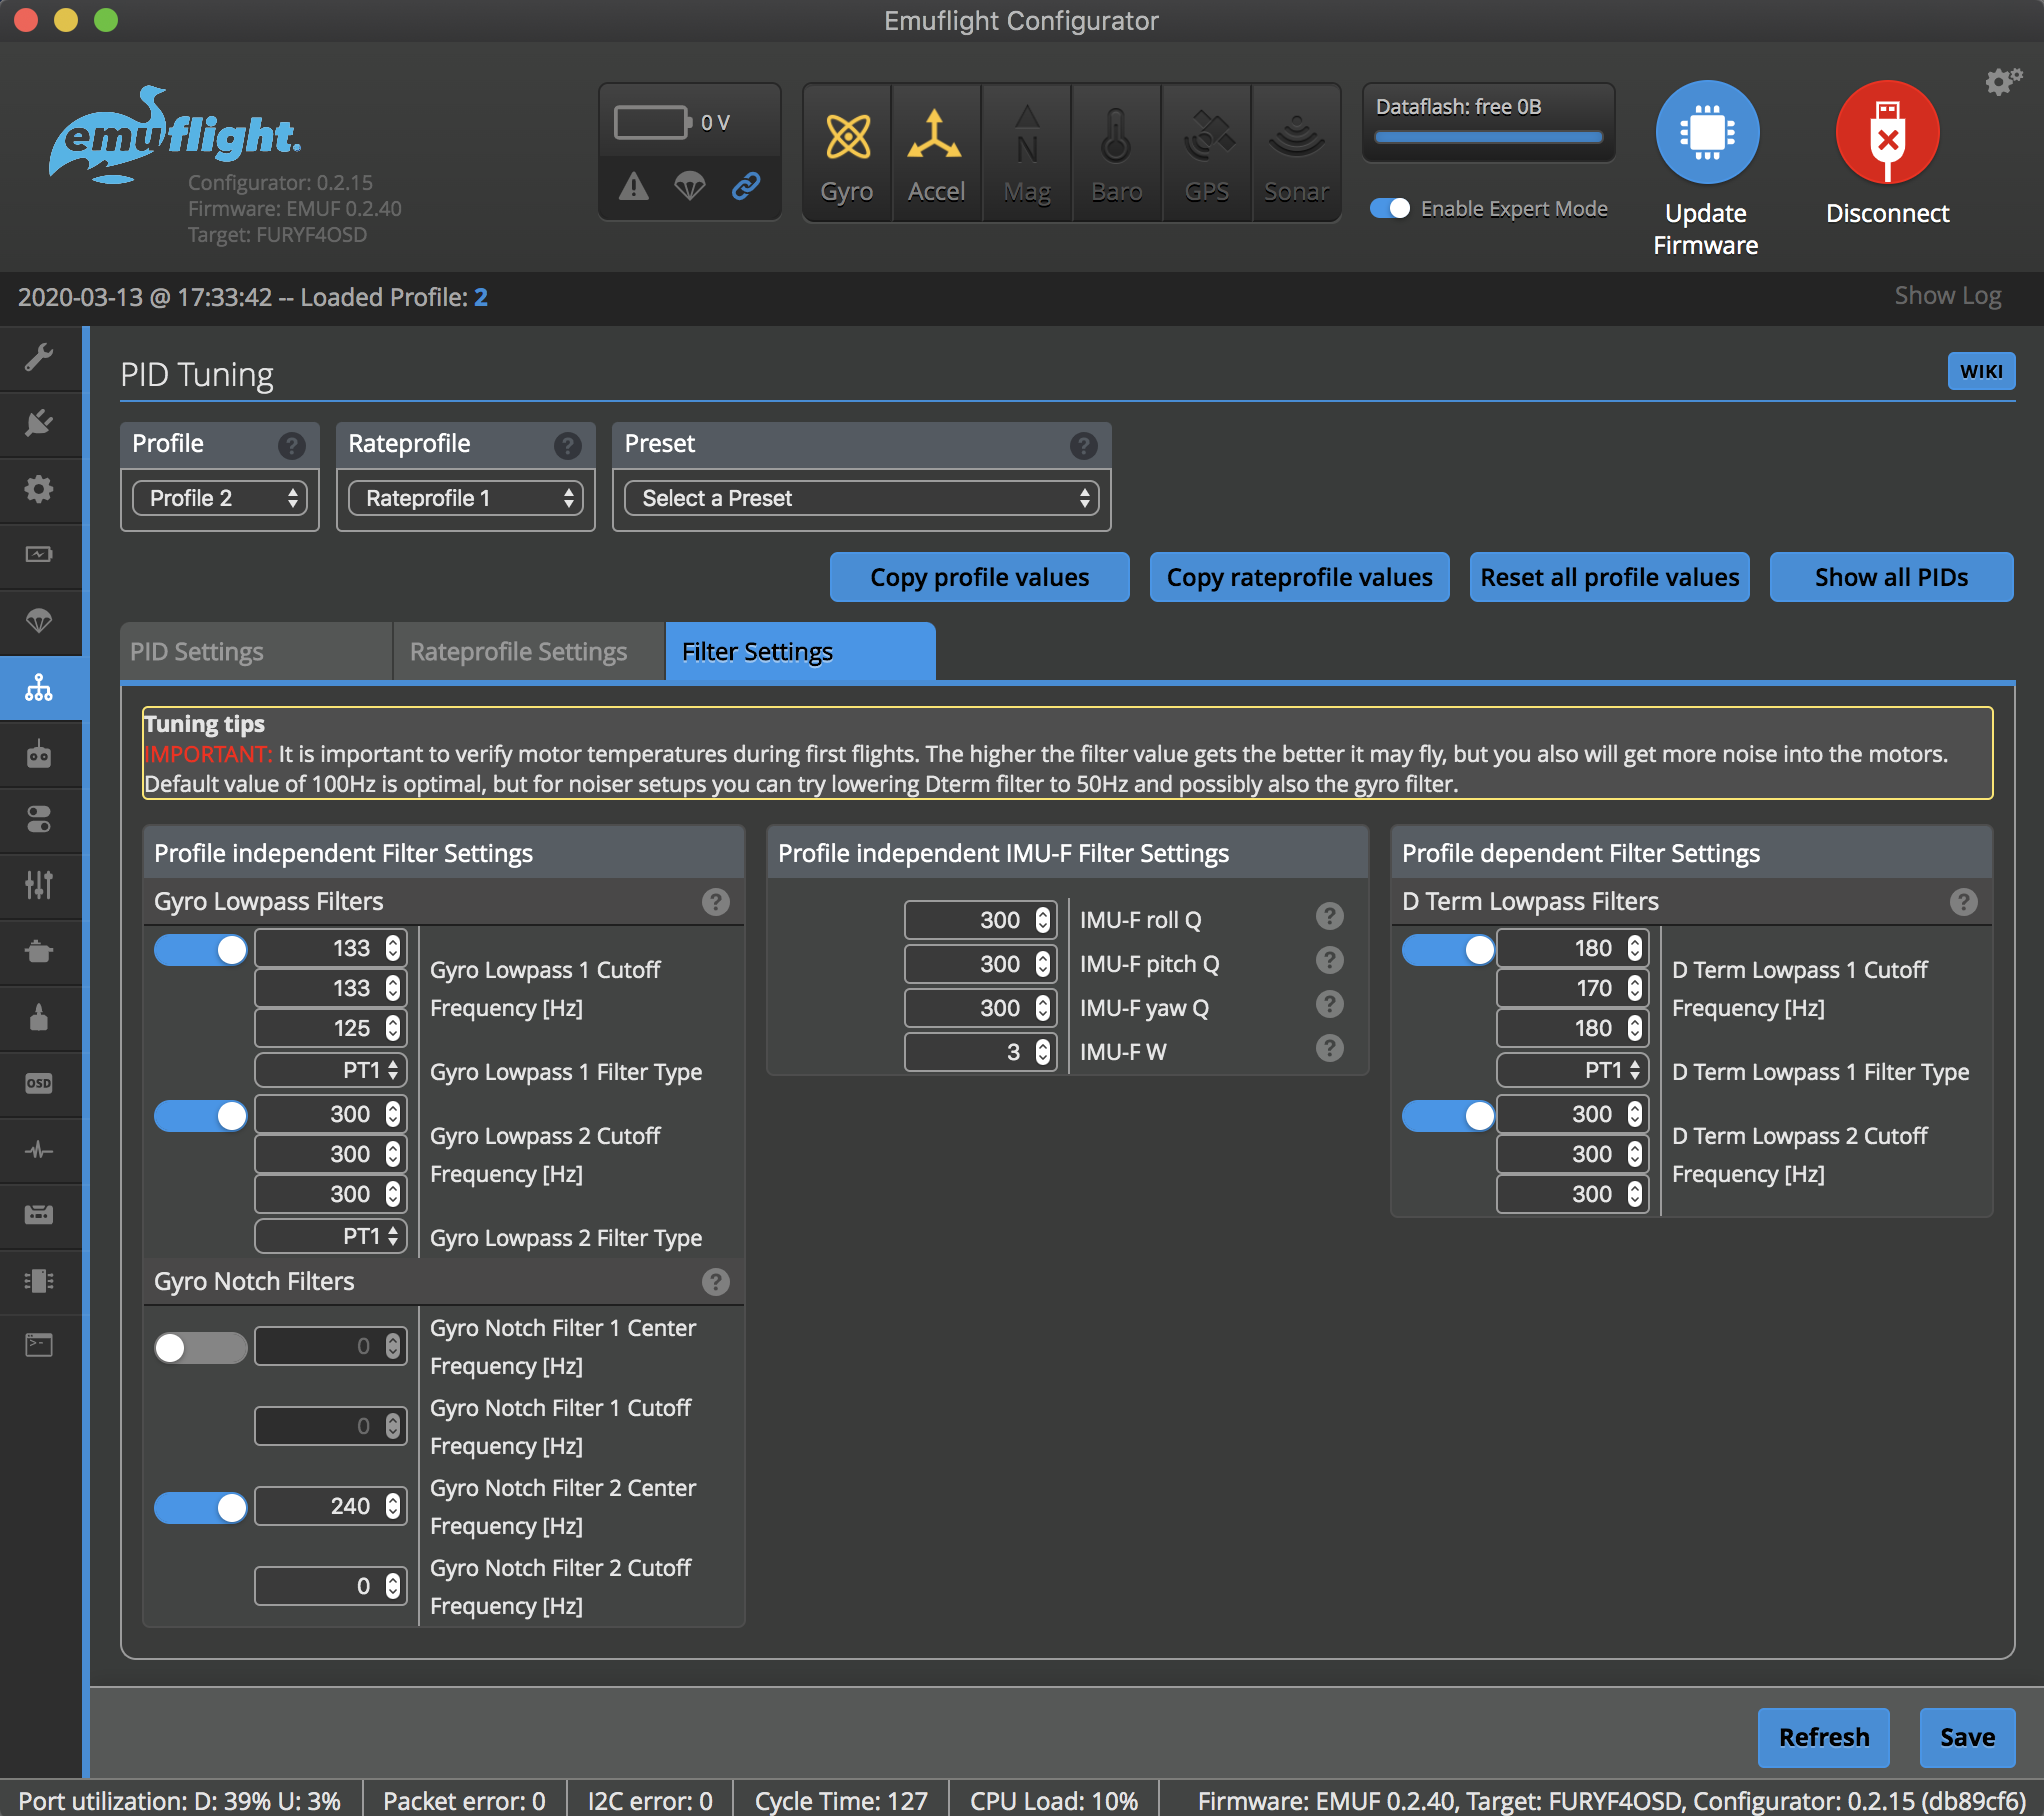
Emuflight is best for pilots seeking specific flight characteristics, particularly those who prioritize smoothness over absolute responsiveness.
Ardupilot/PX4
Ardupilot and PX4 are professional-grade open-source autopilot systems. I've used these for more serious mapping and survey work.
The strengths of these systems include comprehensive mission planning and professional features. The level of autonomous capability far exceeds what's available in other firmware options.
Their weaknesses include complex setup and less optimization for agility. These are not systems I'd choose for freestyle or racing.

Ardupilot and PX4 are best for mapping, survey work, and professional applications where reliability and autonomous capabilities are more important than agility.
Firmware Features Comparison
In my experience using these different firmware options, I've developed a sense of their relative strengths in different areas:
| Feature | Betaflight | INAV | KISS | Emuflight | Ardupilot |
|---|---|---|---|---|---|
| Acro Mode | ★★★★★ | ★★★★☆ | ★★★★★ | ★★★★★ | ★★★☆☆ |
| GPS Modes | ★★☆☆☆ | ★★★★★ | ★★☆☆☆ | ★★☆☆☆ | ★★★★★ |
| OSD Options | ★★★★☆ | ★★★★☆ | ★★★☆☆ | ★★★★☆ | ★★★☆☆ |
| Ease of Setup | ★★★☆☆ | ★★☆☆☆ | ★★★★★ | ★★★☆☆ | ★☆☆☆☆ |
| Community Support | ★★★★★ | ★★★★☆ | ★★★☆☆ | ★★★☆☆ | ★★★★☆ |
| Update Frequency | ★★★★★ | ★★★★☆ | ★★☆☆☆ | ★★★☆☆ | ★★★★☆ |
| Hardware Options | ★★★★★ | ★★★★☆ | ★★☆☆☆ | ★★★★☆ | ★★★☆☆ |
Selecting the Right Flight Controller
Choosing the appropriate flight controller depends on your specific needs and build requirements. After building dozens of different drones, I've developed some guidelines for different applications.
For Racing Drones
When building racing drones, I prioritize performance, reliability, and simplicity. Every gram matters, and unnecessary features just add weight.
I recommend an F4 or F7 processor for high loop rates. While F7 has more processing power, many top racers still use F4 boards because they're lighter and perfectly capable of handling racing demands.
For the gyro, I prefer the MPU6000 series or ICM20602 for reliability. A clean gyro signal is critical for racing, where small disturbances can affect handling at high speeds.
The form factor should be 20×20mm for compact builds or 30.5×30.5mm for standard builds. I've moved most of my race builds to 20×20mm to save weight and space.
Integration-wise, an FC+ESC stack creates clean builds with minimal wiring. This reduces weight and the potential for wiring failures, which are common in racing crashes.
For firmware, I exclusively use Betaflight optimized for racing. The defaults have gotten much better, but I still make tweaks for my specific flying style.
Some examples of flight controllers I've had success with for racing include the iFlight SucceX-E F4/F7, T-Motor F7, and SpeedyBee F4/F7.
For Freestyle Drones
For freestyle drones, I prioritize reliability, a comprehensive feature set, and performance. These builds take more abuse than any others, so durability is key.
I recommend an F7 processor for better filtering and features. The extra processing power helps with complex filtering, which is important for the high power-to-weight ratios common in freestyle builds.
The gyro should be well-isolated for a clean signal. Freestyle involves high-power maneuvers that create a lot of vibration, so good isolation makes a significant difference.
An accurate current sensor is important for battery management. Freestyle flying can involve rapid changes in power demand, so knowing your battery status is crucial.
Blackbox capability via onboard flash or SD card is essential for tuning. I've found that proper tuning makes a massive difference in freestyle performance, and blackbox data is the key to good tuning.
A full-featured OSD provides important in-flight information. I rely on my OSD to tell me when it's time to land, which is easy to forget when you're having fun with freestyle tricks.
Flight controllers I've had good experiences with for freestyle include the Matek F722-SE, Holybro Kakute F7, and Diatone Mamba F722.
For Long Range/Cinematic Drones
For long-range and cinematic applications, I prioritize reliability, GPS features, and power efficiency. These builds need to be trustworthy when flying far from home.
I recommend an F7 processor for handling GPS and other peripherals. The additional UARTs and processing power are valuable for the multiple systems typically found on long-range builds.
A barometer is useful for altitude hold and related features. When flying far away, having reliable altitude information is important for navigation and battery management.
Multiple UARTs are needed for GPS, telemetry, camera control, etc. My long-range builds typically use at least 5-6 UARTs for various systems.
INAV firmware support is important for navigation features. While Betaflight has basic GPS capabilities, INAV is far superior for serious navigation tasks.
Clean power filtering is essential for extended flight times. Long-range flying is all about efficiency, and clean power helps maximize flight time.
Flight controllers that have served me well for these applications include the Matek F765-WING, Holybro Kakute H7, and iFlight Beast H7.
For Micro Builds
When building micro drones, I prioritize size, weight, and integration. Every component needs to be as small and light as possible.
The form factor should be 16×16mm or 20×20mm to fit in compact frames. I've been amazed at how capable these tiny flight controllers have become.
AIO designs with integrated ESCs simplify the build and save space. In the smallest builds, separate components simply aren't practical.
Ultralight components are essential for good flight performance. A heavy flight controller in a micro build will noticeably affect handling.
A simplified design with only essential features helps minimize weight. Features like barometers and extra UARTs are often omitted to save weight.
Flight controllers I've used successfully in micro builds include the HGLRC Zeus F4/F7 AIO, BetaFPV F4 AIO, and NamelessRC F4/F7 AIO.
For Beginners
For beginners, I recommend prioritizing ease of use, durability, and value. Your first builds will likely crash more often, so resilience is important.
An F4 processor is sufficient for learning. While F7 offers more features, an F4 board will provide everything a beginner needs at a lower cost.
Protection features like conformal coating and robust design help survive crashes. I always recommend beginners apply additional conformal coating to their flight controllers – it's cheap insurance against accidental shorts.
Good documentation and support resources make the learning curve easier. Some manufacturers provide much better documentation than others, which makes a big difference when you're learning.
Betaflight firmware with good defaults allows for success without extensive tuning. The default settings have improved dramatically in recent years, making it much easier for beginners to achieve good flight performance.
Budget-friendly options provide good value without excessive features. There's no need to spend extra on features you won't use while learning.
Flight controllers I often recommend to beginners include the iFlight SucceX-E F4, Matek F405-STD, and JHEMCU GHF411.
Flight Controller Installation and Setup
Proper installation and configuration are crucial for optimal performance. I've made every mistake possible in this area, so I've learned what works and what doesn't.
Hardware Installation
Mounting Considerations
The orientation of your flight controller is critical – the arrow should point forward, or you can configure a different orientation in software. I've learned to double-check this before every maiden flight, as it's an easy mistake to make.
Vibration isolation through soft mounting with grommets or foam tape makes a significant difference in flight performance. I use soft mounting on all my builds now – the improvement in gyro data is remarkable.
For more detailed information on vibration isolation, see:
Drone Vibration Damping
The location should be at the center of gravity and protected from crashes. I try to position the flight controller in the center of the frame, both for balance and to provide maximum protection.
Access to the USB port is important for configuration and updates. I've built quads where I had to partially disassemble them to connect USB – not a mistake I'll repeat.
Adequate airflow for cooling the electronics prevents overheating issues. Flight controllers can get quite warm, especially when packed close to ESCs and video transmitters.
Wiring Best Practices
Clean routing of wires away from sensitive components reduces interference. I've found that keeping signal wires away from power wires makes a noticeable difference in performance.
Secure connections through proper soldering or quality connectors prevent failures. I've had too many crashes caused by poor connections to take shortcuts here anymore.
Strain relief prevents tension on solder joints and connectors. A small zip tie or blob of hot glue can save you from frustrating intermittent issues.
Separation of signal wires from power wires reduces noise. I always try to route signal wires on the opposite side of the stack from power wires.
Minimizing wire length reduces noise and weight. I cut all wires to the exact length needed – no extra loops or slack.
For more detailed information on wiring, see:
Drone Wiring Guide
Software Configuration
Initial Setup Process
The setup process follows a logical sequence that I've refined over many builds:
- Install Configurator Software: I keep separate versions for different firmware branches to avoid compatibility issues.
- Connect the FC: Use a quality USB cable that supports data transfer. I've tracked down many mysterious connection problems to cheap or damaged USB cables.
- Flash Firmware: Update to the latest stable version. I usually avoid bleeding-edge releases for builds I depend on – stability is more important than the newest features.
- Basic Configuration:
• Set correct board orientation
• Configure UARTs for peripherals
• Set up receiver protocol
• Configure battery monitoring - Receiver Setup:
• Bind receiver to transmitter
• Verify channel mapping
• Set up failsafe behavior (I always test this before the first flight – it's saved me from flyaways more than once) - Motor Configuration:
• Verify motor direction (always with props off!)
• Set up ESC protocol (DShot600 is my recommendation for most builds)
• Check for unusual noise or vibration - Flight Mode Setup:
• Configure arm switch
• Set up additional flight modes
• I use a consistent switch layout across all my models to avoid confusion - OSD Configuration:
• Customize on-screen display elements
• Position elements for visibility
• Set up warnings and alarms - PID Tuning:
• Start with defaults or presets
• Fine-tune as needed after initial flights
Common Setup Issues and Solutions
Over the years, I've encountered and solved countless setup issues. Here are some of the most common problems and their solutions:
No Connection to Configurator
When your flight controller won't connect to the configurator, it can be incredibly frustrating. I've found several potential causes:
• Incorrect/Missing Drivers: Often the culprit. I've learned to keep a collection of drivers for different flight controllers, as Windows in particular can be finicky.
• Damaged USB Ports/Cables: Cause mysterious connection issues. I now use high-quality USB cables and have a dedicated "known good" cable for troubleshooting.
• Bootloader Mode Issues: Sometimes the flight controller gets stuck in bootloader mode. I've developed a routine of shorting the boot pins and power cycling to force it into the correct mode.
• Incorrect COM Port: A simple mistake that's easy to make. I always check device manager to confirm which port the flight controller is using.
Motors Spinning Wrong Direction
Having motors spin the wrong way is a common issue with simple solutions:
• Swap Motor Wires: You can swap any two motor wires to reverse the direction. I've done this countless times, though it requires resoldering.
• BLHeli Configuration: Using BLHeli configurator to reverse motor direction is easier if you're using BLHeli ESCs. This is my preferred method as it doesn't require any hardware changes.
• Pre-Flight Verification: Always verify motor order and direction in the configurator before the first flight. I've crashed more than one quad by skipping this step.
Unstable Flight Behavior
When your quad doesn't fly right, there are several potential causes:
• Incorrect FC Orientation: A common culprit. I once spent hours troubleshooting erratic behavior only to realize I had the flight controller rotated 90 degrees from what was configured in software.
• Vibration Issues: Can cause all sorts of strange behavior. I've become a strong advocate for proper vibration isolation after seeing the dramatic difference it makes in flight performance.
• PID Tuning Problems: Often manifest as oscillations or sluggish response. When in doubt, I reset to default PIDs and start fresh.
• Gyro Noise: Can cause twitchy, unpredictable behavior. I've found that proper filtering settings and good hardware isolation make a significant difference.
Receiver Not Detected
When your receiver isn't communicating with your flight controller, check these common issues:
• Incorrect UART Assignment: The most frequent problem. I always double-check which UART the receiver is connected to and ensure it's properly configured in the Ports tab.
• Wrong Receiver Protocol: Another common mistake. The protocol in the Configuration tab must match your receiver type.
• Binding Issues: Can cause communication failures. I've learned to follow the binding procedure carefully for each receiver type.
• Wiring Problems: Especially with signal and ground connections, can prevent communication. I always check continuity with a multimeter if I suspect wiring issues.
Advanced Flight Controller Topics
For experienced pilots looking to optimize their setups, these advanced concepts provide deeper insights. I've spent years exploring these areas to get the most out of my builds.
PID Tuning and Filtering
The heart of flight controller performance lies in PID tuning and filtering. This is where art meets science in the FPV world.
PID Basics
Understanding the PID controller is fundamental to good tuning:
P (Proportional) provides immediate correction to error. I think of this as the "strength" of the correction. Too high, and you get oscillations; too low, and the quad feels sluggish.
I (Integral) accumulates error over time. This helps overcome persistent forces like wind or an unbalanced build. I've found that I term is often overused by beginners – a little goes a long way.
D (Derivative) responds to the rate of change of error. This dampens the P term's corrections and prevents overshooting. Getting D term right is crucial for smooth flight – too low and you get bouncy corners, too high and you get hot motors.
Advanced Filtering
Proper filtering makes a massive difference in flight performance:
Gyro filtering removes noise before it reaches the PID controller. I've learned that cleaner gyro data leads to better flight performance and cooler motors.
D-Term filtering is specific to the derivative term, which is particularly sensitive to noise. I pay special attention to this, as excessive D-term noise quickly leads to hot motors.
Dynamic notch filtering automatically targets motor noise frequencies. This was a game-changer for me – it adapts to different throttle levels and dramatically reduces noise without adding latency.
RPM filtering uses ESC telemetry for precise noise targeting. When I first enabled this on a problematic build, the difference was night and day – suddenly the quad was butter-smooth with no hot motors.
Static filters target known noise sources at fixed frequencies. I use these sparingly, as they add latency, but they're valuable for addressing specific noise issues.
Filter Tuning Approach
My approach to filter tuning has evolved over time:
I start with defaults or presets, which have gotten much better in recent Betaflight versions. Often, these are good enough for casual flying.
For serious performance, I analyze blackbox logs to identify noise characteristics. This reveals specific frequencies that need targeting.
I adjust filters to target specific noise while maintaining responsiveness. This is a balancing act – too much filtering adds latency, too little leaves noise.
Testing incrementally with small changes is crucial. I make one change at a time and test thoroughly before moving on.
The key is balancing filtering against latency and responsiveness. Perfect filtering with too much latency feels worse than a bit of noise with crisp response.
Blackbox Logging and Analysis
Flight data recording has transformed how I approach tuning and troubleshooting:
Setting Up Blackbox
Storage options include onboard flash vs. SD card. I prefer SD cards for serious tuning work, as they provide much more capacity.
Logging rates balance detail against duration. For initial tuning, I use high rates to capture subtle issues; for longer flights, I reduce the rate.
Selecting relevant parameters to log helps manage file size. I focus on gyro data, PID values, and motor outputs for most tuning work.
Analyzing Logs
INAV and Betafligth have their own tools for blackbox log exploration. I've spent countless hours staring at these graphs, learning to interpret the patterns.

PIDtoolbox is another powerful tool for deep analysis of your flight controller logs.

Key metrics I look for include gyro trace (for noise), PID response (for tuning), and motor outputs (for headroom). The relationships between these tell the real story of how your quad is performing.
Identifying issues becomes easier with experience. I've learned to recognize the signatures of various problems – noise looks different from PID issues, which look different from mechanical problems.
Using Logs for Tuning
Noise analysis helps identify frequencies requiring filtering. I look for spikes in the FFT plot that correspond to motor frequencies or their harmonics.
Step response shows how quickly the craft responds to inputs. I want to see quick response without excessive overshoot.
P-Term evaluation reveals oscillations or sluggishness. A good P-term response shows quick correction without continuing to bounce back and forth.
D-Term noise is a common cause of hot motors. I look for amplified noise in the D term that corresponds to motor output spikes.
Motor headroom ensures motors aren't maxing out. I want to see at least 20% headroom on the motor outputs during aggressive maneuvers.
Betaflight CLI and Advanced Configuration
The command-line interface provides powerful configuration options that aren't available in the GUI:
Essential CLI Commands
diff all shows all settings that differ from defaults. This is my go-to command for checking my configuration and sharing settings with others.
dump displays all current settings, including defaults. This is useful for understanding the complete configuration.
get [parameter] shows specific parameter values. I use this to check individual settings without wading through the entire configuration.
set [parameter]=[value] changes parameter values. This allows for precise control over every aspect of the flight controller.
save commits current configuration to memory. I've learned the hard way to use this after making changes – forgetting means losing all your work.
resource shows resource allocation for pins and peripherals. This is essential for advanced configuration and troubleshooting.
resource [resource_type] [index] [pin] reassigns resources to different pins. I've used this to free up pins for specific functions or work around hardware issues.
status displays system status information. This is useful for checking what features are active and how the system is configured.
Resource Remapping
Reassigning pins for different functions is a powerful capability:
Motor outputs can be moved to different pins. I've used this to work around damaged pads on flight controllers.
UART reassignment allows moving serial ports to different pins. This has saved me when the default UART pins were damaged or needed for another function.
LED control can be configured for different pins. I've used this to add LED strips to builds where the default LED pin was unavailable.
Special functions like camera control and buzzer outputs can be reassigned. This flexibility has allowed me to add features to builds that wouldn't otherwise support them.
Custom Mixer Configurations
For non-standard motor layouts, custom mixers are essential:
Custom motor mixes adjust motor influence on each axis. I've used this for unusual builds like asymmetric frames or heavy camera mounts.
Specialized configurations like tricopters and V-tails require custom mixing. The default mixer works for standard quads, but anything unusual needs customization.
Thrust linearization improves throttle response by compensating for non-linear motor characteristics. This makes throttle feel more consistent throughout the range.
Firmware Compilation and Customization
Building custom firmware allows for specific optimizations:
Why Compile Custom Firmware
Enabling experimental features provides access to cutting-edge capabilities. I've compiled custom firmware to test new features before they're officially released.
Optimizing for specific hardware can improve performance. Removing unnecessary components frees up processing power for what matters.
Customizing defaults sets your preferred starting point. I maintain a custom build with my preferred settings baked in.
Fixing bugs sometimes requires implementing patches before official releases. I've compiled custom firmware to address specific issues that affected my builds.
Compilation Process
Setting up the development environment requires Git, a toolchain, and other dependencies. I maintain a dedicated development VM for this purpose.
Cloning the repository gets you the source code to work with. I always check out the specific branch or tag I want to build from.
Configuring the build involves selecting the target and features. This is where you can customize what's included in your firmware.
Compiling builds the firmware from source. Modern computers make this process quite quick.
Flashing uploads the compiled firmware to your flight controller. I always make a backup of the original firmware before flashing custom builds.
Common Customizations
Target modifications allow for hardware-specific adjustments. I've modified targets to better match the specific hardware I'm using.
Feature toggles enable or disable specific capabilities. Removing features you don't use frees up resources for what matters.
Default changes modify the starting configuration. I set my preferred defaults for PIDs, rates, and other settings.
Performance optimizations adjust for specific use cases. Racing builds benefit from different optimizations than long-range builds.
Troubleshooting Flight Controller Issues
Even the best flight controllers can develop problems. Here's how I diagnose and address common issues:
Hardware Troubleshooting
Power Issues
When your FC won't power up or experiences random reboots, check these common causes:
Voltage regulator output should be clean and stable. I use a multimeter to verify proper voltage at the test points.
Battery connection and voltage need to be within the FC's operating range. I've damaged flight controllers by connecting higher voltage batteries than they were rated for.
Adding or replacing filtering capacitors can solve many power-related issues. I add a low-ESR capacitor to almost every build as cheap insurance against power problems.
Short circuits can cause mysterious power issues. I use a multimeter in continuity mode to check for shorts between power and ground.
Adequate power supply capacity is essential, especially for builds with many peripherals. I've seen issues where the FC would power up fine by itself but fail when all components were connected.
Sensor Problems
When sensors provide erratic readings or poor stabilization:
Recalibrating sensors often resolves minor issues. I make sure the quad is perfectly level during accelerometer calibration.
Physical damage can affect sensor performance. I've had to replace flight controllers after hard crashes damaged the gyro.
Improving vibration isolation makes a significant difference in sensor performance. I use soft mounting on all my builds now.
Firmware updates sometimes resolve sensor issues. I've seen bugs in specific firmware versions that affected sensor readings.
If sensors are damaged beyond repair, replacing the flight controller is the only option. I keep spare flight controllers for my primary builds for this reason.
Connection Failures
When peripherals aren't detected or communication is intermittent:
Checking wiring and connections is the first step. I use a magnifying glass to inspect small solder joints and connections.
Verifying UART configurations ensures the right protocols are enabled on the right ports. I've spent hours troubleshooting only to find I enabled the wrong feature on a UART.
Testing with different cables can identify connection issues. I keep known-good USB cables specifically for troubleshooting.
Damaged pins or solder joints often cause intermittent issues. I've fixed many problems by reflowing solder joints that looked fine to the naked eye.
Signal levels and protocols must match between devices. I've had issues where 3.3V and 5V devices weren't communicating properly due to voltage mismatch.
Software Troubleshooting
Firmware Issues
When the firmware crashes, freezes, or behaves unexpectedly:
Updating to the latest stable firmware often resolves known issues. I generally avoid bleeding-edge releases for builds I depend on.
Trying different firmware versions can work around specific bugs. I've had to downgrade firmware to avoid issues that affected my particular setup.
Resetting to defaults and reconfiguring from scratch sometimes resolves mysterious issues. This is often faster than trying to track down a specific problematic setting.
Reflashing with full chip erase clears any corrupted settings or memory. I use this as a last resort when other troubleshooting fails.
Hardware compatibility issues can cause unexpected behavior. I check the supported targets list before updating firmware.
Configuration Problems
When your quad doesn't respond correctly to inputs or features don't activate:
Verifying all configuration settings is tedious but effective. I go through each tab in the configurator methodically.
Resetting to defaults and reconfiguring often resolves issues with conflicting settings. Sometimes it's faster than trying to find the specific problem.
Checking mode switch assignments ensures they're activating as expected. I use the receiver tab to verify switch positions are being recognized correctly.
Verifying receiver channel mapping is crucial for proper control. I've had issues where channels were mapped incorrectly, causing strange behavior.
Exporting and reviewing configuration can help identify problems. I compare configurations between working and non-working builds to spot differences.
Performance Tuning Issues
When your quad oscillates, responds sluggishly, or motors run hot:
Resetting PIDs to defaults provides a known starting point. I do this whenever I make significant changes to a build.
Verifying filter settings ensures they're appropriate for your build. Too much filtering causes latency; too little leaves noise.
Checking for mechanical issues like loose components or damaged props is essential. I've chased tuning issues that were actually caused by a cracked frame.
Analyzing blackbox logs provides insights into specific issues. This is the most powerful troubleshooting tool for performance problems.
Applying appropriate presets for your build type often resolves common issues. The presets in recent Betaflight versions are quite good.
When to Replace a Flight Controller
Sometimes, replacement is the only option. I replace flight controllers when:
Physical damage affects performance, especially to critical components like the gyro or processor. I've tried to salvage damaged boards, but it's rarely worth the effort.
Sensors have failed or become unreliable. A flight controller with an unreliable gyro is dangerous to fly.
Processor or memory issues cause instability. If your flight controller randomly reboots or freezes, it's time for a replacement.
Upgrading to access new features sometimes requires new hardware. I've replaced perfectly functional flight controllers to gain access to features that required newer hardware.
After significant water or electrical damage, replacement is often safer than repair. I learned this lesson after trying to salvage a flight controller that had gotten wet – it worked for a while, then failed catastrophically mid-flight.
Future Trends in Flight Controllers
The flight controller landscape continues to evolve rapidly. Here's where I see things heading:
Hardware Advancements
H7 and more powerful processors are becoming the new standard. I've been testing H7 flight controllers, and while the differences are subtle now, they provide headroom for future features.
Improved sensors with lower noise floors will enhance flight performance. Each generation of gyros gets better at rejecting noise while maintaining sensitivity.
Integration is increasing, with more all-in-one solutions. The trend toward highly integrated flight stacks will continue, making builds cleaner and simpler.
Size reduction continues, with components getting smaller and lighter. I'm amazed at how much functionality fits into modern 16×16mm flight controllers.
Power efficiency improvements provide better performance per watt. This is particularly important for long-range and endurance builds.
Software Innovations
Machine learning for adaptive tuning and filtering is on the horizon. I've seen early experiments with ML-based tuning that show promise for automatically optimizing performance.
Advanced autonomy features are improving, with better GPS and navigation capabilities. The gap between hobby and professional drone capabilities is narrowing.
Simplified setup with more intuitive configuration is making the hobby more accessible. The learning curve is getting less steep with each firmware generation.
Specialized firmware options tailored to specific flying styles are emerging. We're seeing more divergence between racing, freestyle, and long-range firmware.
Improved defaults mean better out-of-box experience. Modern flight controllers fly remarkably well with default settings.
Emerging Technologies
Computer vision for camera-based navigation and obstacle avoidance is becoming more accessible. I've experimented with basic vision systems, and they're getting more practical for hobby use.
Mesh networking enables drone-to-drone communication. This opens up possibilities for coordinated flight and improved safety.
Advanced telemetry provides more comprehensive flight data. The amount of information available to pilots continues to increase.
Cloud integration for configuration and data analysis is becoming more common. Online platforms for sharing and analyzing flight data are emerging.
Simulation integration with digital twins allows for testing in virtual environments. I've used simulation to test configurations before applying them to real hardware.
FAQ: Common Questions About Flight Controllers
Over the years, I've been asked countless questions about flight controllers. Here are the most common ones:
What's the difference between F4 and F7 flight controllers?
F4 and F7 refer to the STM32 processor series used in the flight controller. In my experience, the main differences are:
F7 processors are more powerful (typically 216-400MHz vs. 168-216MHz for F4), allowing for higher loop rates, more complex filtering, and additional features. I notice the difference most in demanding situations with lots of filtering.
F7 controllers usually have more UARTs and better overall performance. This matters when you're connecting multiple peripherals like GPS, telemetry, and camera control.
F4 controllers are more affordable and still sufficient for most flying styles. Many of my builds still use F4 boards because they offer a great balance of performance and cost.
For most pilots, an F4 is perfectly adequate, but if you're pushing the limits of performance or need to connect many peripherals, an F7 is worth the upgrade.
How do I know if my flight controller is damaged?
Signs of a damaged flight controller include:
Failure to power up or connect via USB is the most obvious sign. If your FC won't power on or isn't recognized by your computer, something's wrong.
Erratic sensor readings or drift can indicate gyro damage. I've seen this after hard crashes – the quad becomes unflyable due to random movements.
Unexpected reboots or freezes suggest processor or memory issues. If your quad randomly disarms mid-flight, the flight controller may be failing.
Smoke or visible damage to components is a clear indicator. I've released the magic smoke from more than one flight controller.
Overheating during operation can indicate internal damage or shorts. If your FC gets unusually hot, something's wrong.
Persistent errors in the configurator often point to hardware issues. If you see the same error repeatedly despite reflashing firmware, suspect hardware problems.
Failure to arm or maintain stable flight despite proper configuration suggests sensor issues. I've had flight controllers that passed all tests on the bench but failed in the air.
What flight controller is best for a beginner?
For beginners, I recommend flight controllers that are:
Reliable and well-supported, like the iFlight SucceX-E F4 or Matek F405-STD. These have stood the test of time and have large user communities.
Reasonably priced (around $30-40) to balance quality with budget constraints. There's no need to spend on high-end features while learning.
Compatible with Betaflight for easy setup and extensive documentation. The Betaflight ecosystem has the most resources for beginners.
Well-documented with good community support for troubleshooting. When you inevitably run into issues, having resources to help is invaluable.
Durable enough to survive learning crashes. I look for boards with conformal coating and robust design.
Including essential features without overwhelming complexity. Features like OSD and current monitoring are useful, but advanced features can wait.
F4 processors are typically sufficient for beginners, with F7 being an option for those wanting more room to grow. I started with F1 processors and was perfectly happy until I knew enough to appreciate the advantages of more advanced hardware.
Can I use any flight controller with any ESC?
Most modern flight controllers can work with most ESCs, but there are compatibility considerations:
Protocol support is critical – ensure the FC and ESCs support the same protocols (DShot, Multishot, etc.). I prefer DShot600 for most builds, as it offers a good balance of performance and reliability.
Voltage compatibility matters – check that the FC can handle the voltage provided by the ESCs/PDB. I've damaged flight controllers by connecting them to higher voltages than they were rated for.
Physical connections vary between individual wires vs. ribbon cables. Make sure your FC and ESCs have compatible connection methods.
For FC/ESC stacks, ensure they're designed to work together. While mixing and matching is possible, stacks designed as a unit typically offer better integration.
Generally, any quality FC can work with any quality ESC if properly configured, but matching components often provides the best experience. I prefer to use components from the same manufacturer when possible, as they're designed to work together.
How often should I update my flight controller firmware?
There's no fixed schedule for firmware updates, but I follow these guidelines:
If everything works well, don't feel obligated to update immediately. The old saying "if it ain't broke, don't fix it" applies here.
Update for new features when a release contains capabilities you want. I updated to Betaflight 4.3 specifically for the improved RPM filtering.
Update for bug fixes if you're experiencing issues addressed in a new release. I check the release notes to see if they address problems I'm having.
For major versions, I wait a few weeks after release for community feedback. Let others find the bugs first.
Avoid updating right before important races or trips. I've learned this lesson the hard way – a last-minute update can introduce unexpected issues.
Always back up your configuration before updating, and be prepared to spend time reconfiguring after significant updates. I keep notes on my specific settings for each quad to make this process easier.
What causes flight controller gyro noise?
Gyro noise can come from several sources:
Mechanical vibration from motors, propellers, or frame resonance is the most common cause. I've found that proper balancing of props and motors makes a significant difference.
Electrical noise from ESCs, power systems, or wiring can affect gyro readings. Keeping signal wires away from power wires helps reduce this.
Sensor limitations create an inherent noise floor. Different gyro models have different noise characteristics.
Mounting issues like poor isolation or rigid mounting transmit vibrations directly to the gyro. I use soft mounting on all my builds now.
Damaged components can cause increased noise. A gyro that's been subjected to hard crashes may develop higher noise levels.
Reducing noise typically involves better vibration isolation, improved wiring, quality components, and appropriate filtering settings. I address mechanical issues first, then use software filtering to handle the remaining noise.
Can I transfer settings between flight controllers?
Yes, but with limitations:
Settings transfer best between the same firmware type (e.g., Betaflight to Betaflight). I've had mixed results trying to transfer settings between different firmware types.
Similar hardware provides better results when transferring settings. Moving from one F4 board to another similar F4 board usually works well.
Using the diff all command to save settings is the most reliable method. I save this output to a text file for each of my builds.
Configurator backup features work well for identical hardware. This is convenient but less flexible than CLI commands.
Some settings always need manual adjustment for new hardware. Resource mappings, in particular, are hardware-specific and don't transfer well.
Always review transferred settings carefully, as incorrect configurations can cause unexpected behavior or crashes. I go through each tab in the configurator after transferring settings to verify everything looks correct.
What's the difference between hardware and software gyro filtering?
The distinction is important for understanding how to optimize performance:
Hardware filtering is implemented in the gyro sensor itself, providing initial noise reduction before the signal reaches the processor. This varies between gyro models and can't be adjusted in firmware.
Software filtering is implemented in the flight controller firmware and is customizable through configuration. This includes dynamic notch filters, low-pass filters, and RPM-based filtering.
Modern flight controllers use a combination of both approaches. I rely on hardware filtering as the first line of defense, then use software filtering to address the specific noise characteristics of my build.
The advantage of software filtering is flexibility – it can be tuned for specific builds and flying styles. The disadvantage is that it uses processing power and can introduce latency.
Conclusion
The flight controller truly is the brain of your FPV drone, translating your intentions into precise flight. After years of building and flying, I've come to appreciate just how critical this component is to the overall experience.
Understanding flight controller technology, selection criteria, and configuration options allows you to optimize performance for your specific needs and flying style. Whether you're building your first drone or your fiftieth, choosing the right flight controller and configuring it properly will have a profound impact on your flying experience.
The technology continues to evolve rapidly, with more powerful processors, better sensors, and more sophisticated firmware providing increasingly capable platforms. By mastering flight controller setup and tuning, you'll unlock the full potential of your drone, achieving the perfect balance of stability, responsiveness, and features for your unique flying style.
I've crashed more drones than I care to admit on my journey to understanding these complex devices, but each failure taught me something valuable. The satisfaction of a perfectly tuned quad responding exactly as intended makes all the troubleshooting worthwhile. There's nothing quite like the feeling of a drone that feels like an extension of your thoughts, and the flight controller is what makes that possible.


Comments ()